Skin Preparation Guide#
Why skin preparation is important?#
Proper skin preparation is crucial before recording any biopotential signal be it Electrocardiography (ECG), Electromyography (EMG), Electroencephalography (EEG), or Electrooculography (EOG).
Clean skin surface:Removes dead skin cells, oils, & other substances that increases skin impedance.Improve impedance:Improves the conduction of electrical signals from the body to the recording equipment and minimizes impedance.Electrode-skin contact:Ensures optimal contact between the electrodes and the skin surface.Signal quality:Enhances the overall quality of recorded signals, providing clear & reliable data for analysis & improves the ability to capture subtle variations in biopotential signals.Consistency in recordings:Reduces variability in signal quality, making it easier to make any Human-Computer Interface (HCI), Brain-Computer Interface (BCI) project or a real-world application.Long term adhesion:Facilitates long-term adhesion & stable placement of electrodes to the skin during extended signal monitoring.
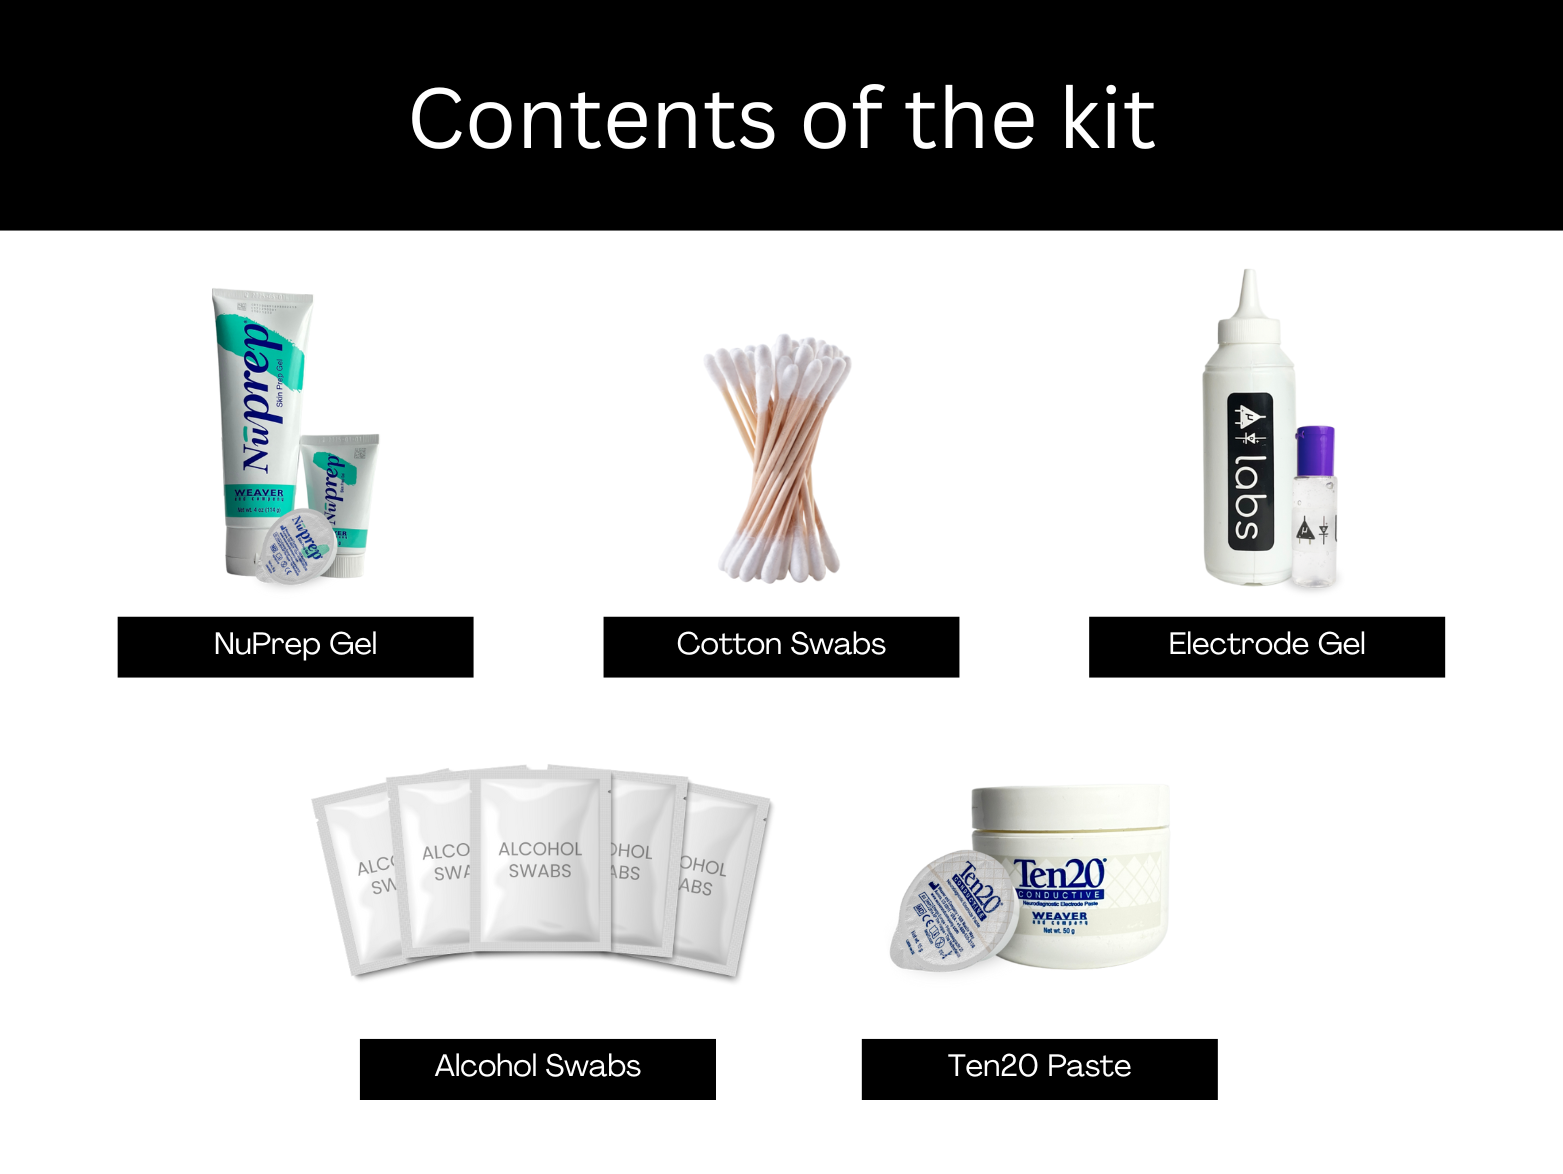
Kit Contents#
Mildly abrasive, highly conductive gel that should be applied before placing the electrodes on the skin to improve signal quality & enhances the performance of monitoring electrodes. |
|
Highly conductive gel that acts as a coupling agent between dry electrodes and the skin to aid the transmission of biopotential signals like ECG, EMG, EOG, or EEG. |
|
Contains the right balance of adhesiveness and conductivity, enabling the dry electrodes to remain in place while allowing the transmittance of biopotential signals. |
|
Alcohol Swabs/Wet wipes |
Soft & non-woven pads that helps in cleaning the skin surface and does not leave any residue. |
Cotton Swabs |
Useful while applying nuprep gel or ten20 paste. |
Steps to follow#
You can follow the steps given below to do the skin preparation properly:
Step 1: Identify the targeted area#
Identify the target area where the gel electrodes or BioAmp Bands will be placed for recording the biopotential signals.
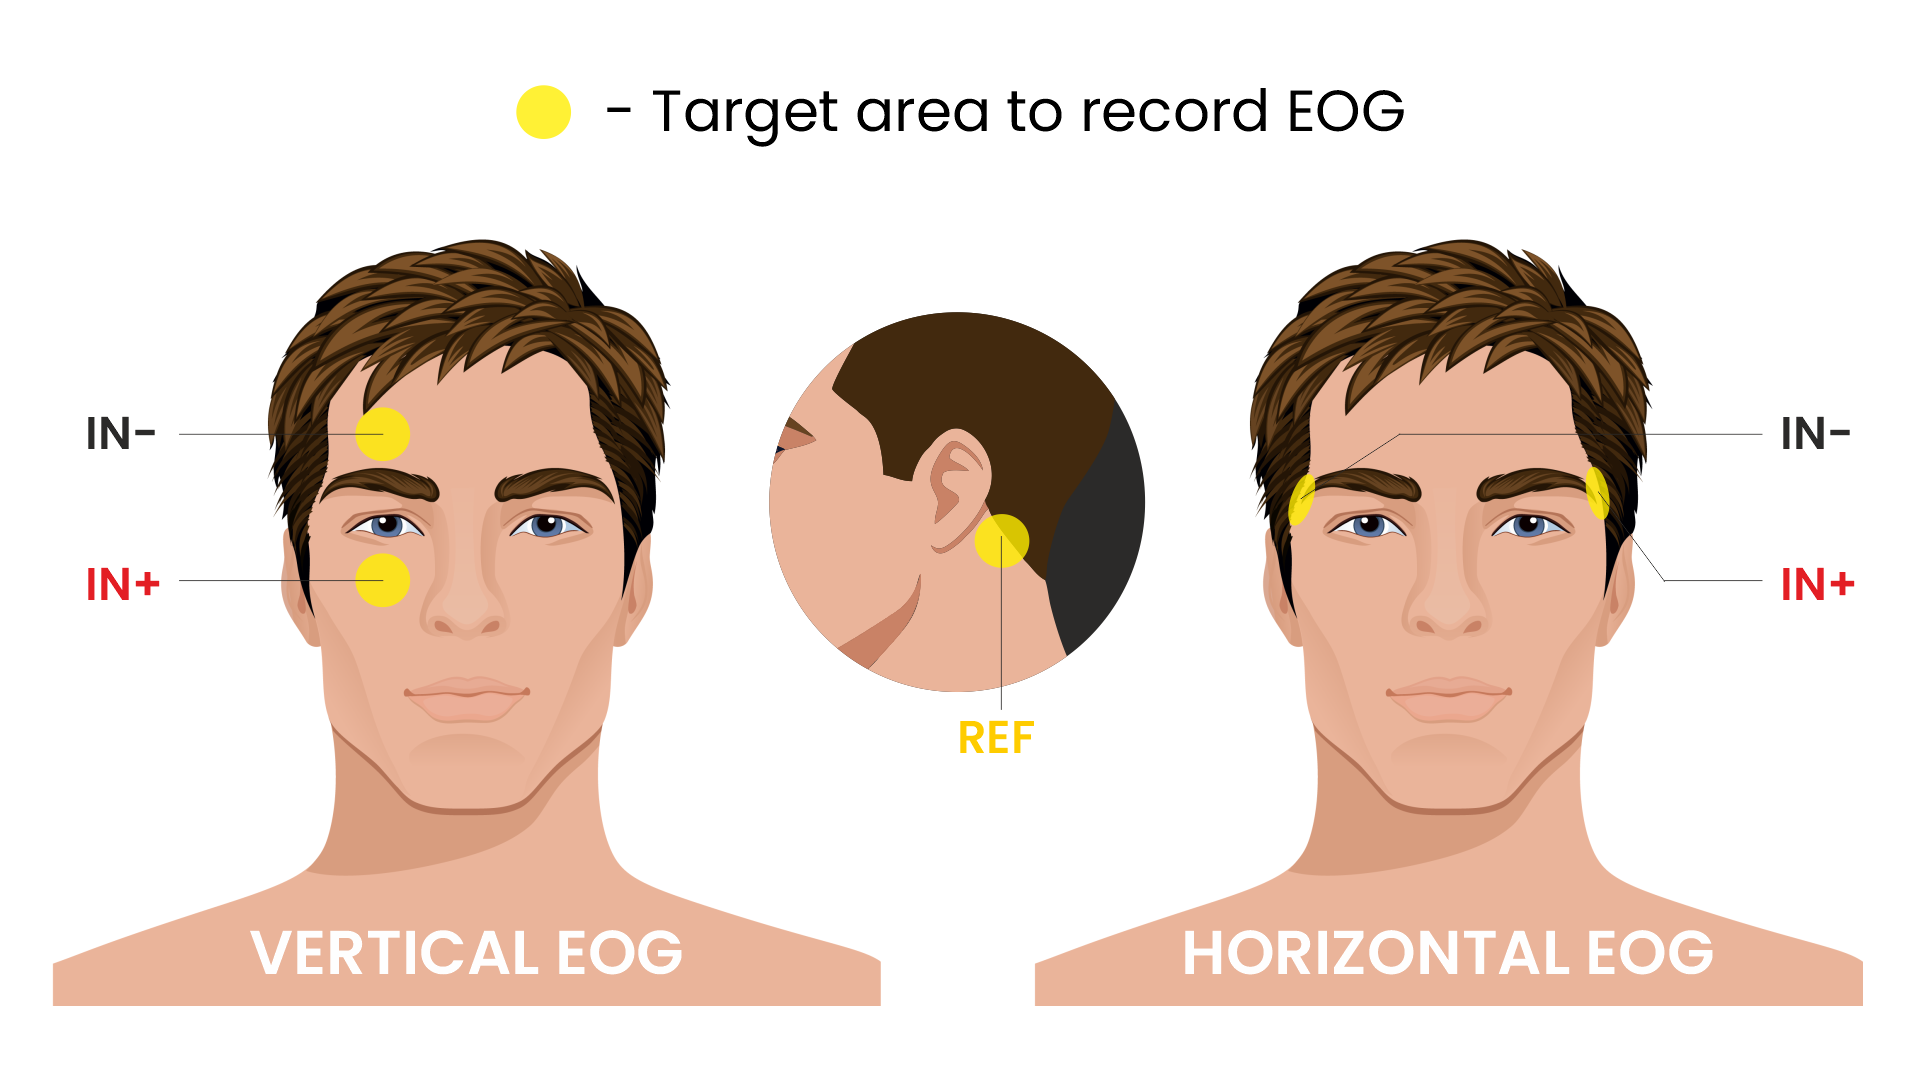
Target area to record EOG#
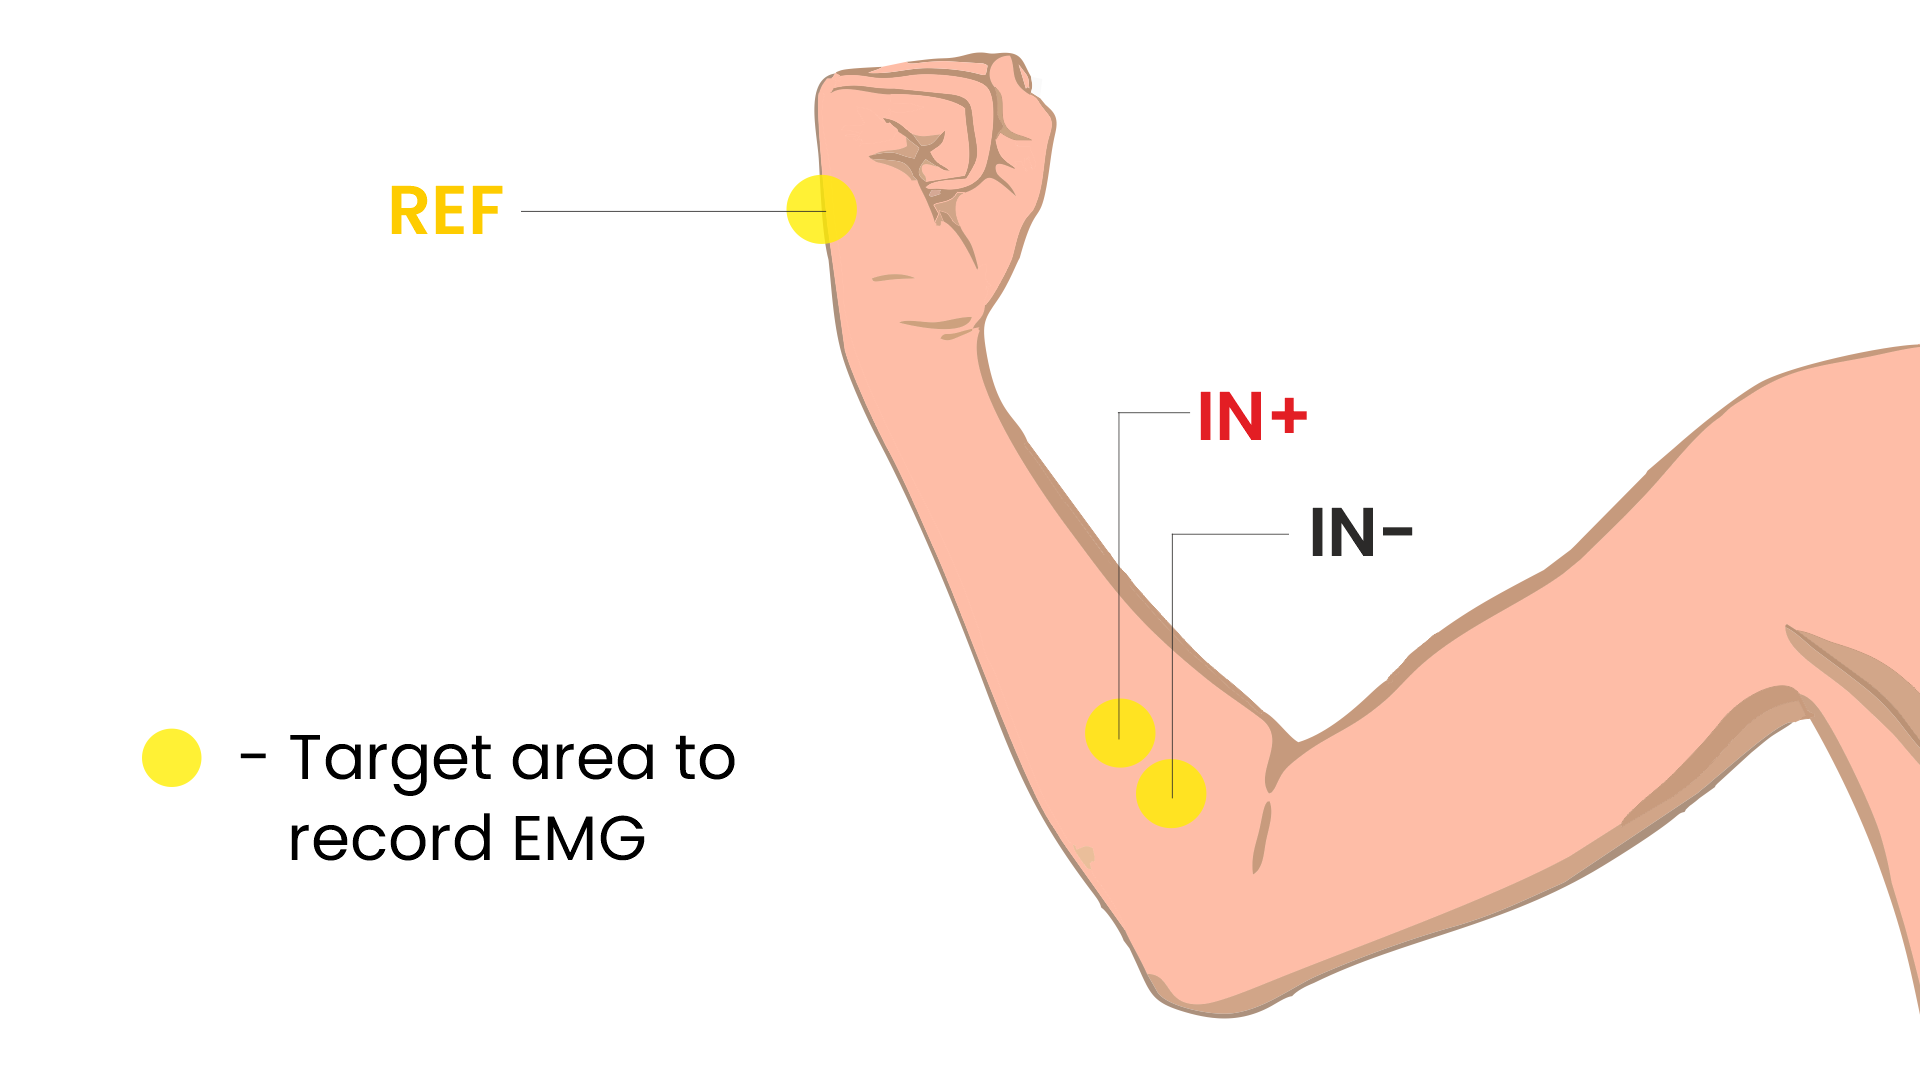
Target area to record EMG#
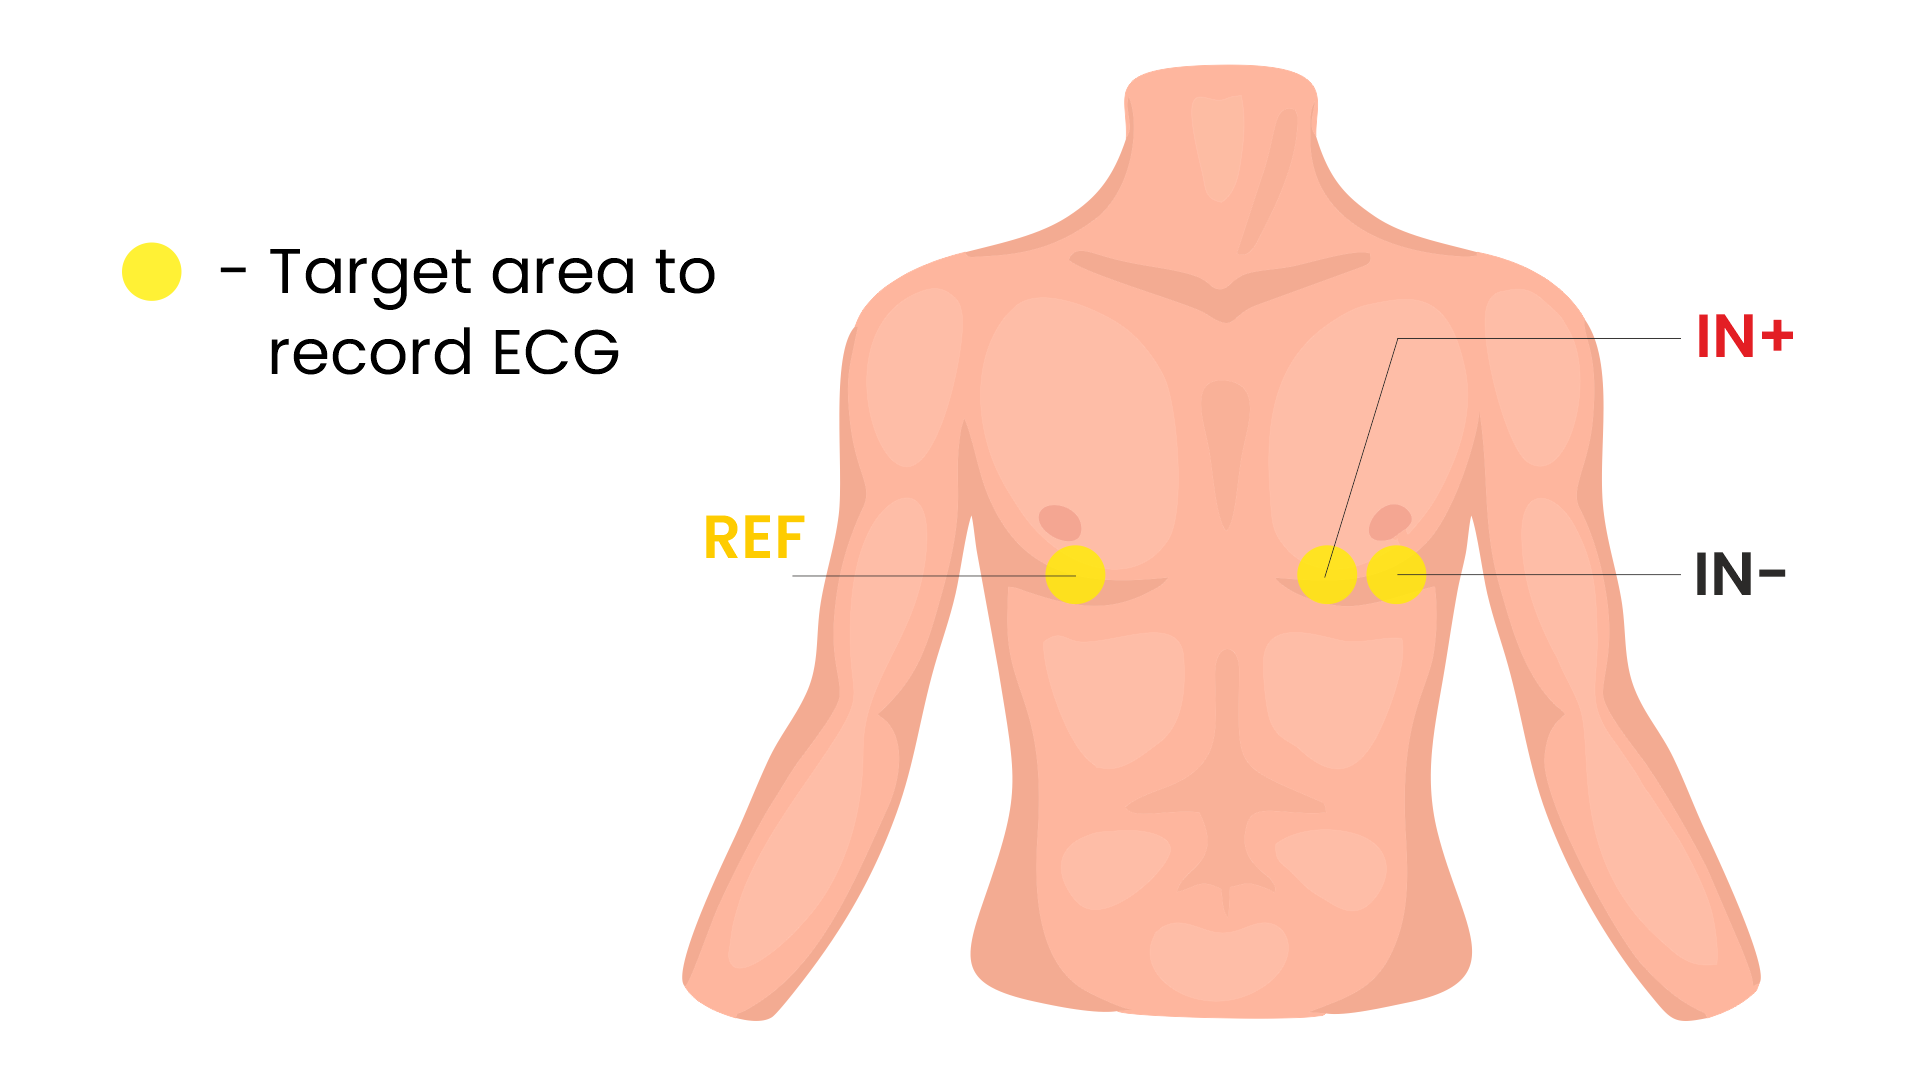
Target area to record ECG#
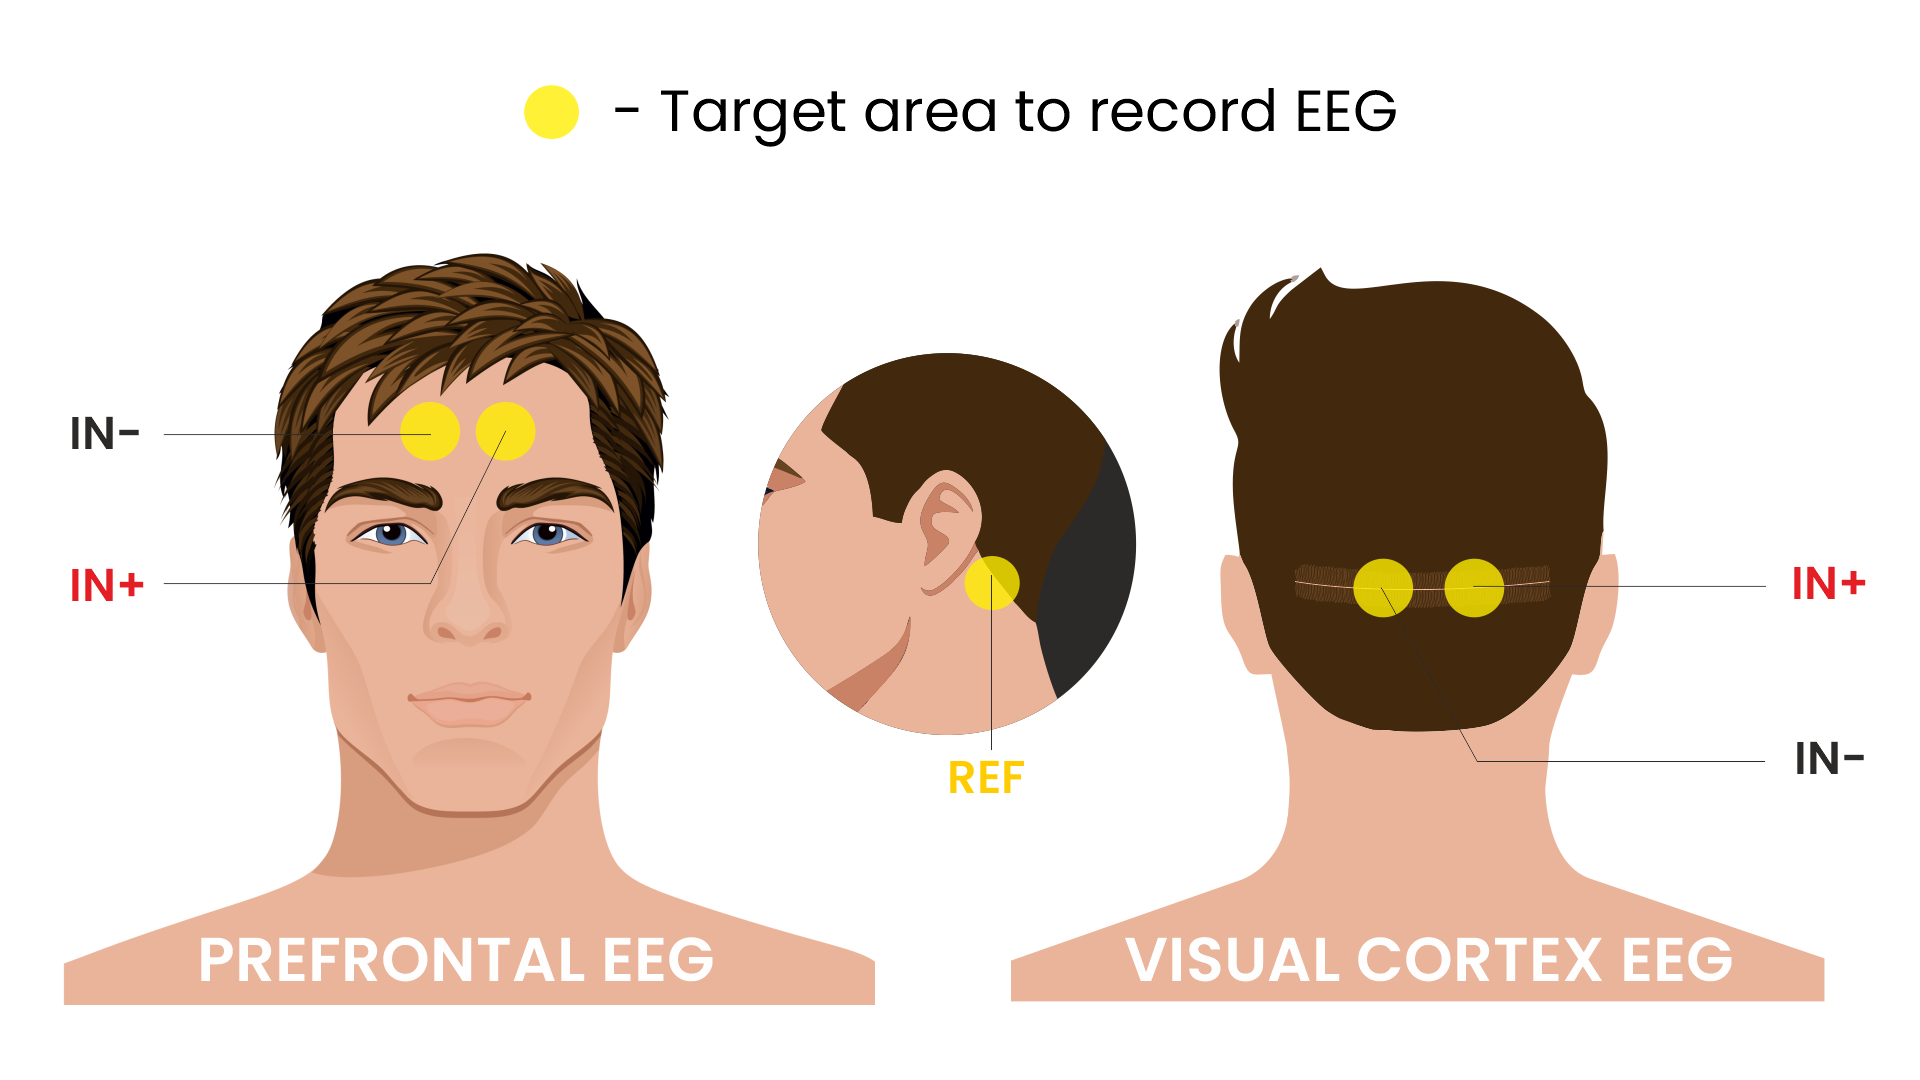
Target area to record EEG#
Step 2: Apply NuPrep gel#
Take a small amount of NuPrep gel using a cotton swab and apply it on your targeted area.

Step 3: Clean the skin surface#
Use gentle, circular motions to rub the gel on the skin surface. This removes all the dead skin cells & improves conductivity.

Rub the gel gently using the cotton swab#
Warning
Do not rub the gel for too long as it has abrasive properties and may cause skin redness and irritation.
Step 4: Wipe off the gel#
Wipe away excess gel with alcohol swabs or wet wipes.

Wipe away excess gel#
Warning
Using alcohol swabs can dry out the skin, so don’t use them if your skin is already dry.
Close your eyes while using the alcohol swabs for EOG recording else it may cause eye redness & irritation.
Step 5: Measuring the signals#
Now you can either use gel electrodes or BioAmp bands for the signal recording.
Using gel electrodes#
Connect the BioAmp cable to gel electrodes, peel the plastic backing from electrodes and place the IN+, IN-, REF cables according to your specific biopotential recording.
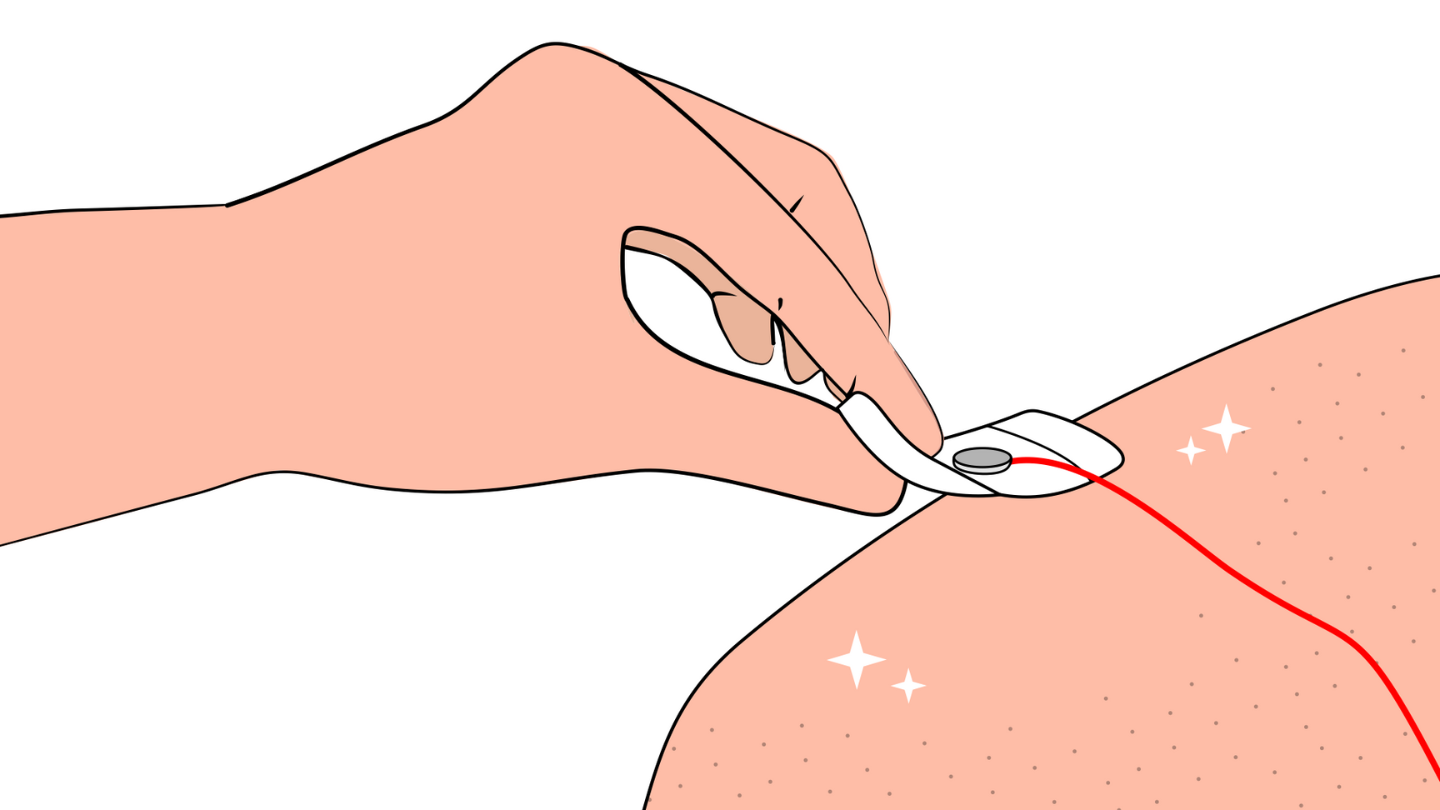
Placing gel electrodes on skin surface#
Note
While placing the gel electrodes on the skin, make sure to place the non-sticky tab of the electrode in the direction opposite to your hair growth. This allows you to remove the electrodes easily without pulling off much body hair.
Using BioAmp bands#
Connect the BioAmp cable to your BioAmp band. Now apply a small amount of electrode gel or Ten20 conductive paste on the dry electrodes between the skin and metallic part of BioAmp cable. This improves the signal conductivity, enhancing overall signal quality.
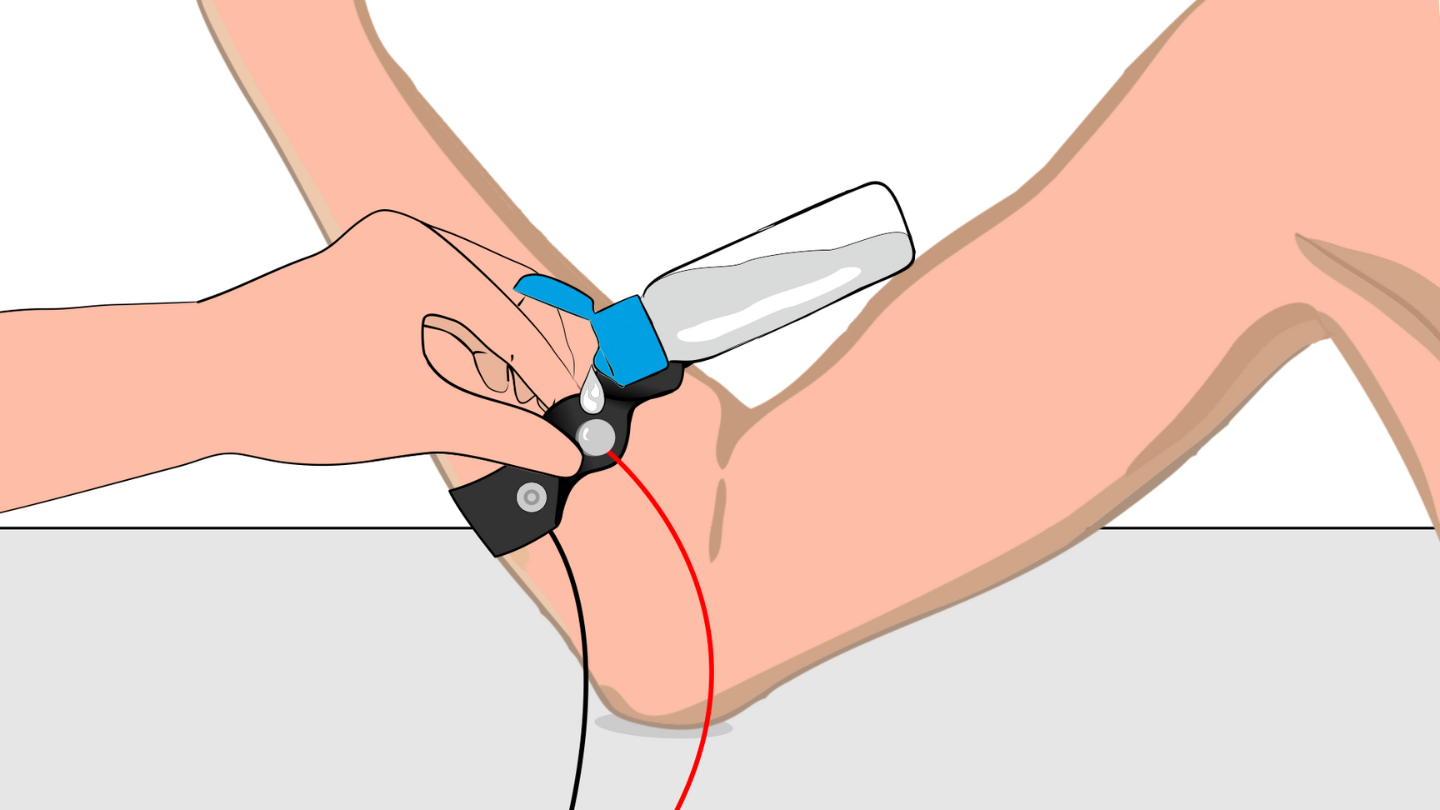
Method 1: Using Electrode gel#
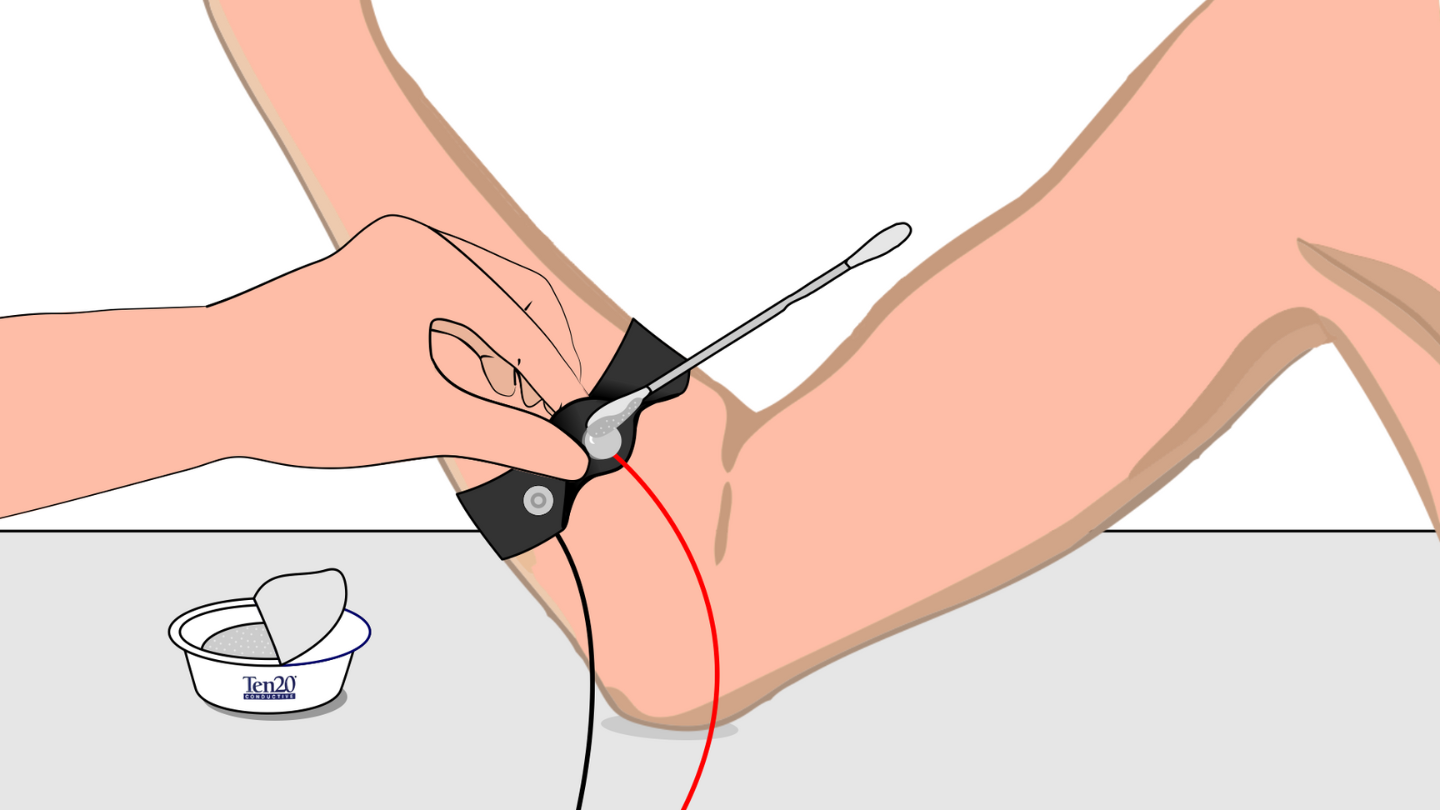
Method 2: Using Ten20 paste#
Note
The above graphics demonstrates the use of electrode gel/Ten20 paste with Muscle BioAmp Band. Similarly you can use Brain BioAmp Band and Heart BioAmp Band. Refer to Using BioAmp Bands guide to assemble and use all the BioAmp Bands correctly.
Now you are all set! Make all the connections correctly and start recording your biopotential signals.
Warning
NuPrep gel, Ten20 paste and the alcohol swabs shouldn’t be used if you have a history of skin allergies to lotions and cosmetics.