BioAmp v1.5#
2023 Edition
Overview#
It is a small size portable biopotential amplifier with a no code setup to record and listen to your muscle signals (EMG) non invasively. The best part is that it doesn’t require any microcontroller (like Arduino) to sample the signal. You just plug a 9V battery into the board, electrodes to the body, and an audio jack to a mobile/laptop, and you are ready to record signals from muscles (EMG) using softwares like audacity or Backyard Brain’s spike recorder app.
Features & Specifications#
Minimum Input Voltage |
7-9 V |
Input Impedance |
10^7 ohm |
Fixed Gain |
~200x |
BioPotentials |
EMG (Electromyography) |
No. of channels |
1 |
Electrodes |
3 (Positive, Negative, and Reference) |
Dimensions |
5.0 x 3.0 cm |
Open Source |
Hardware + Software |
Hardware#
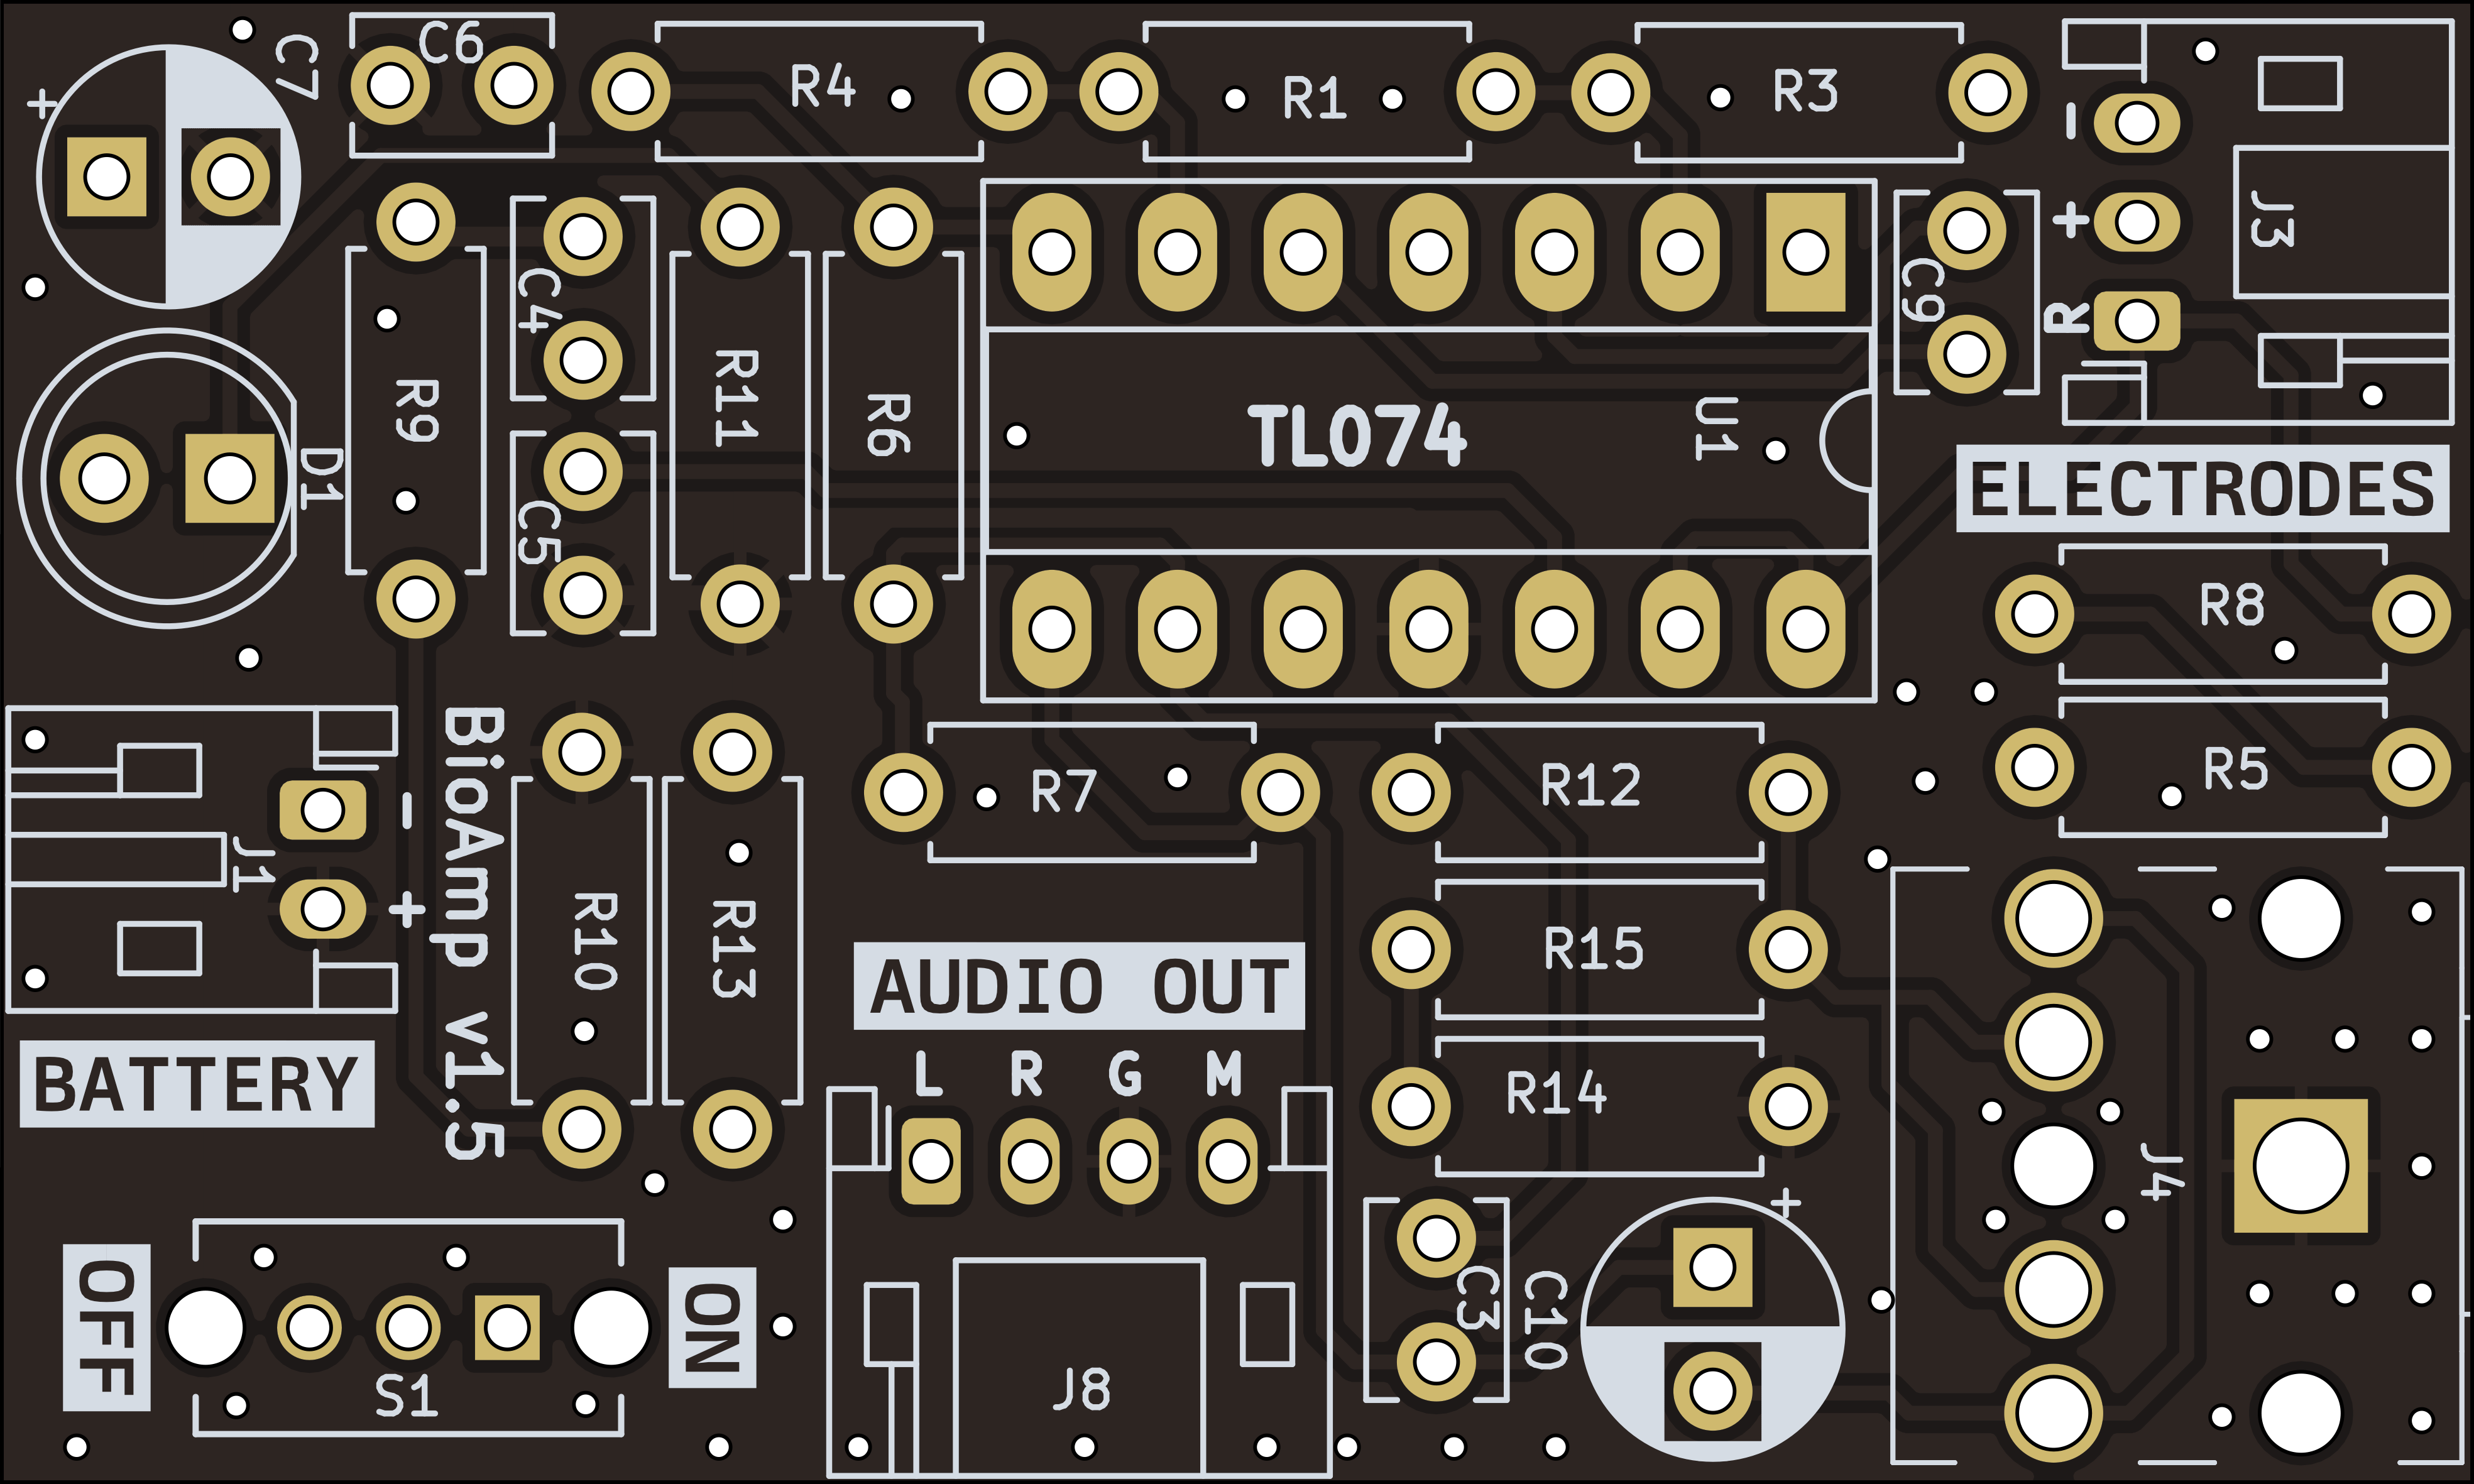
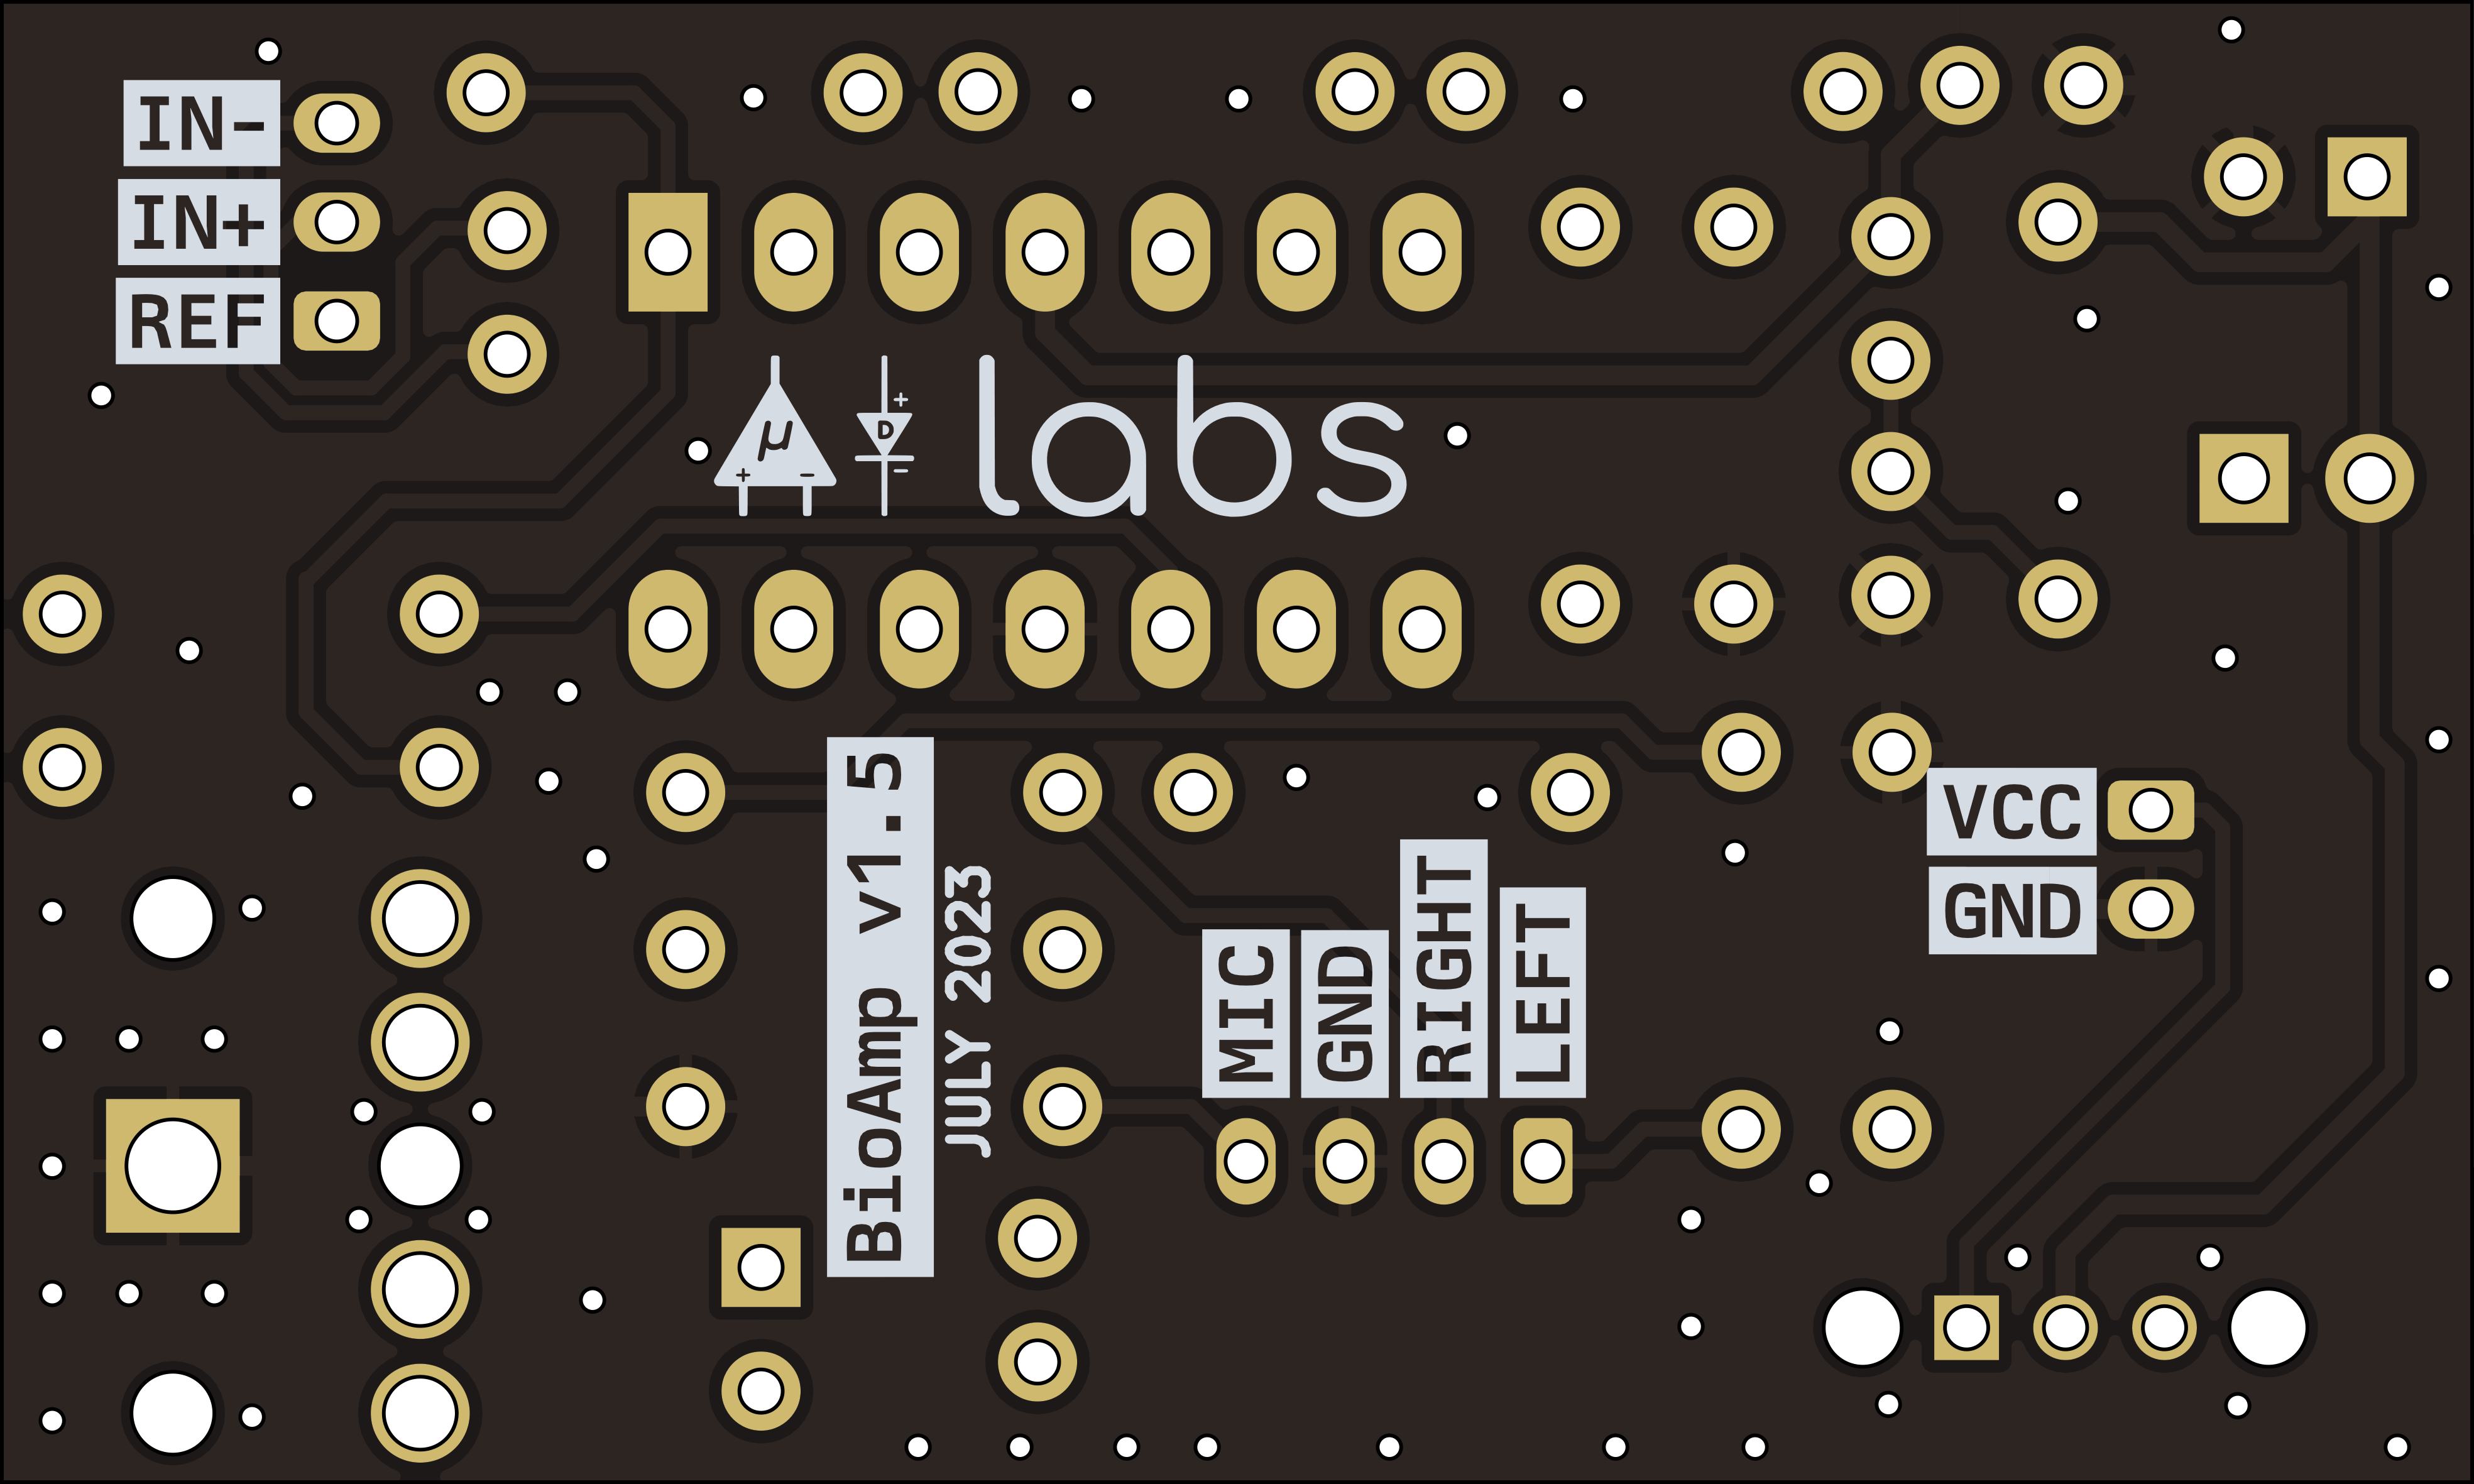
Images below shows a quick overview of the hardware design.
PCB Front
PCB Back
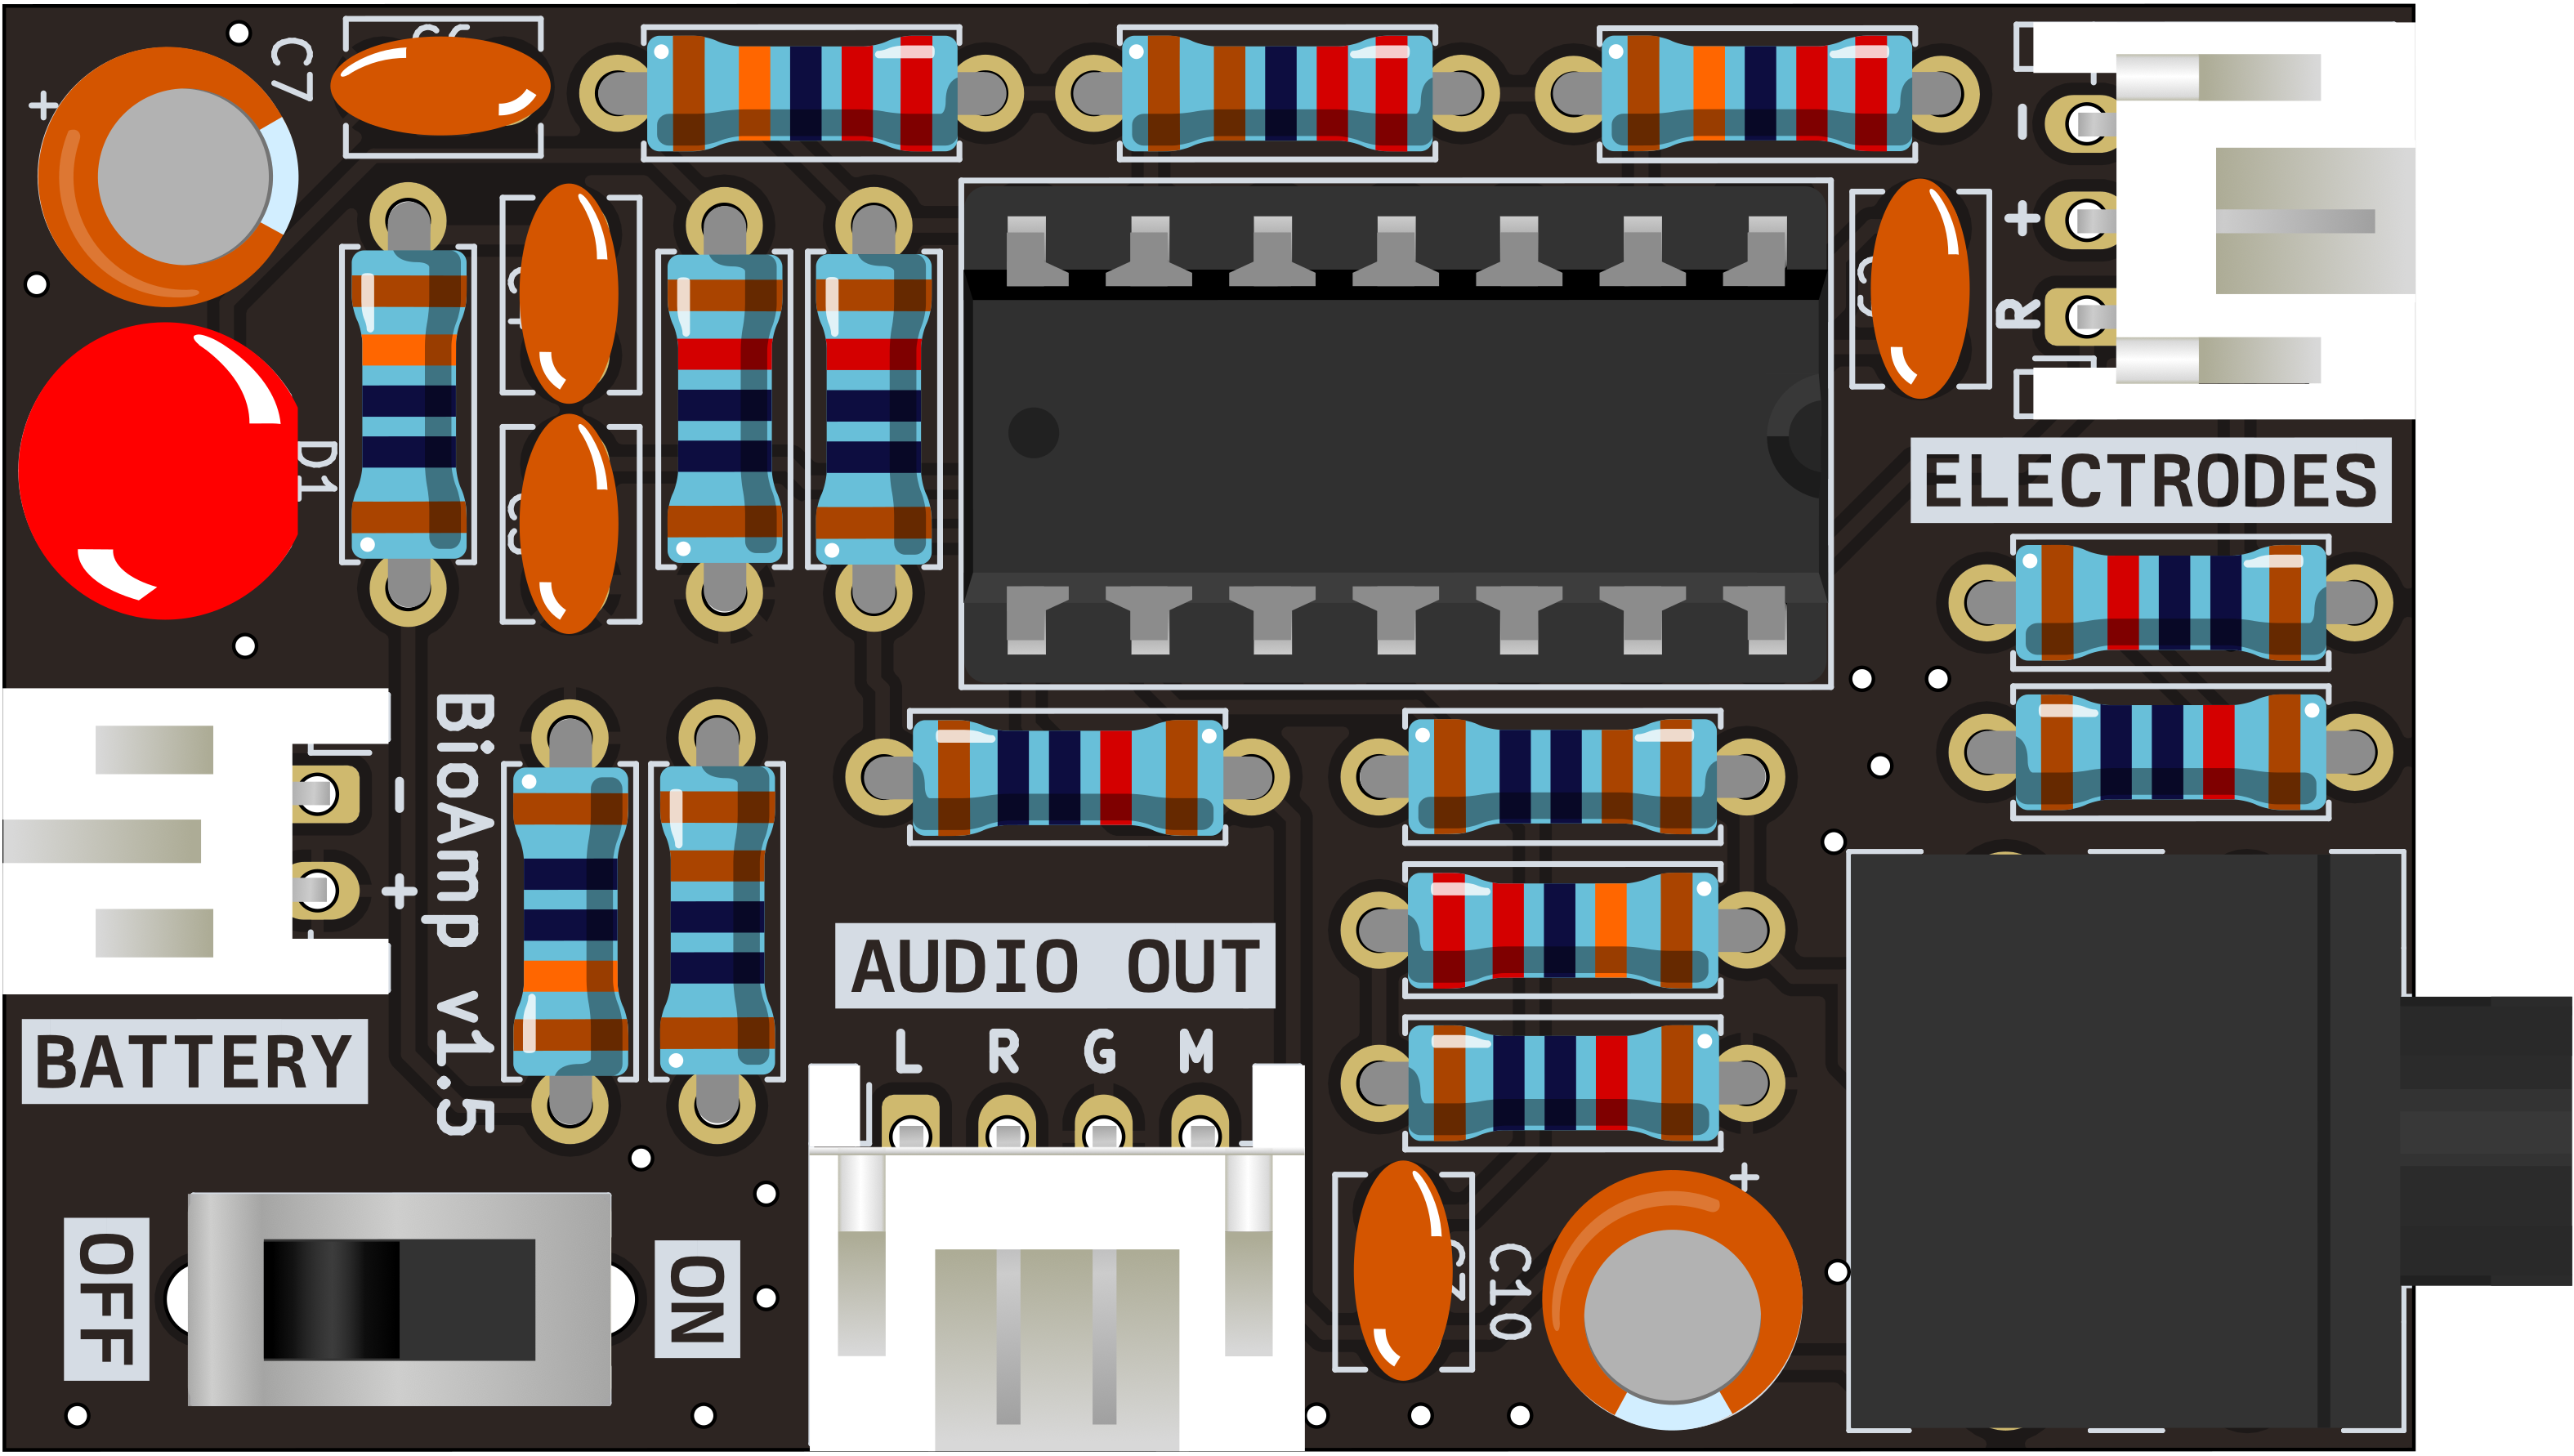
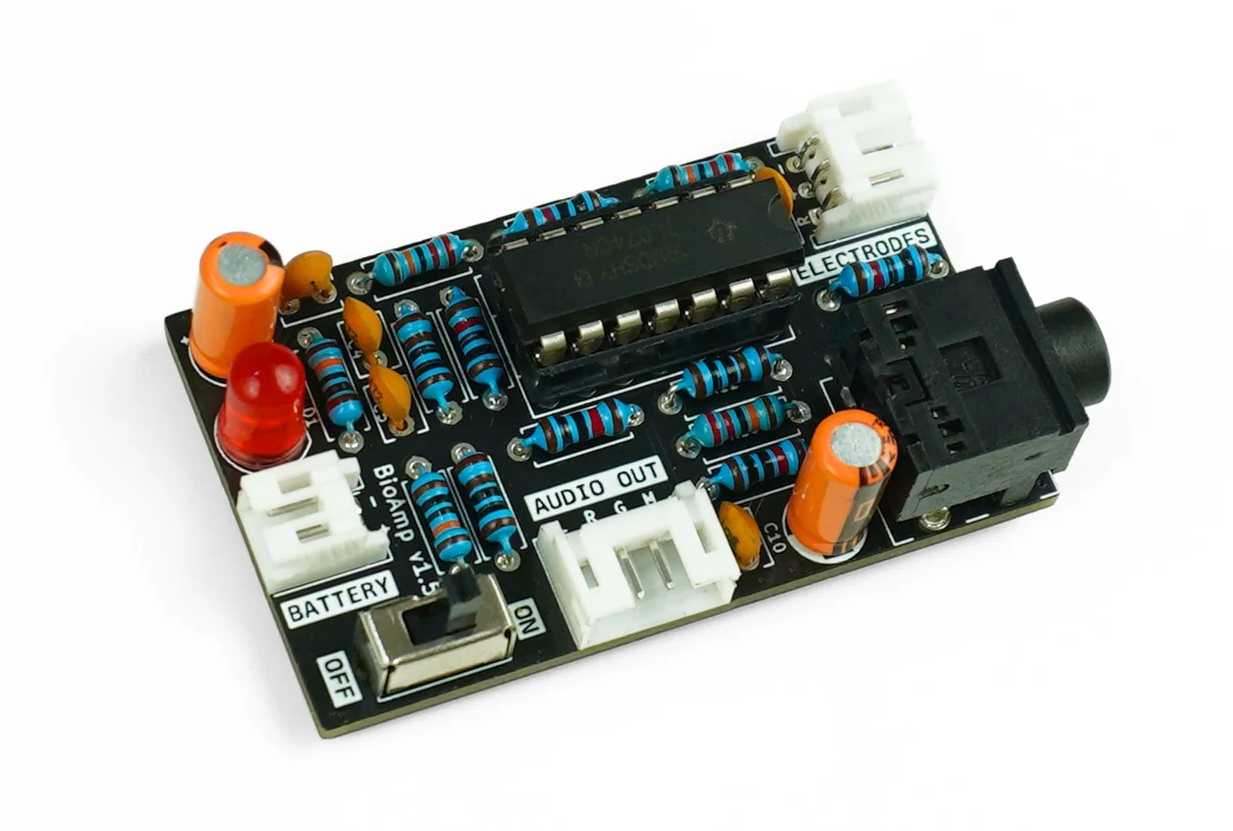
Assembled BioAmp v1.5#
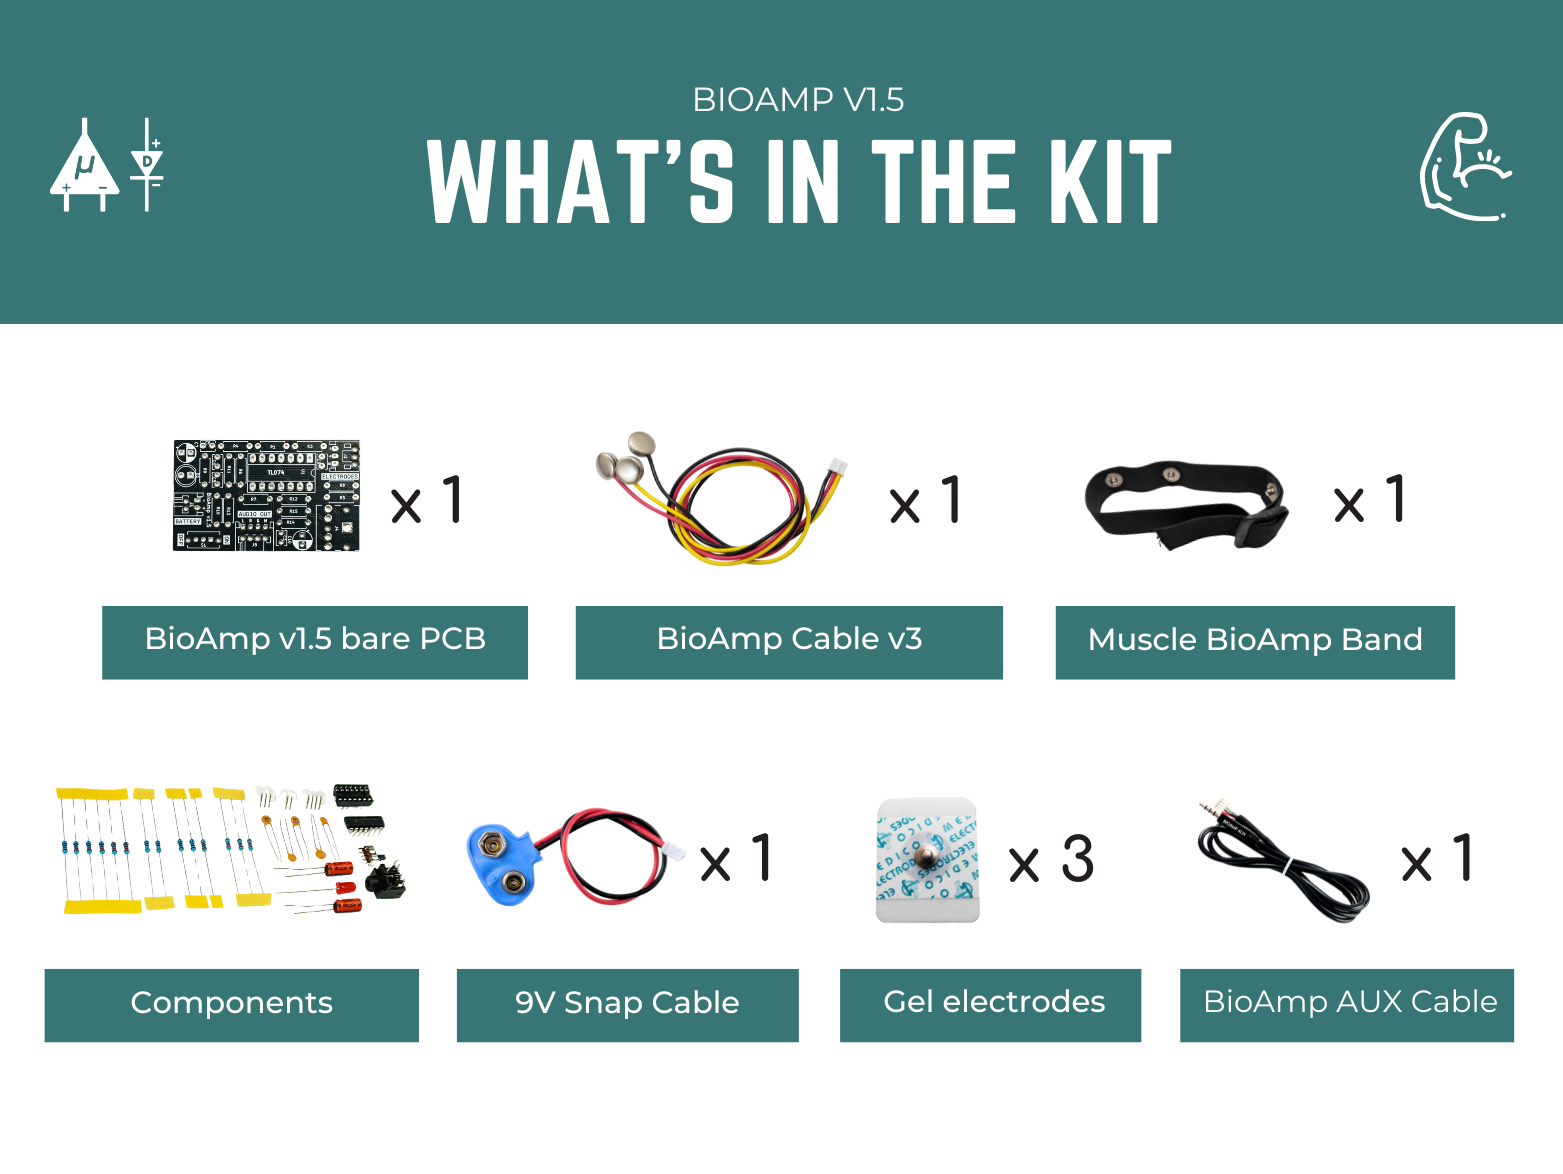
Contents of the kit#
Software requirements#
Before you start using the kit, download Backyard Brains’ Spike Recorder or Audacity according to the operating system you are using (Windows, OSX, Linux).
Assembling the kit#
You can get your own BioAmp v1.5 bag of parts from our online stores (shipping worldwide) and for assembling the board you can take a look at the step by step guide given below.
Note: Follow the highlighted yellow shapes to assemble your BioAmp v1.5!
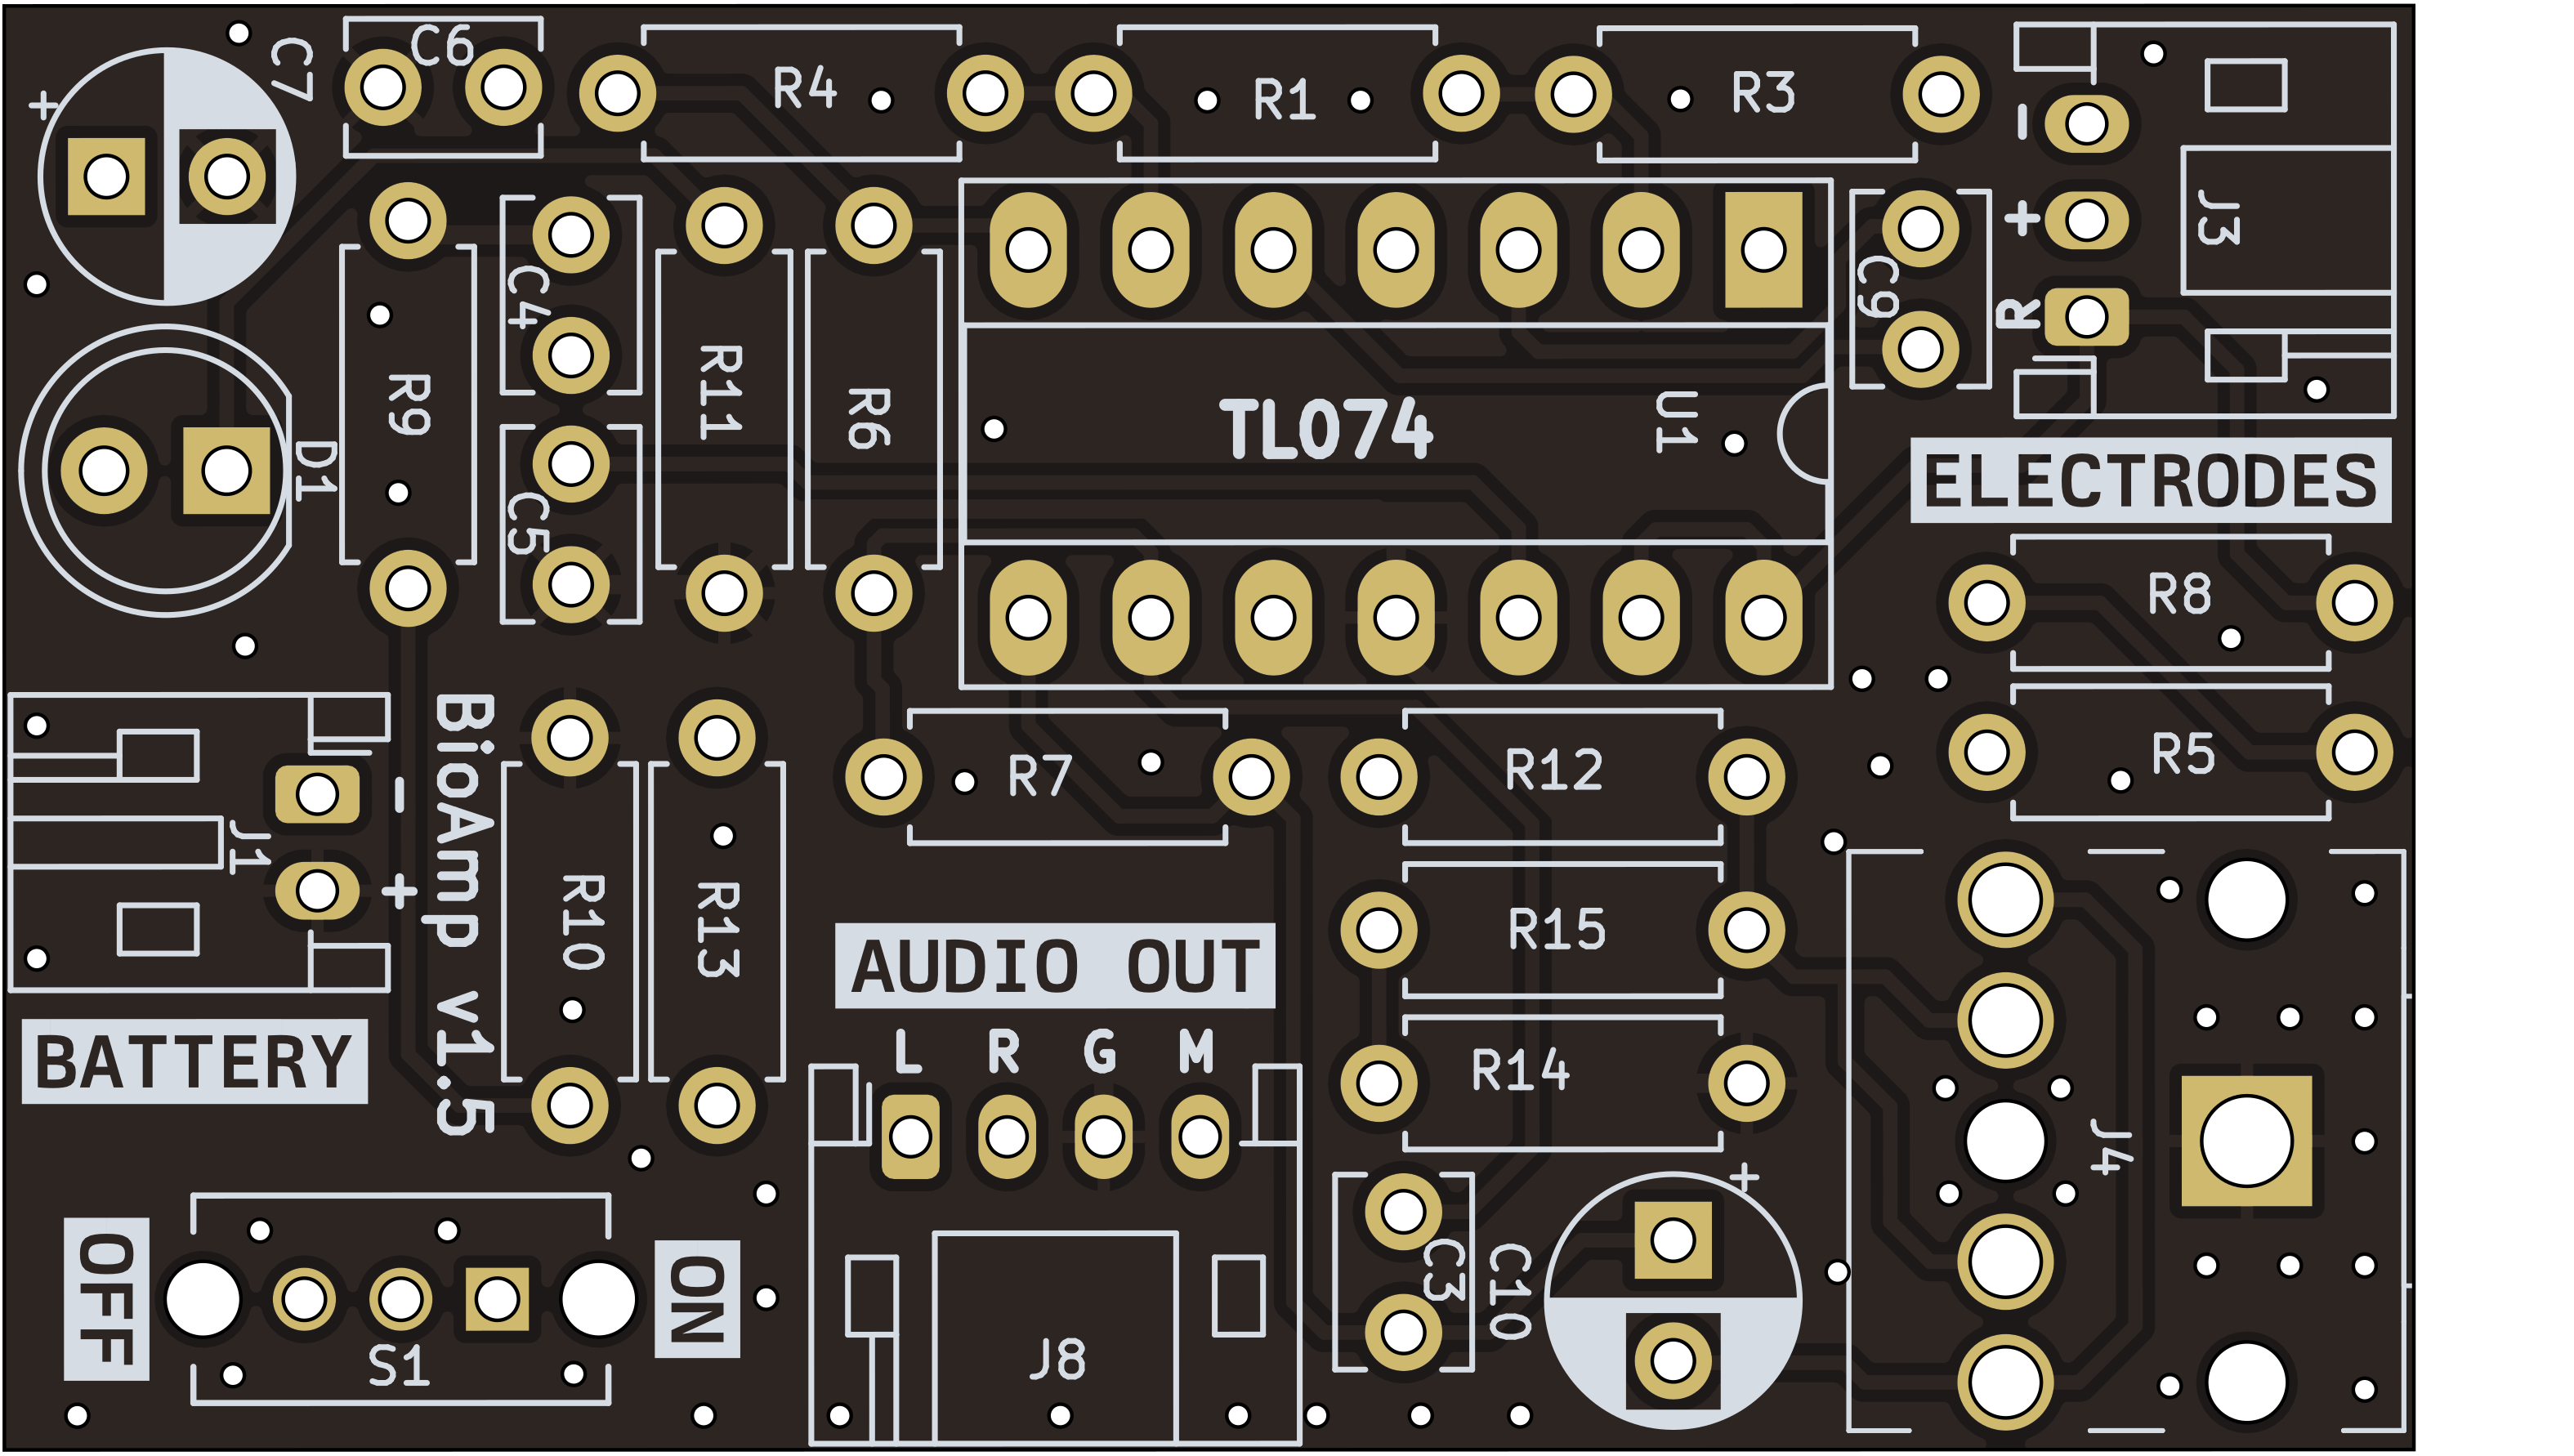
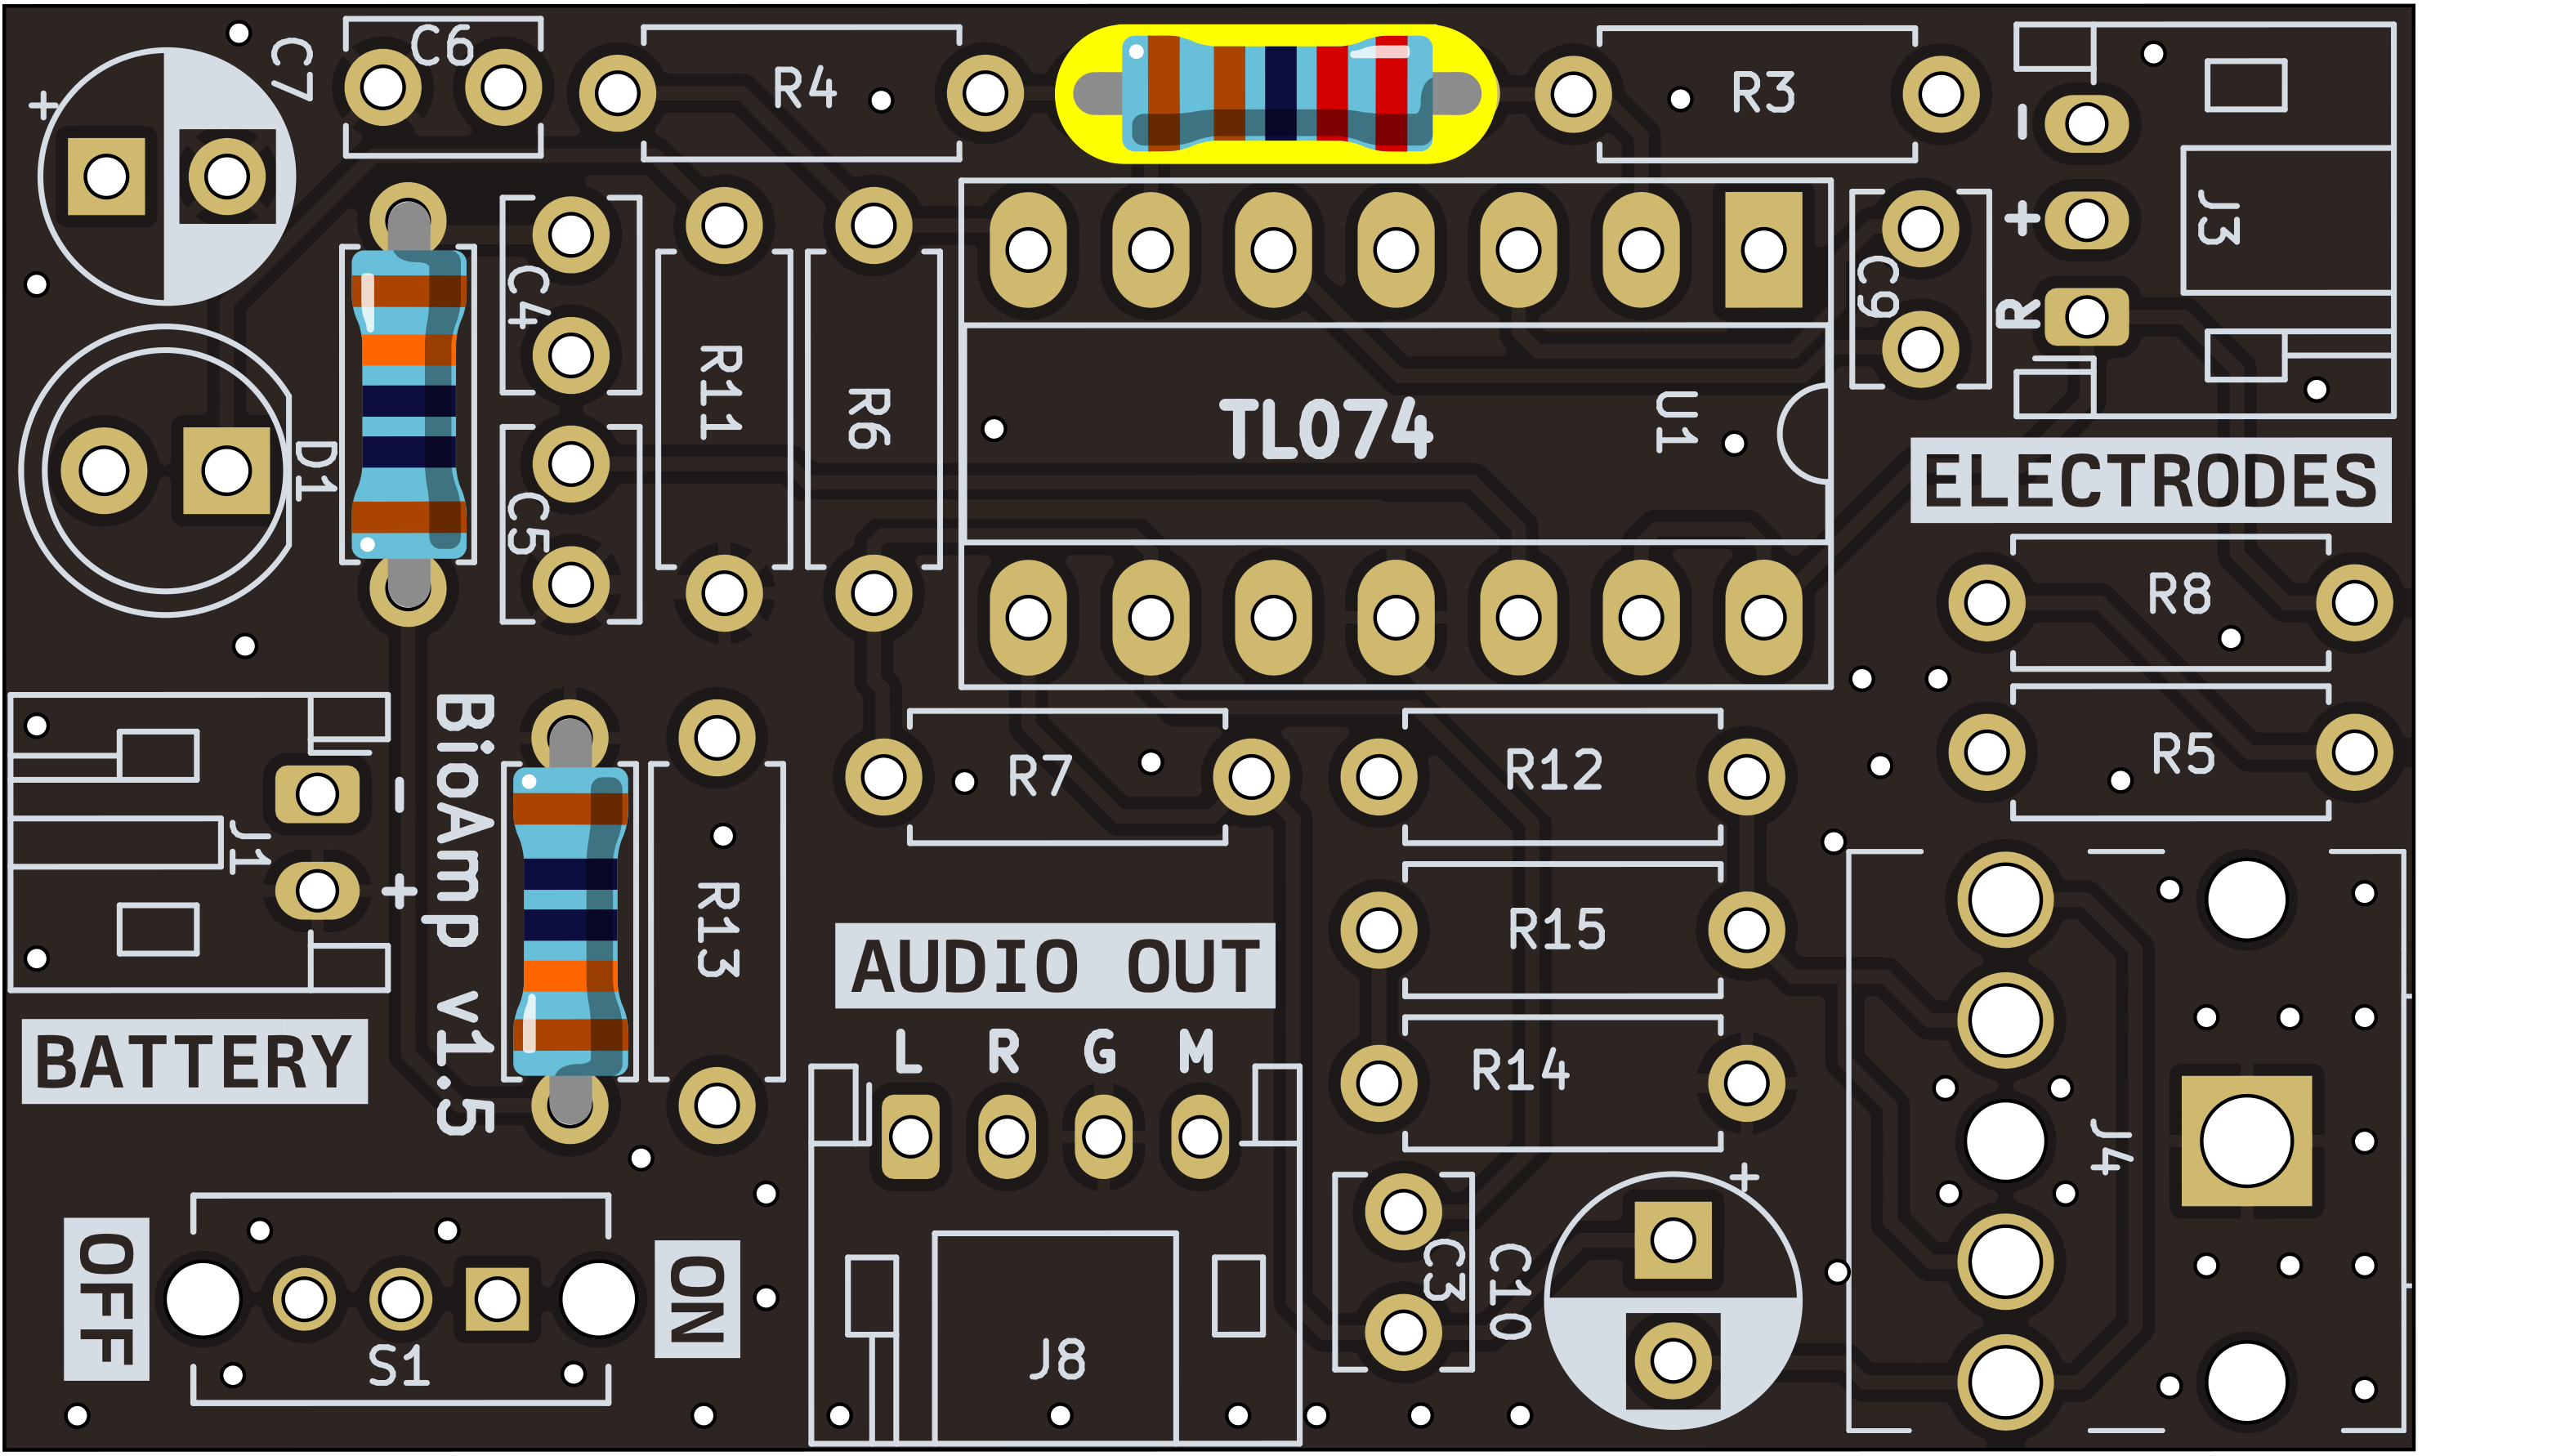
Step 1 - Bare Board#
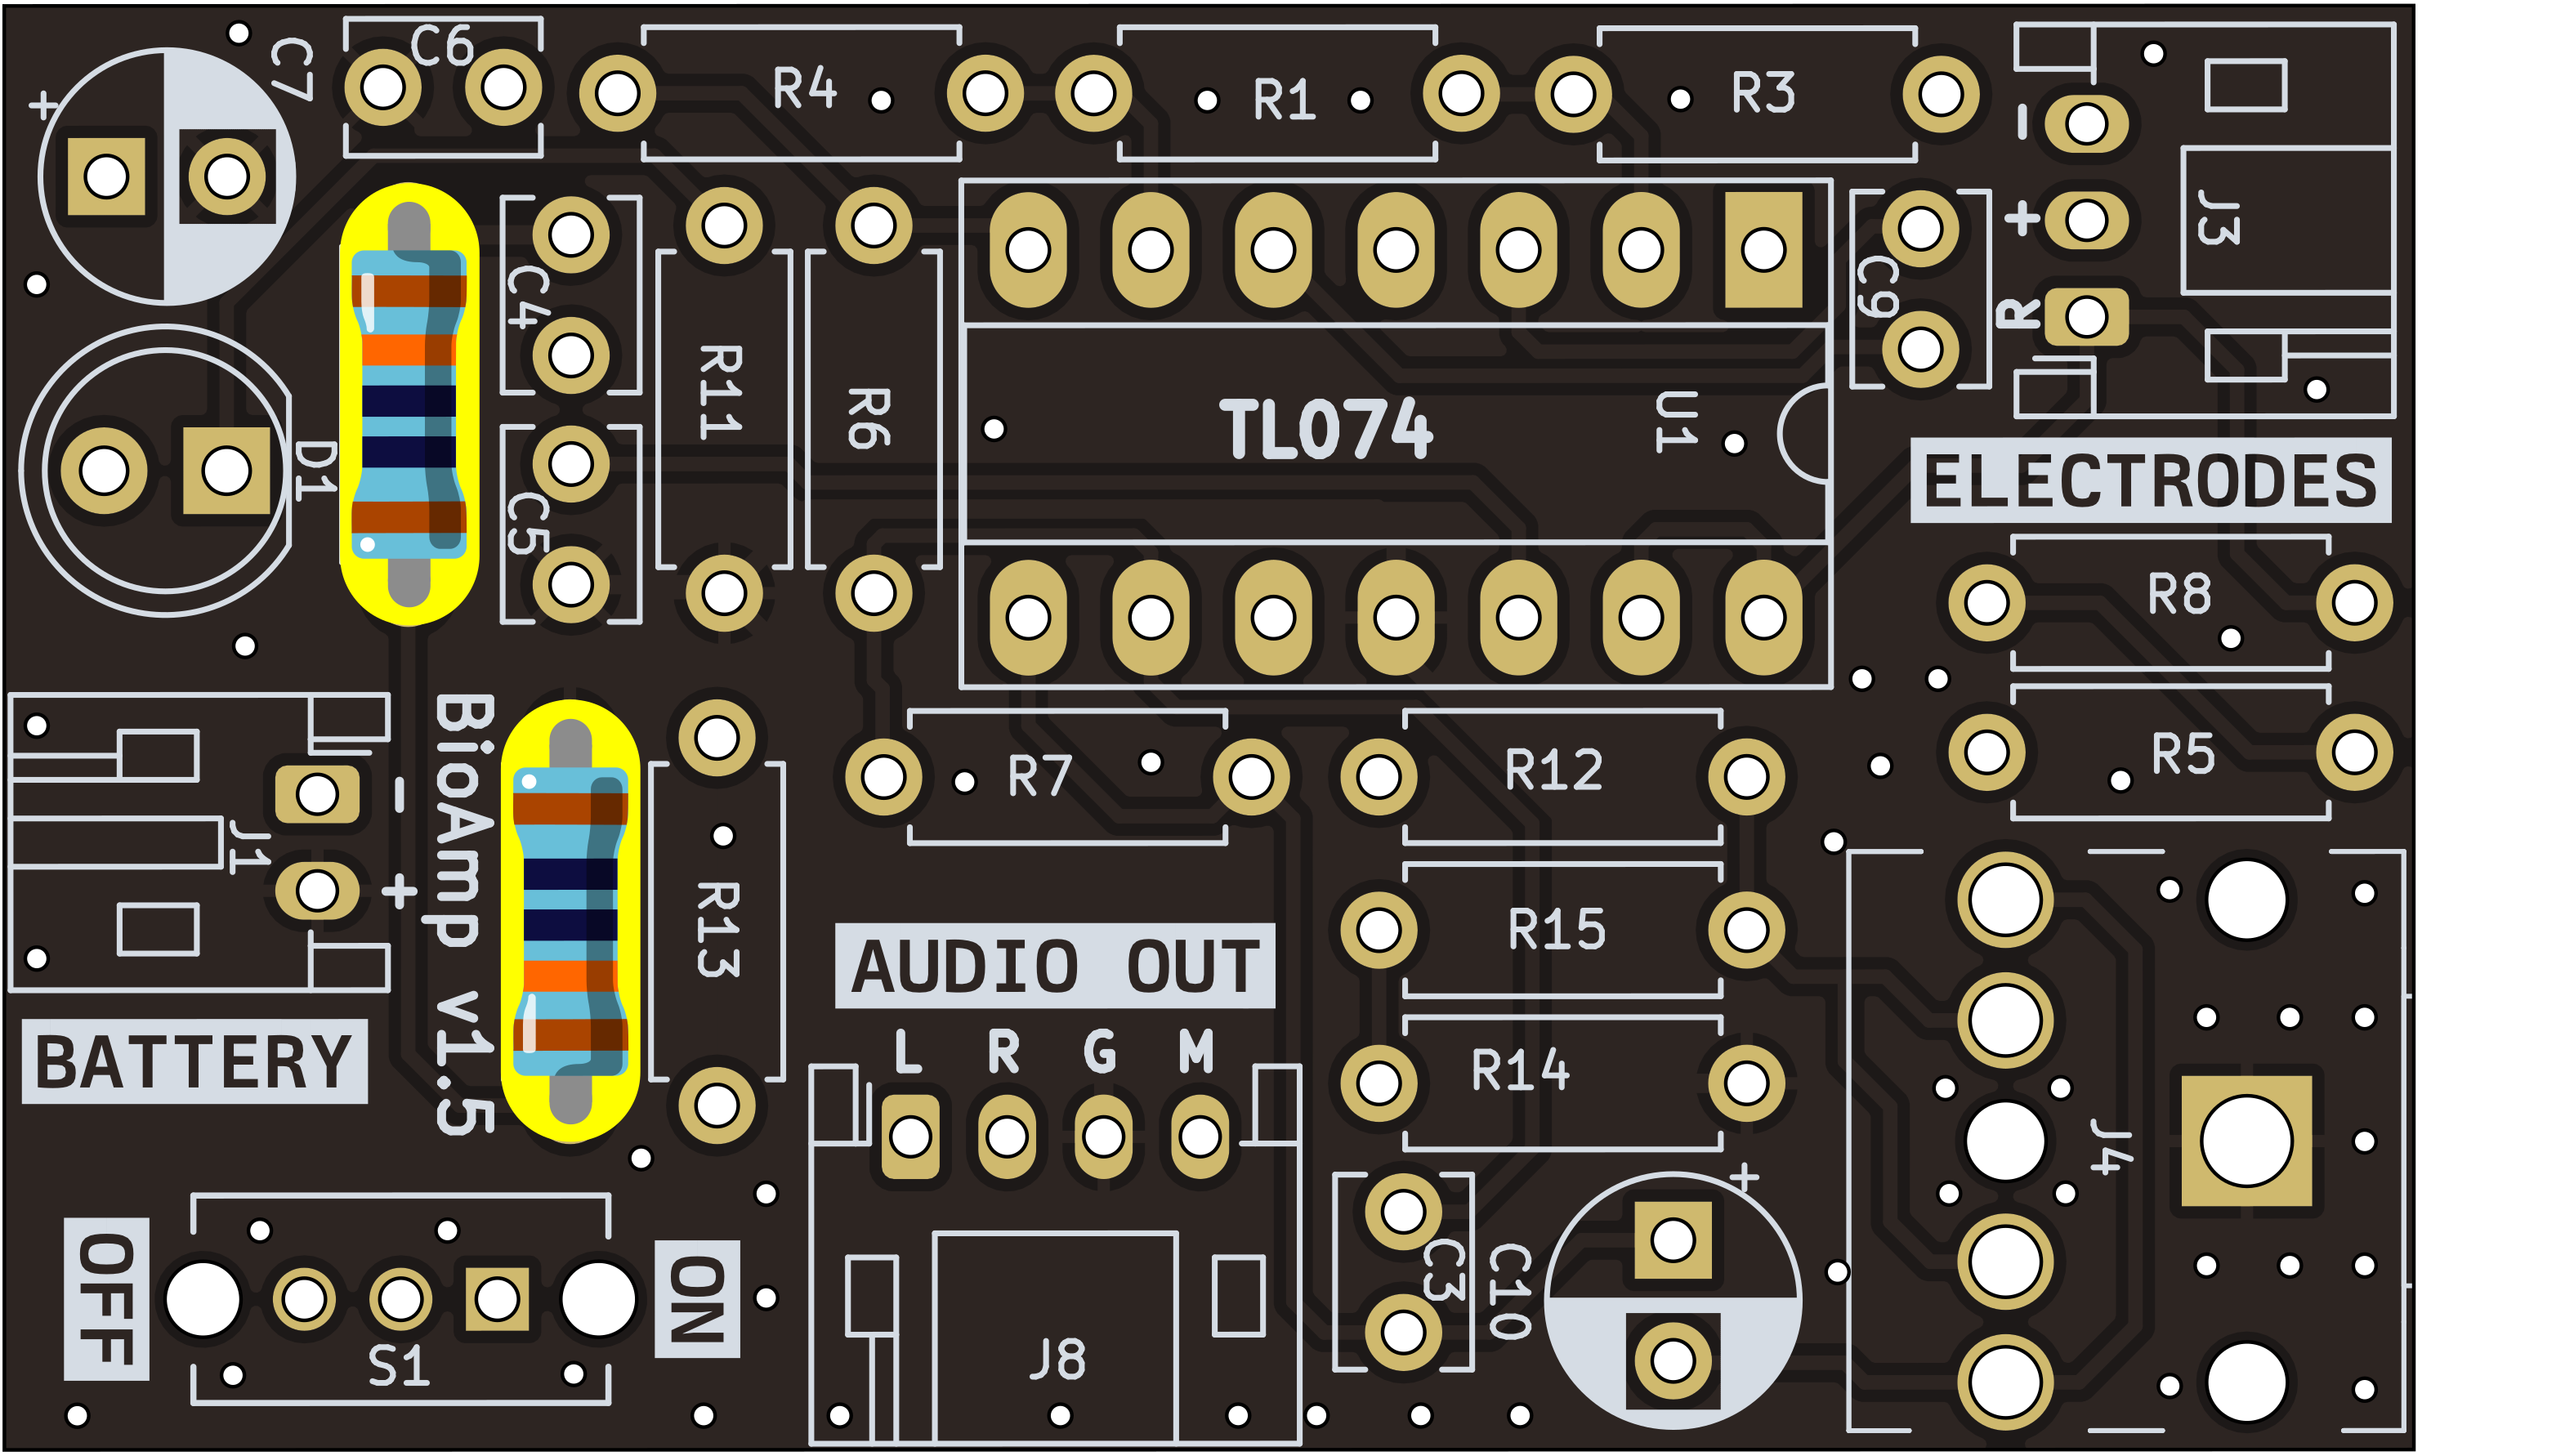
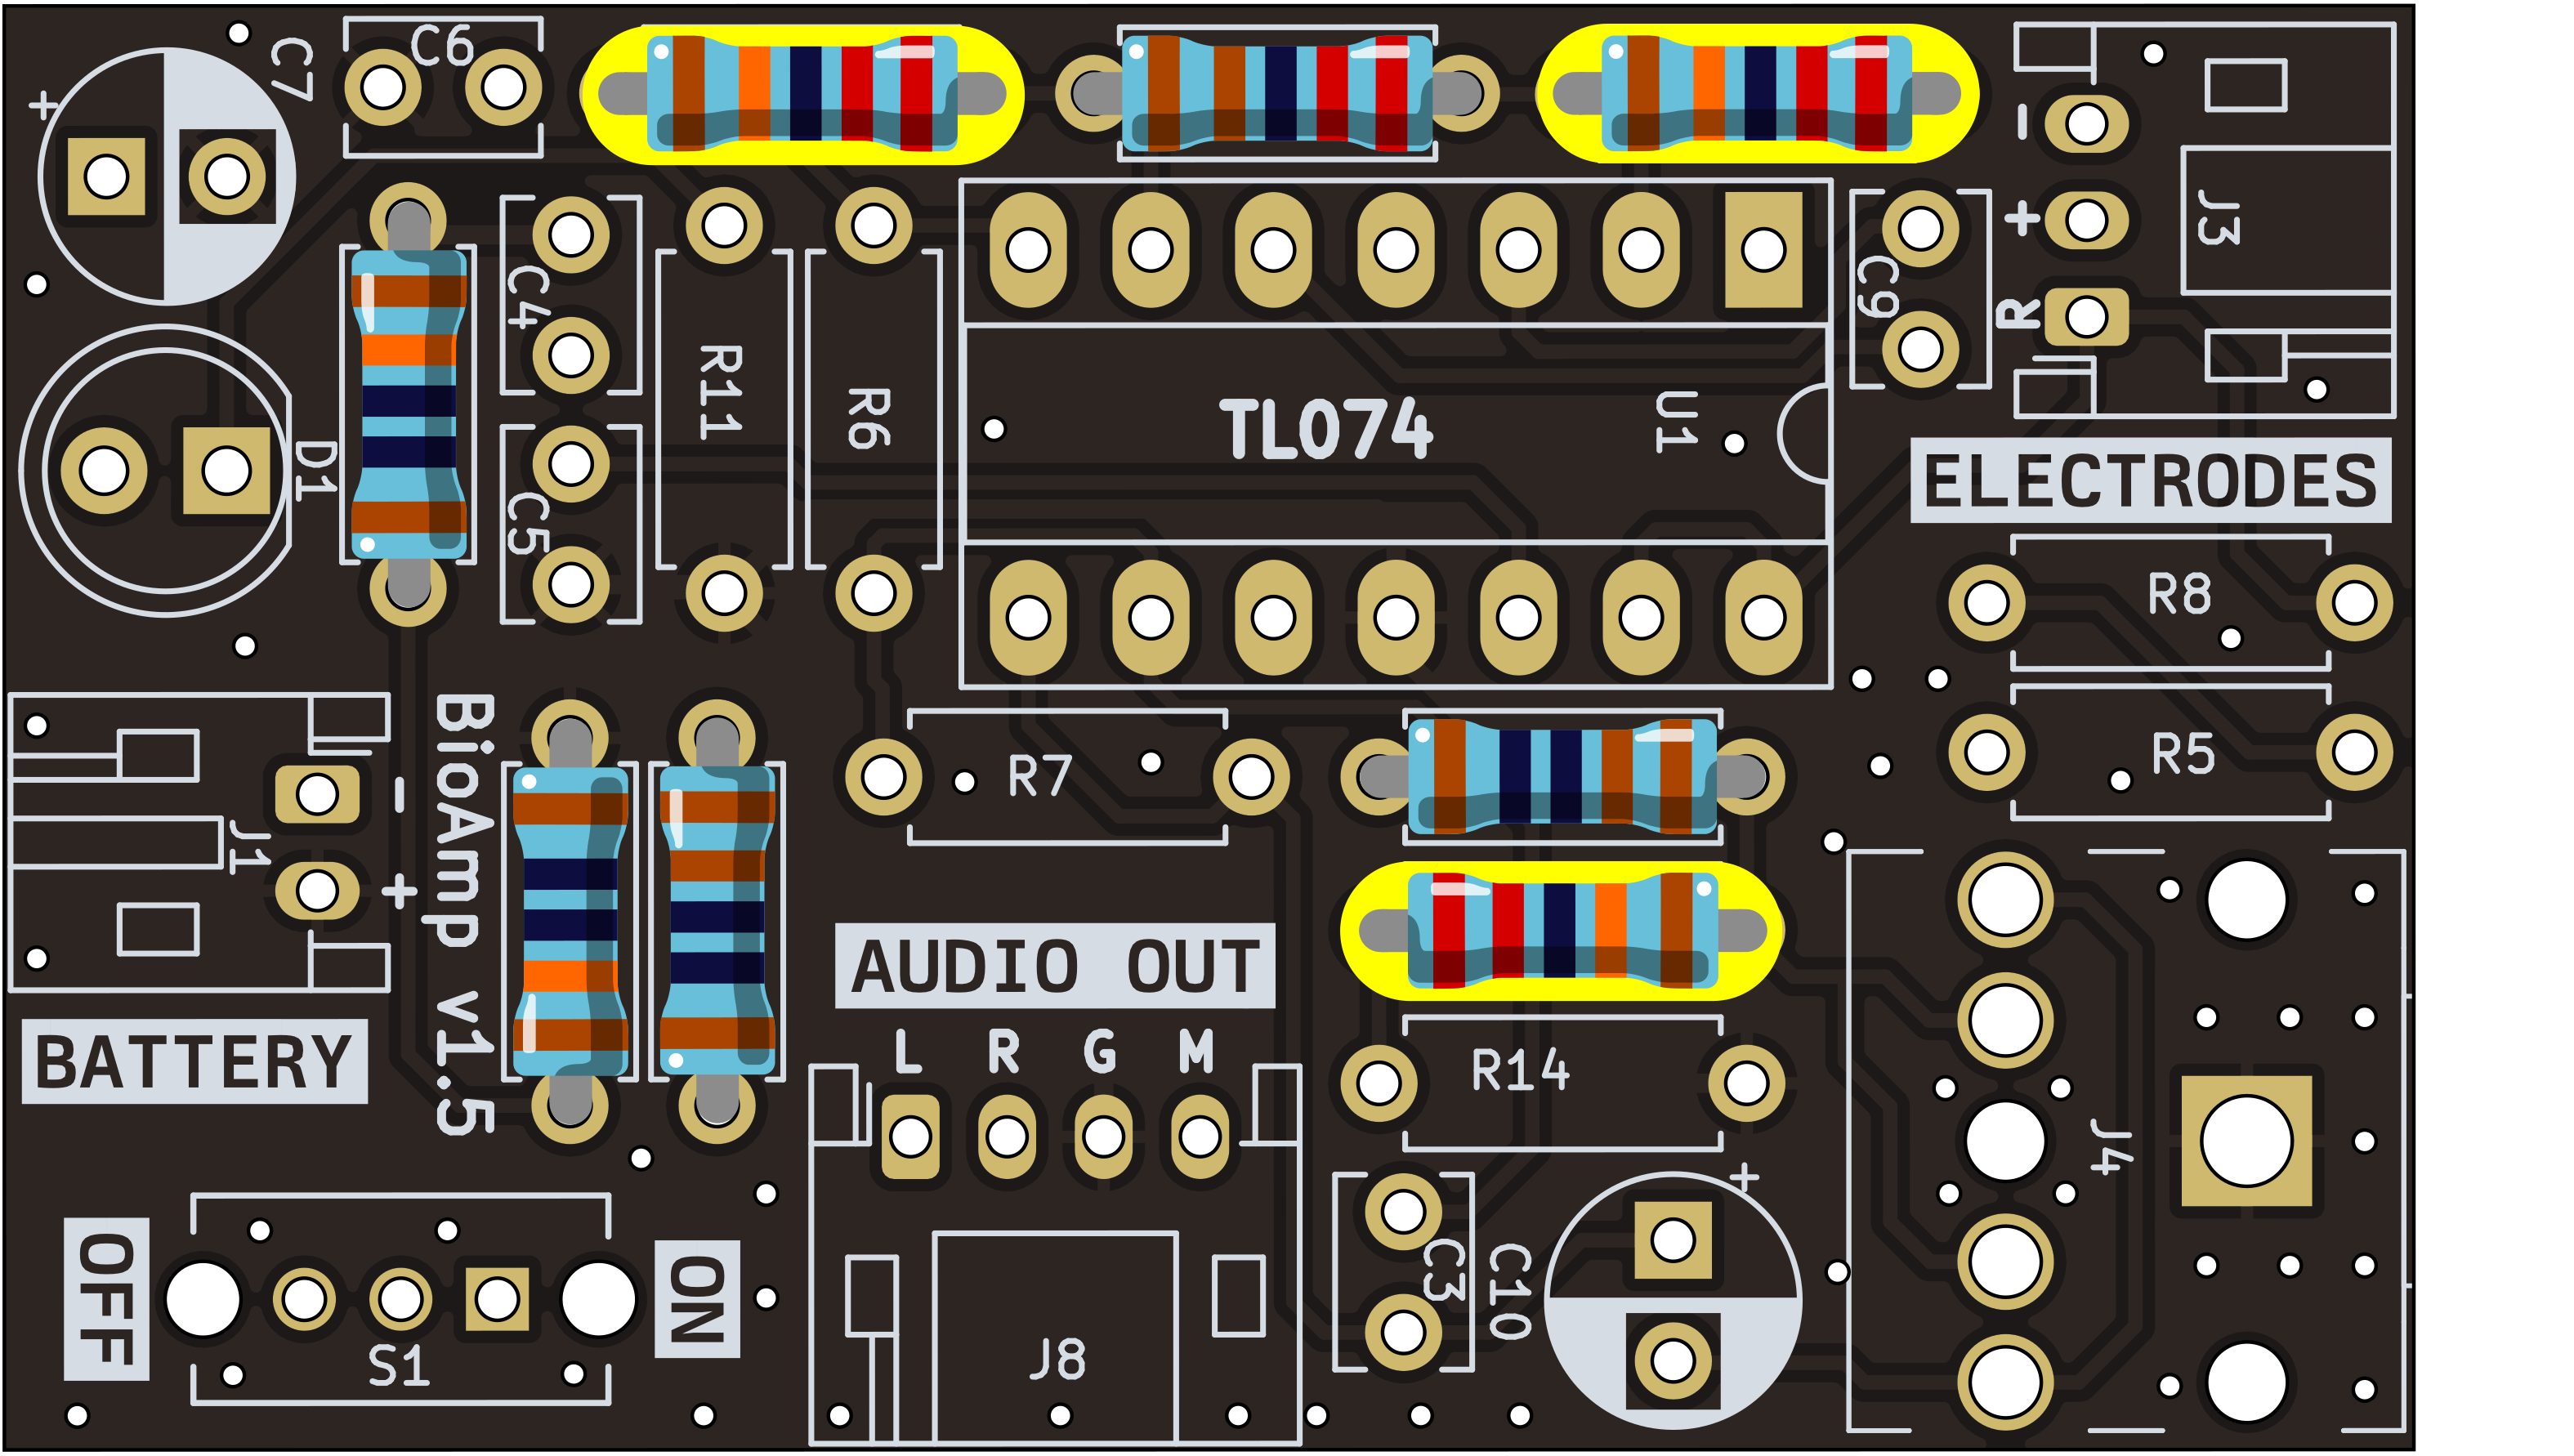
Step 2 - 100K Resistors#
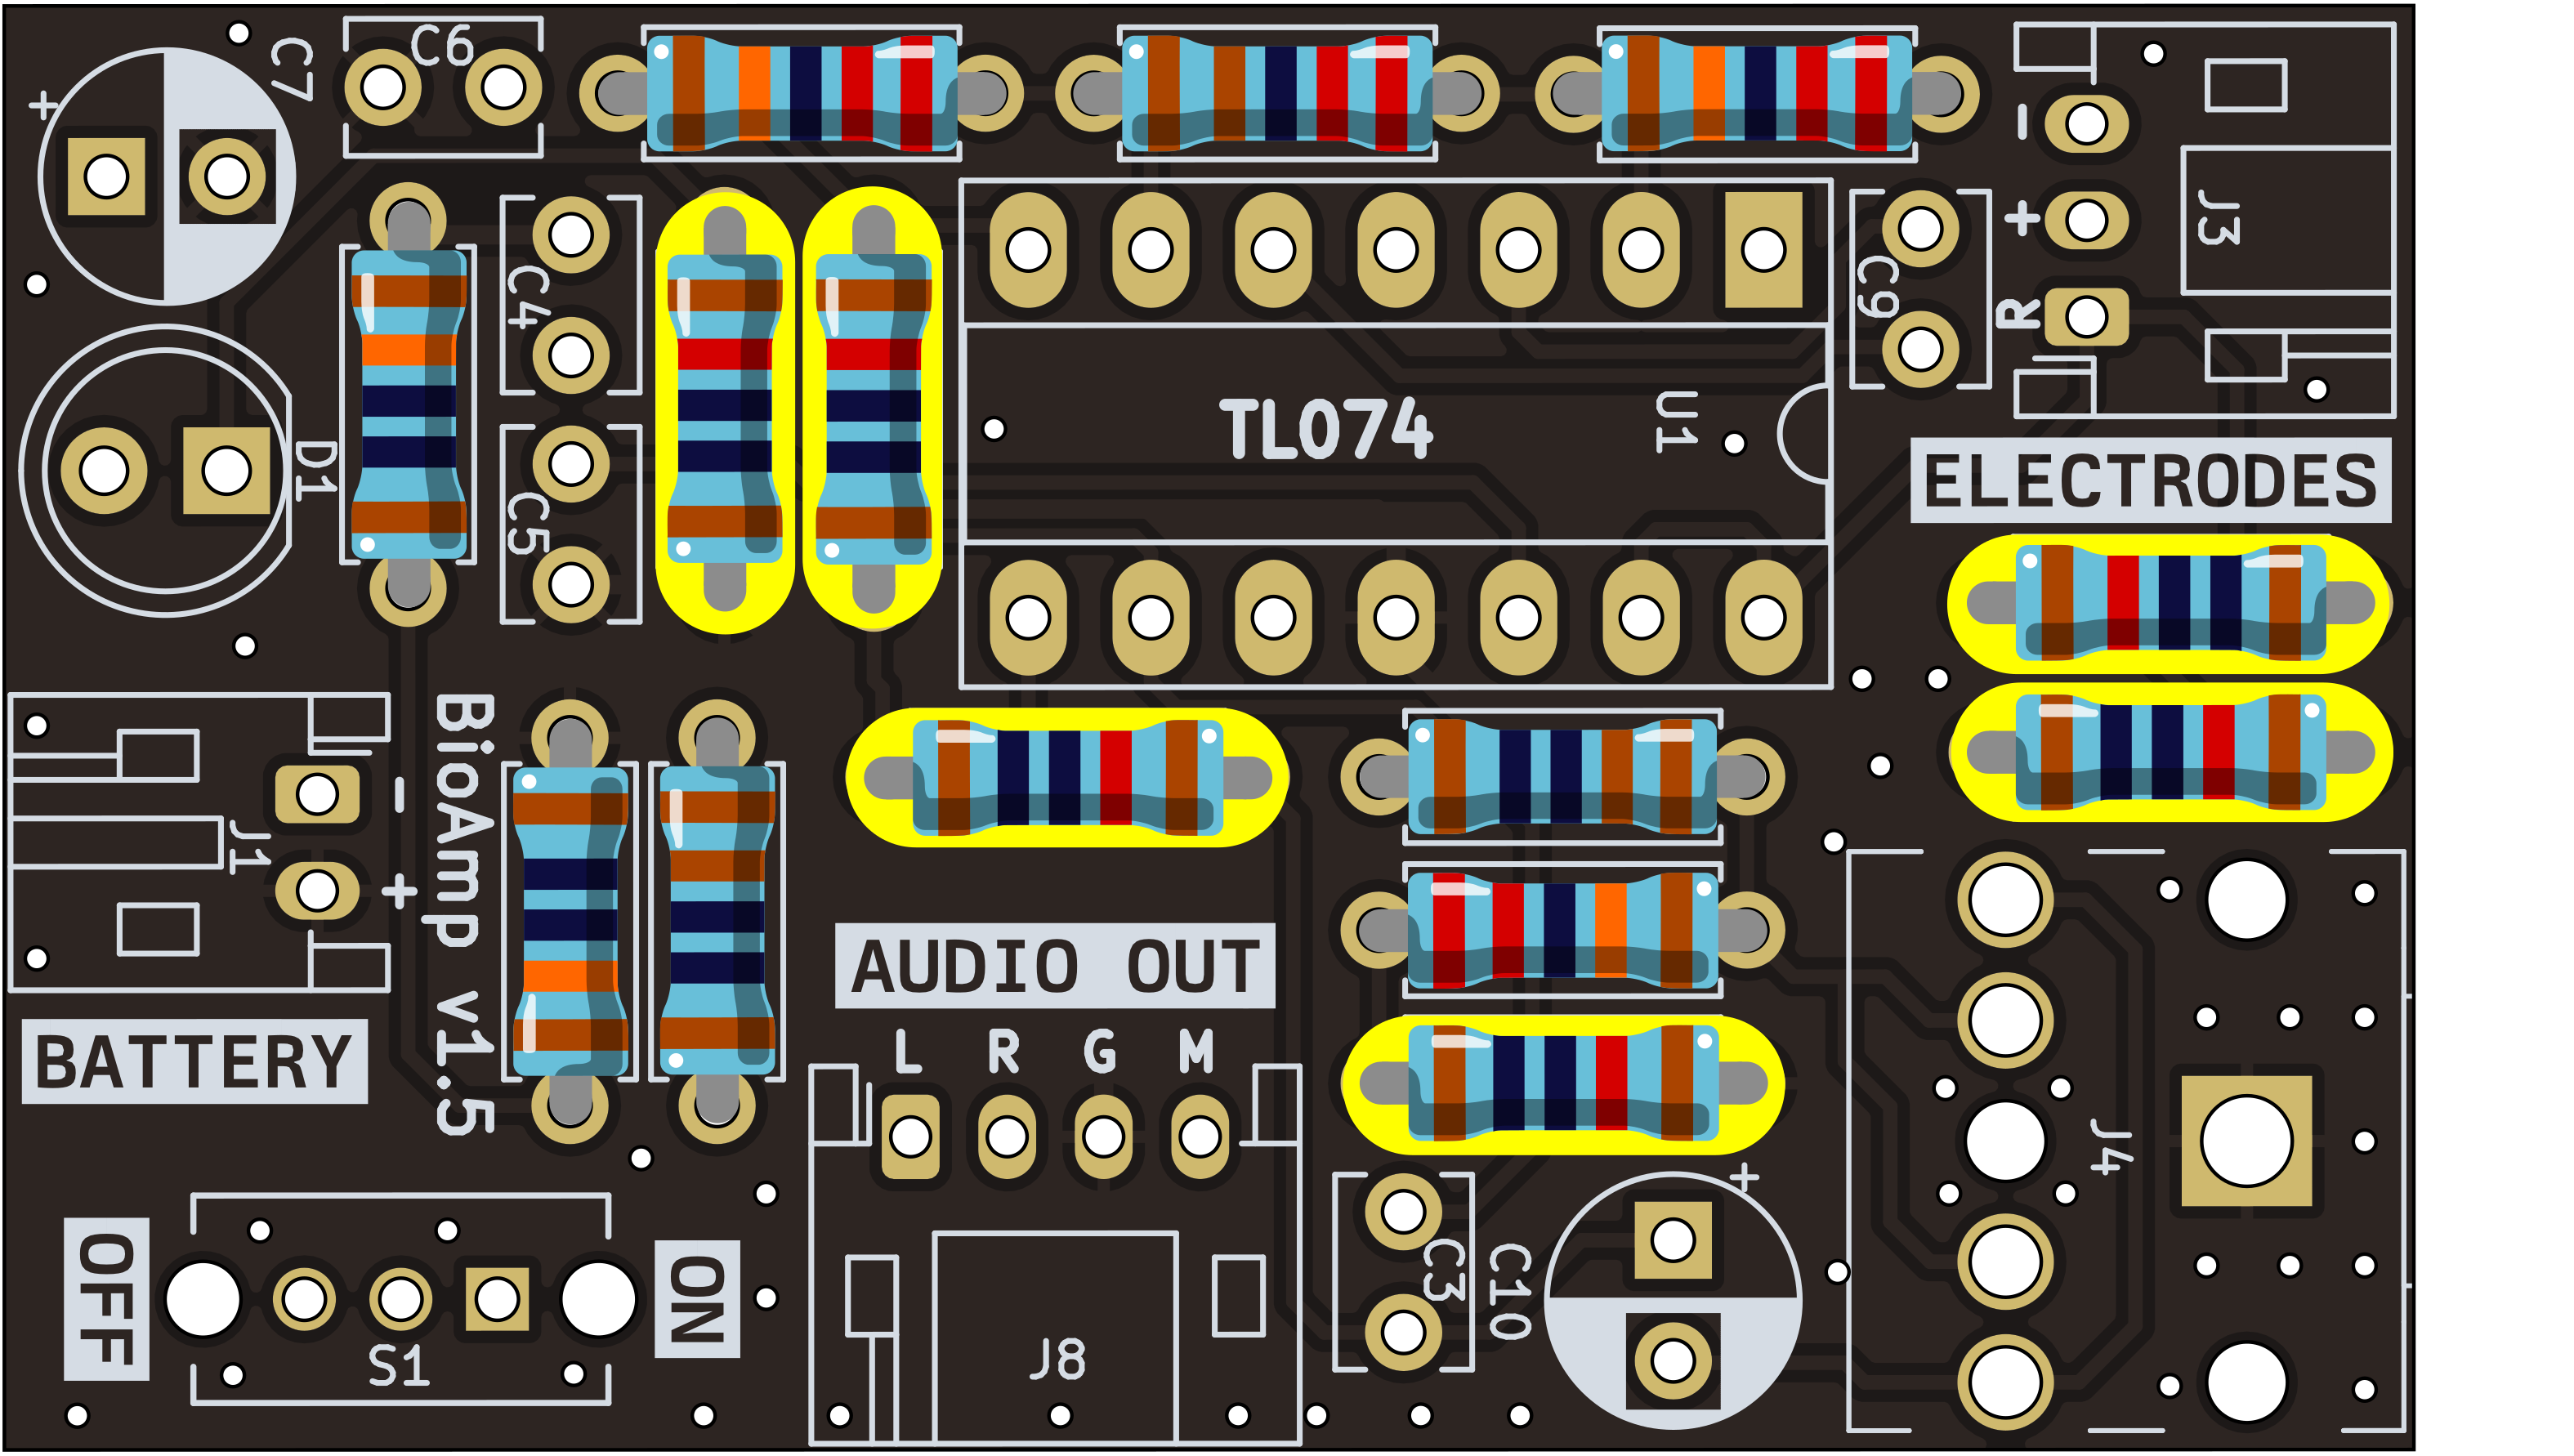
Step 3 - 2.2K Resistor#

Step 4 - 1K Resistors#
Step 5 - 220K Resistors#
Step 6 - 10K Resistors#
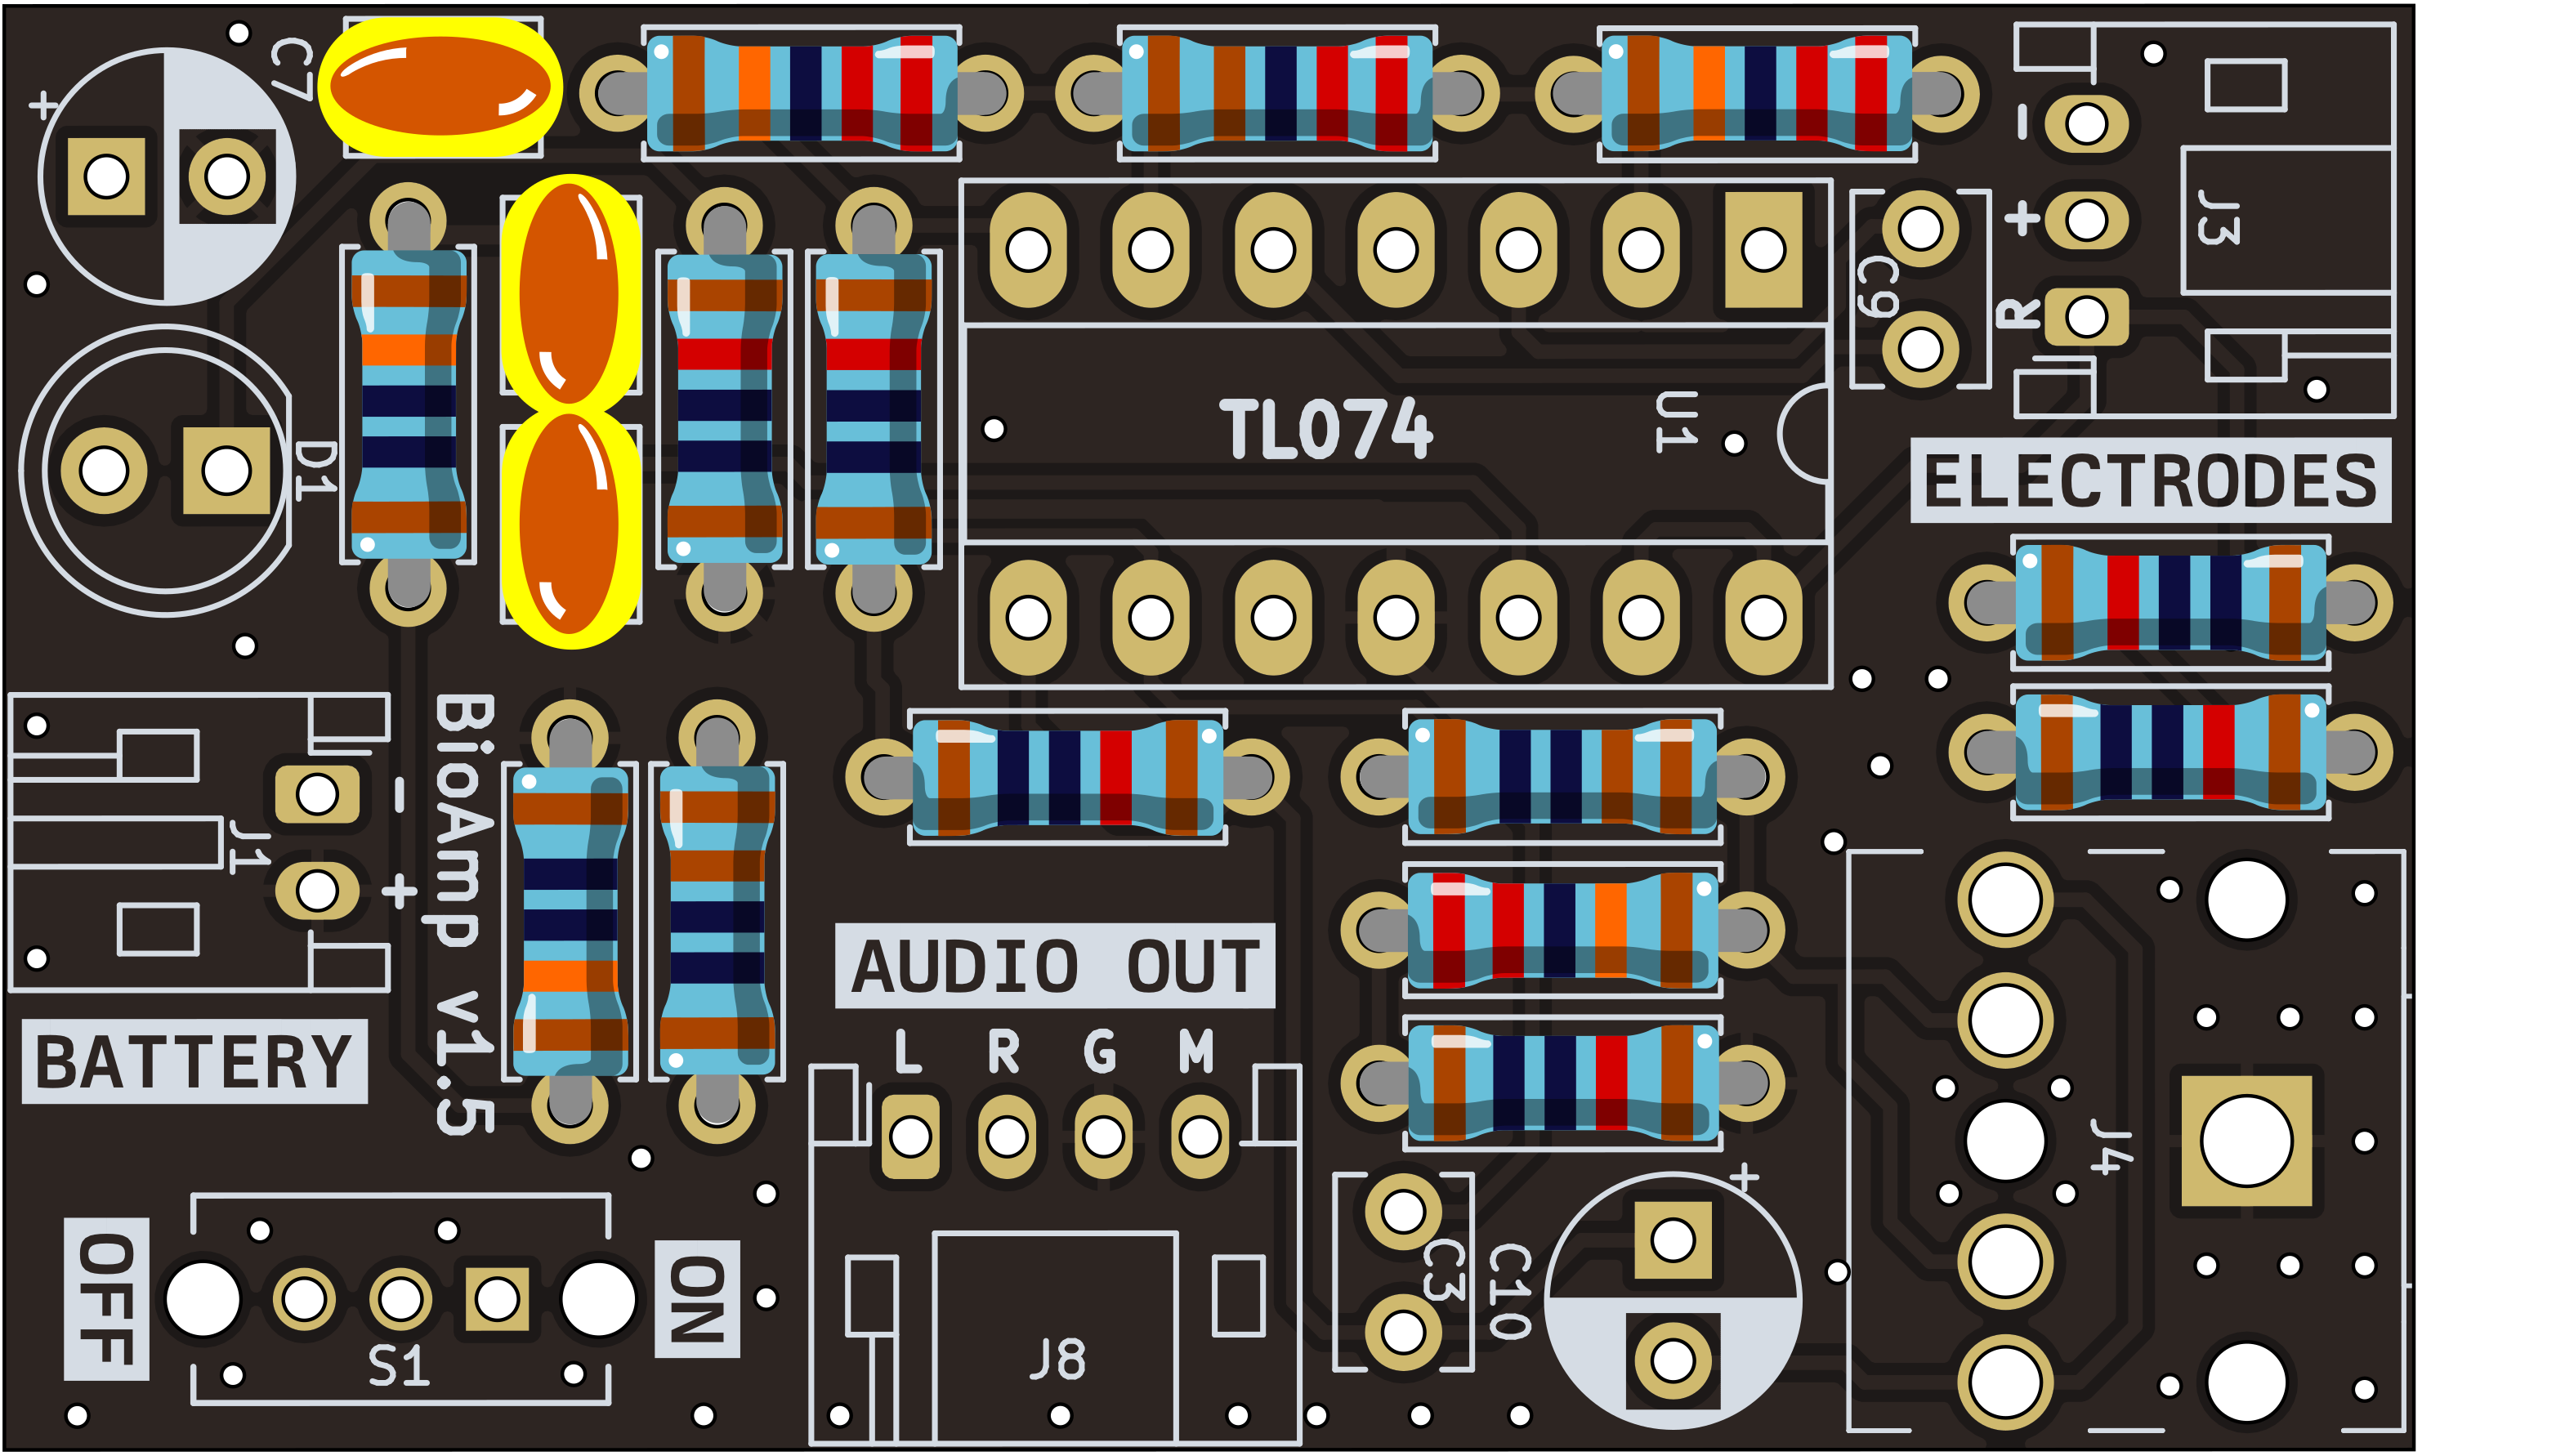
Step 7 - 100nF Capacitors#
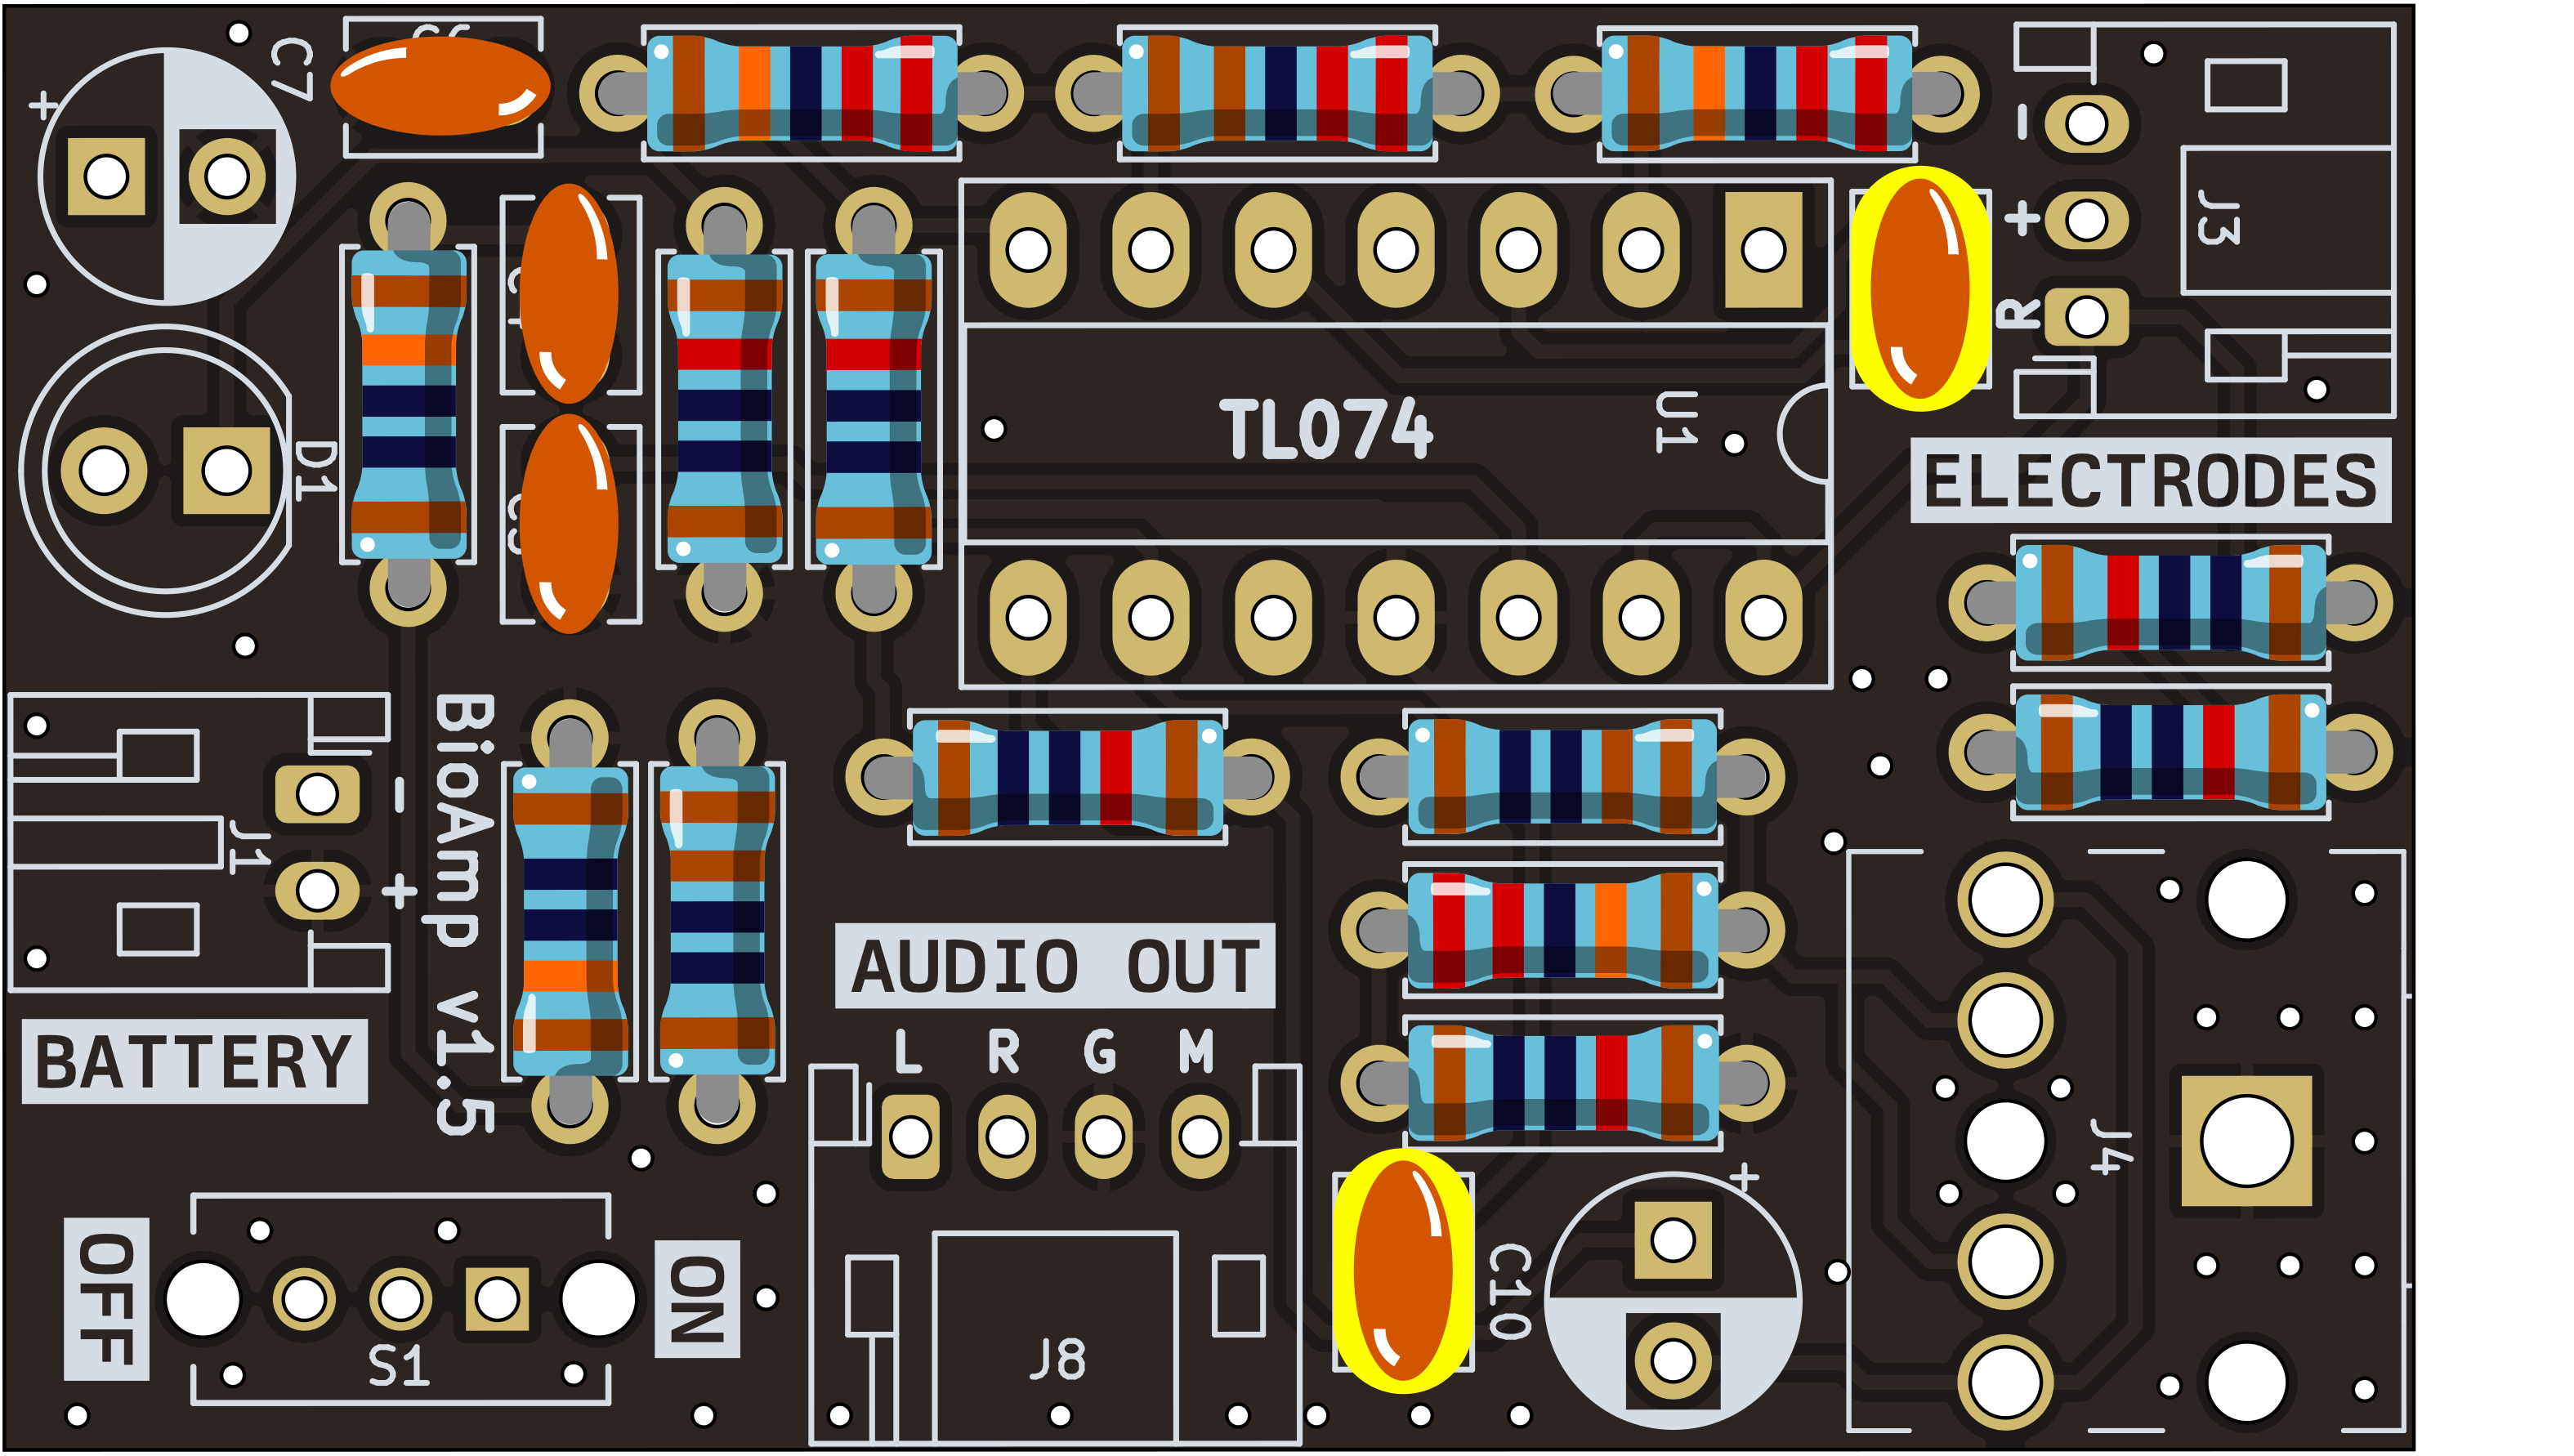
Step 8 - 1nF Capacitors#
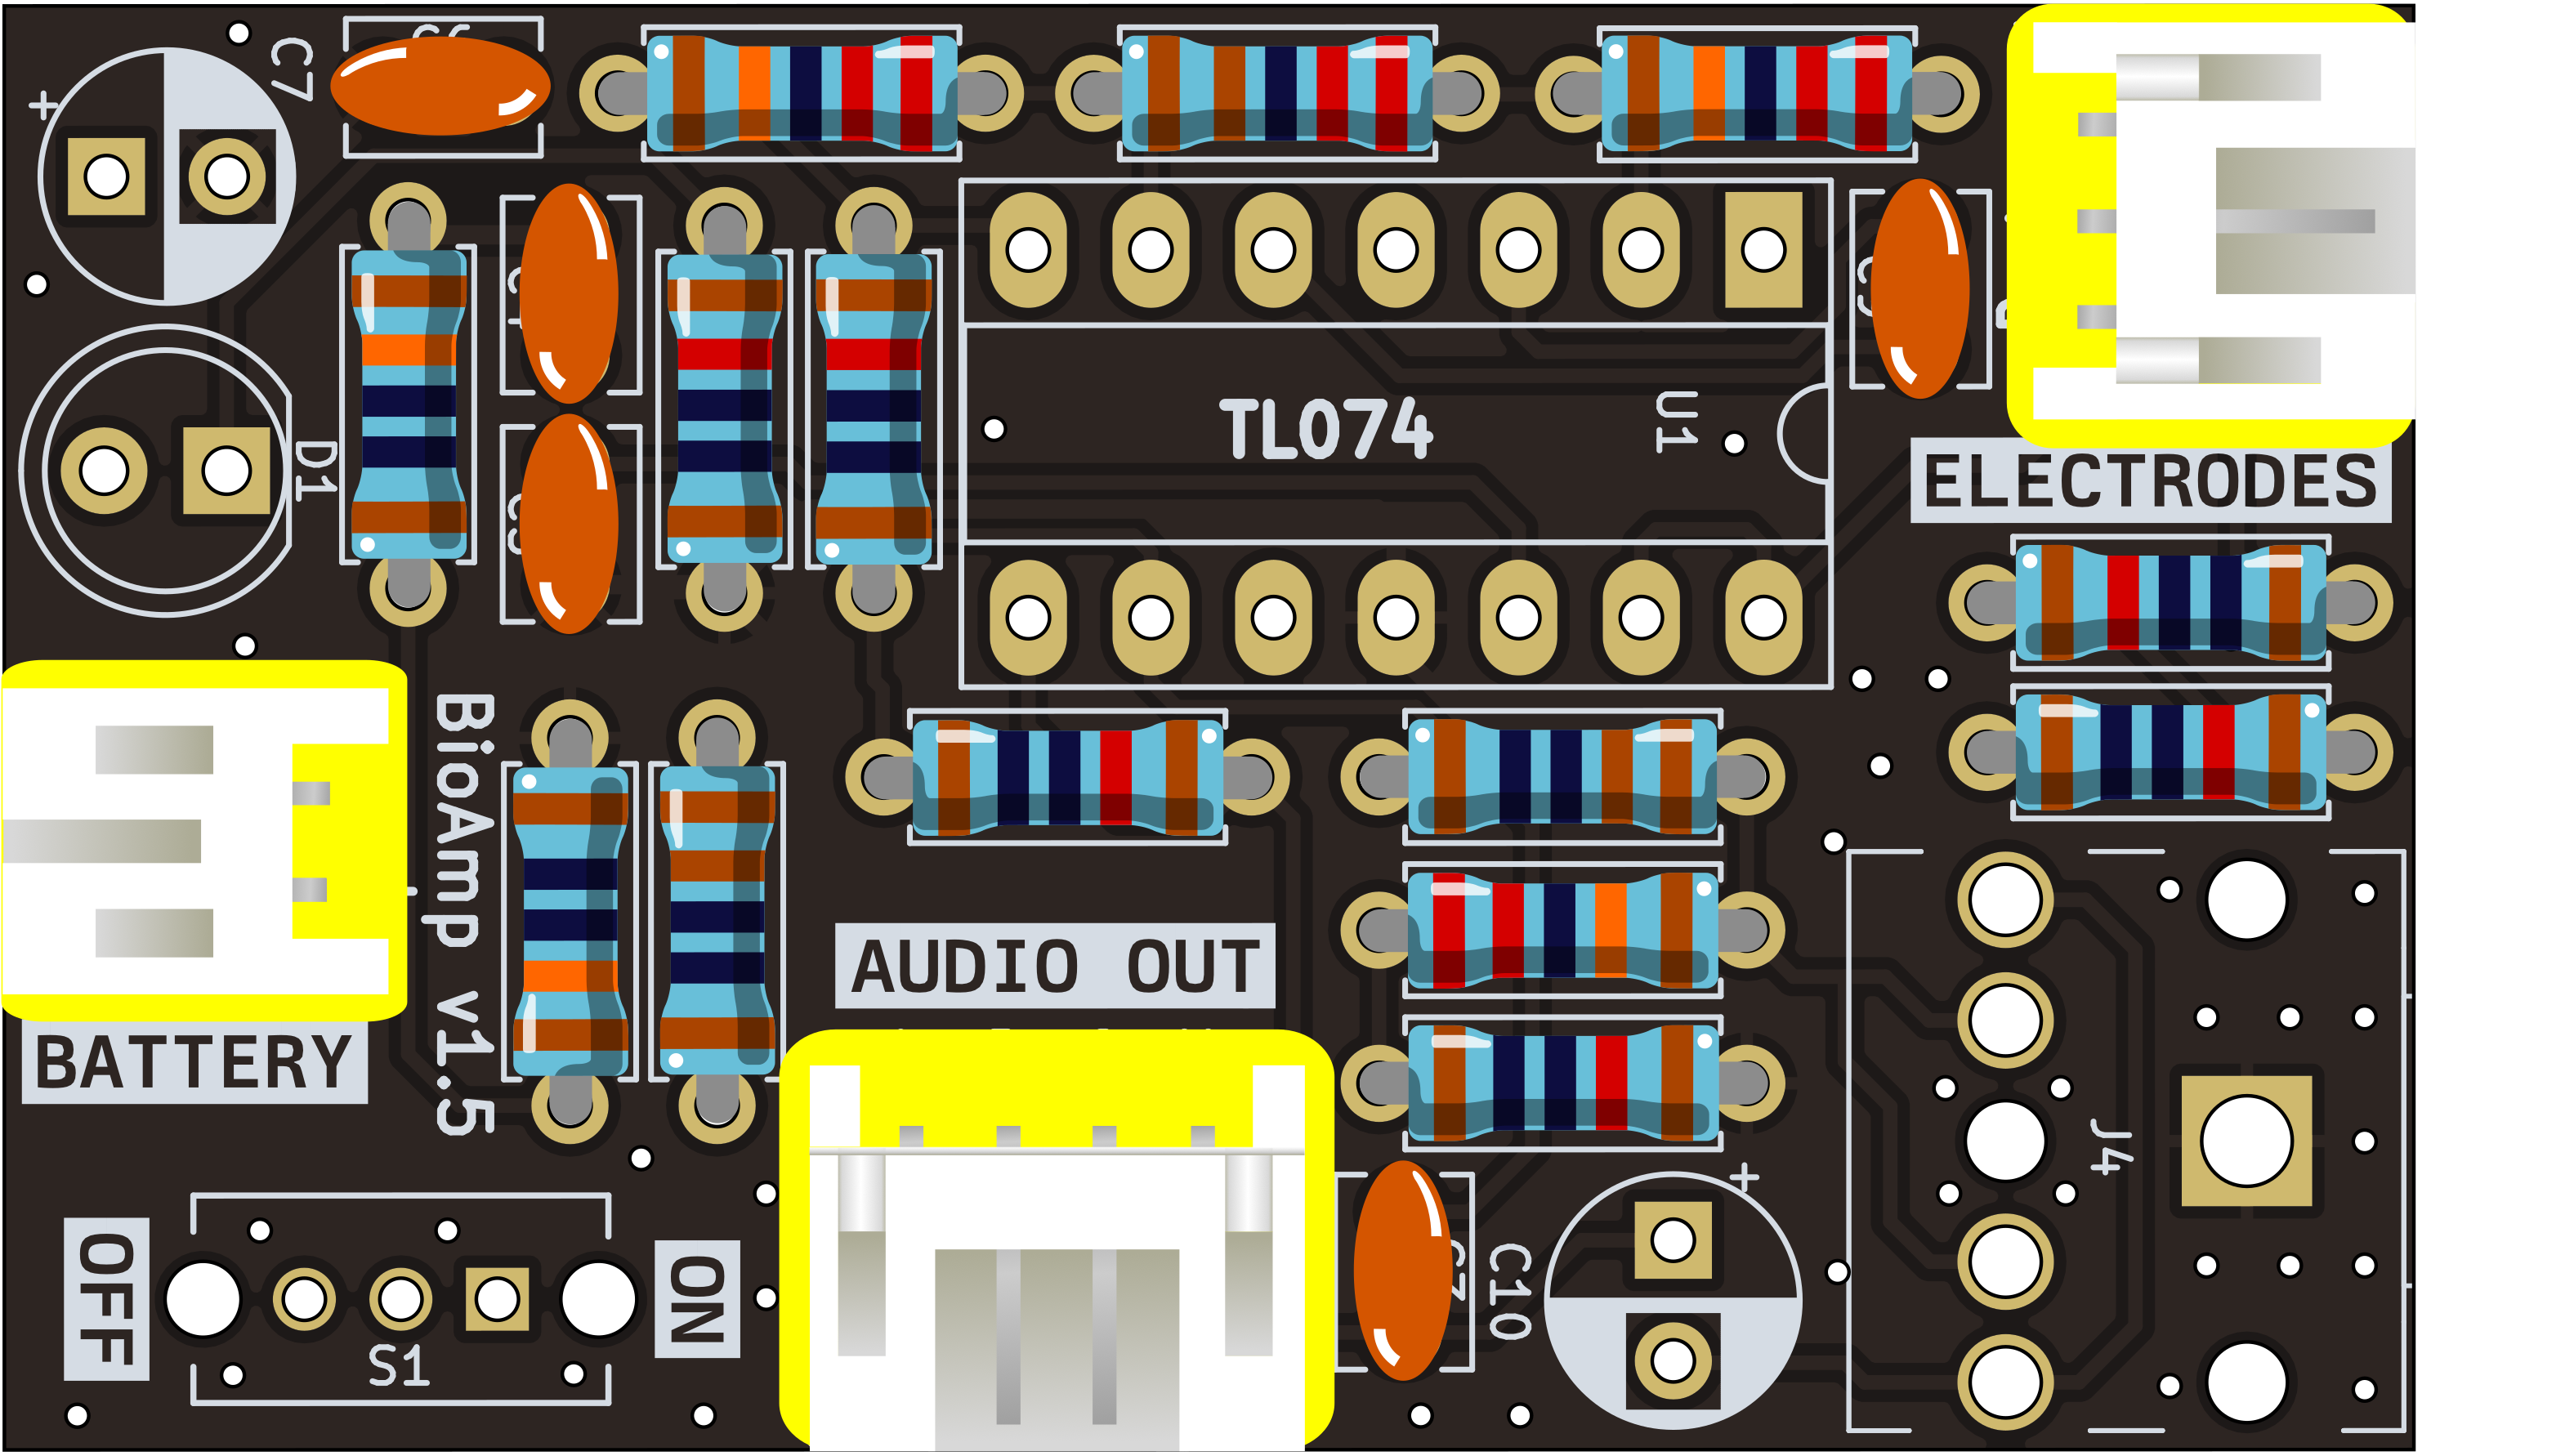
Step 9 - JST PH Connectors#
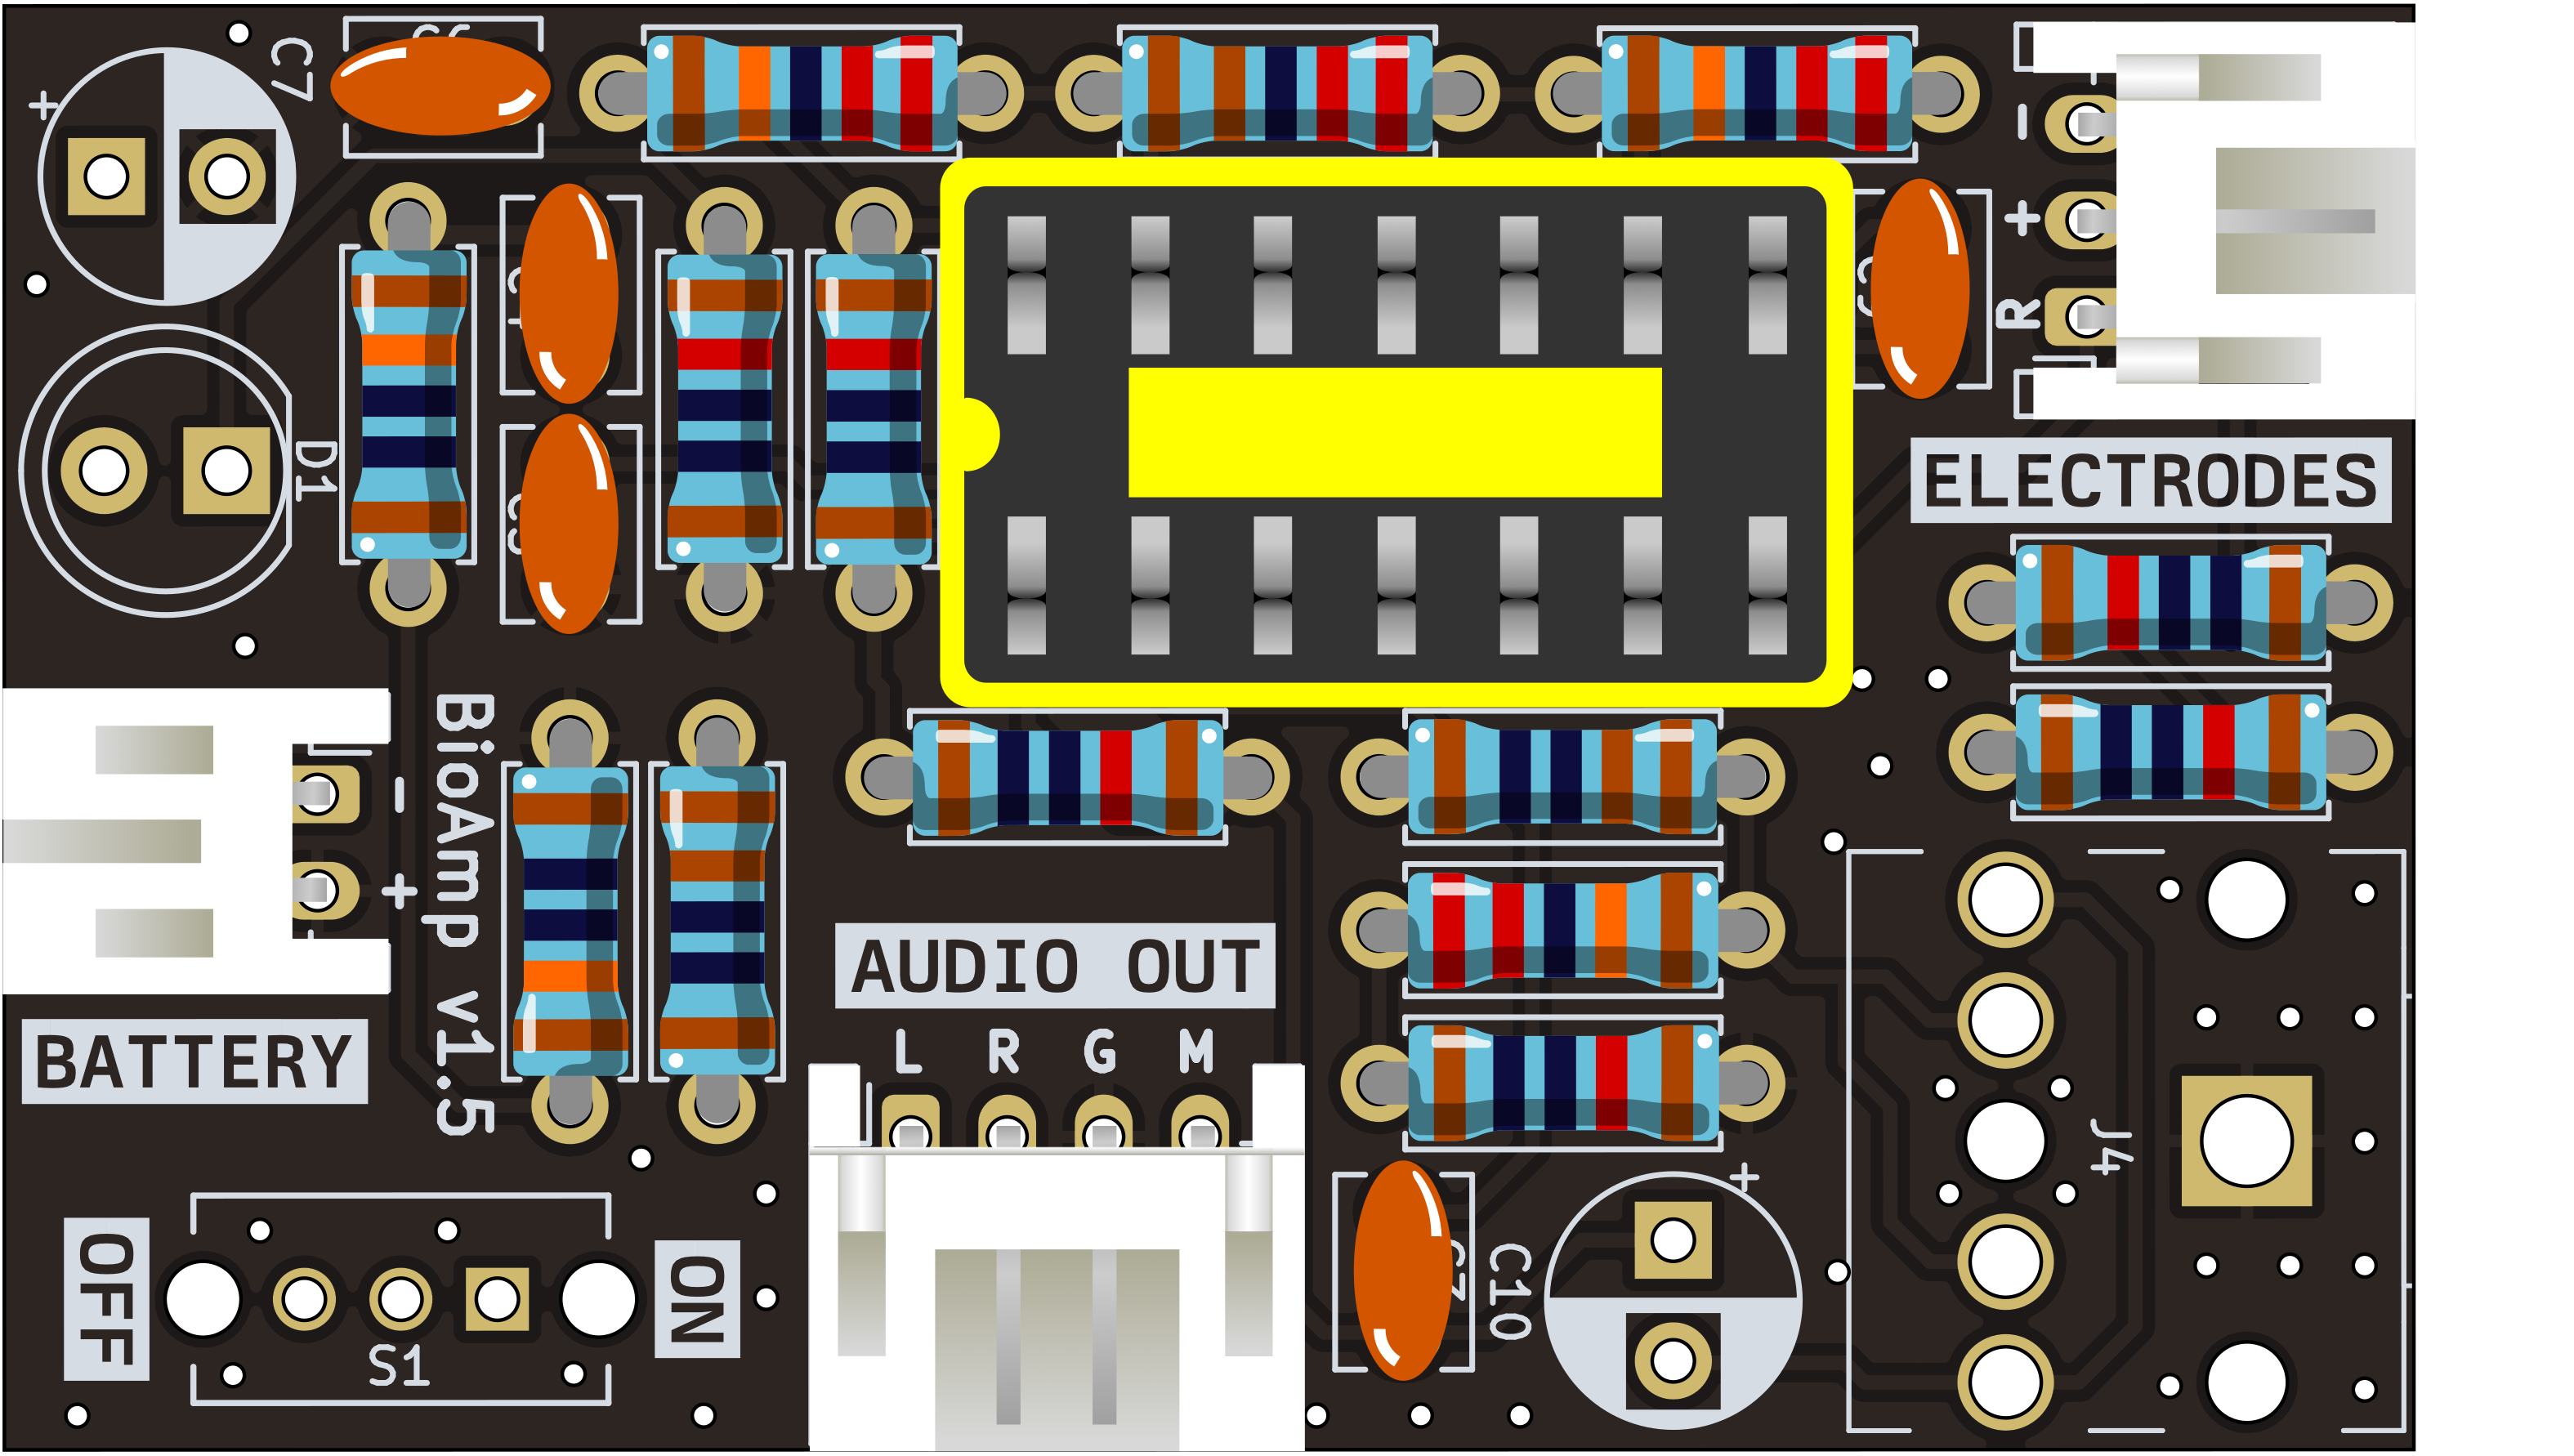
Step 10 - IC Socket#
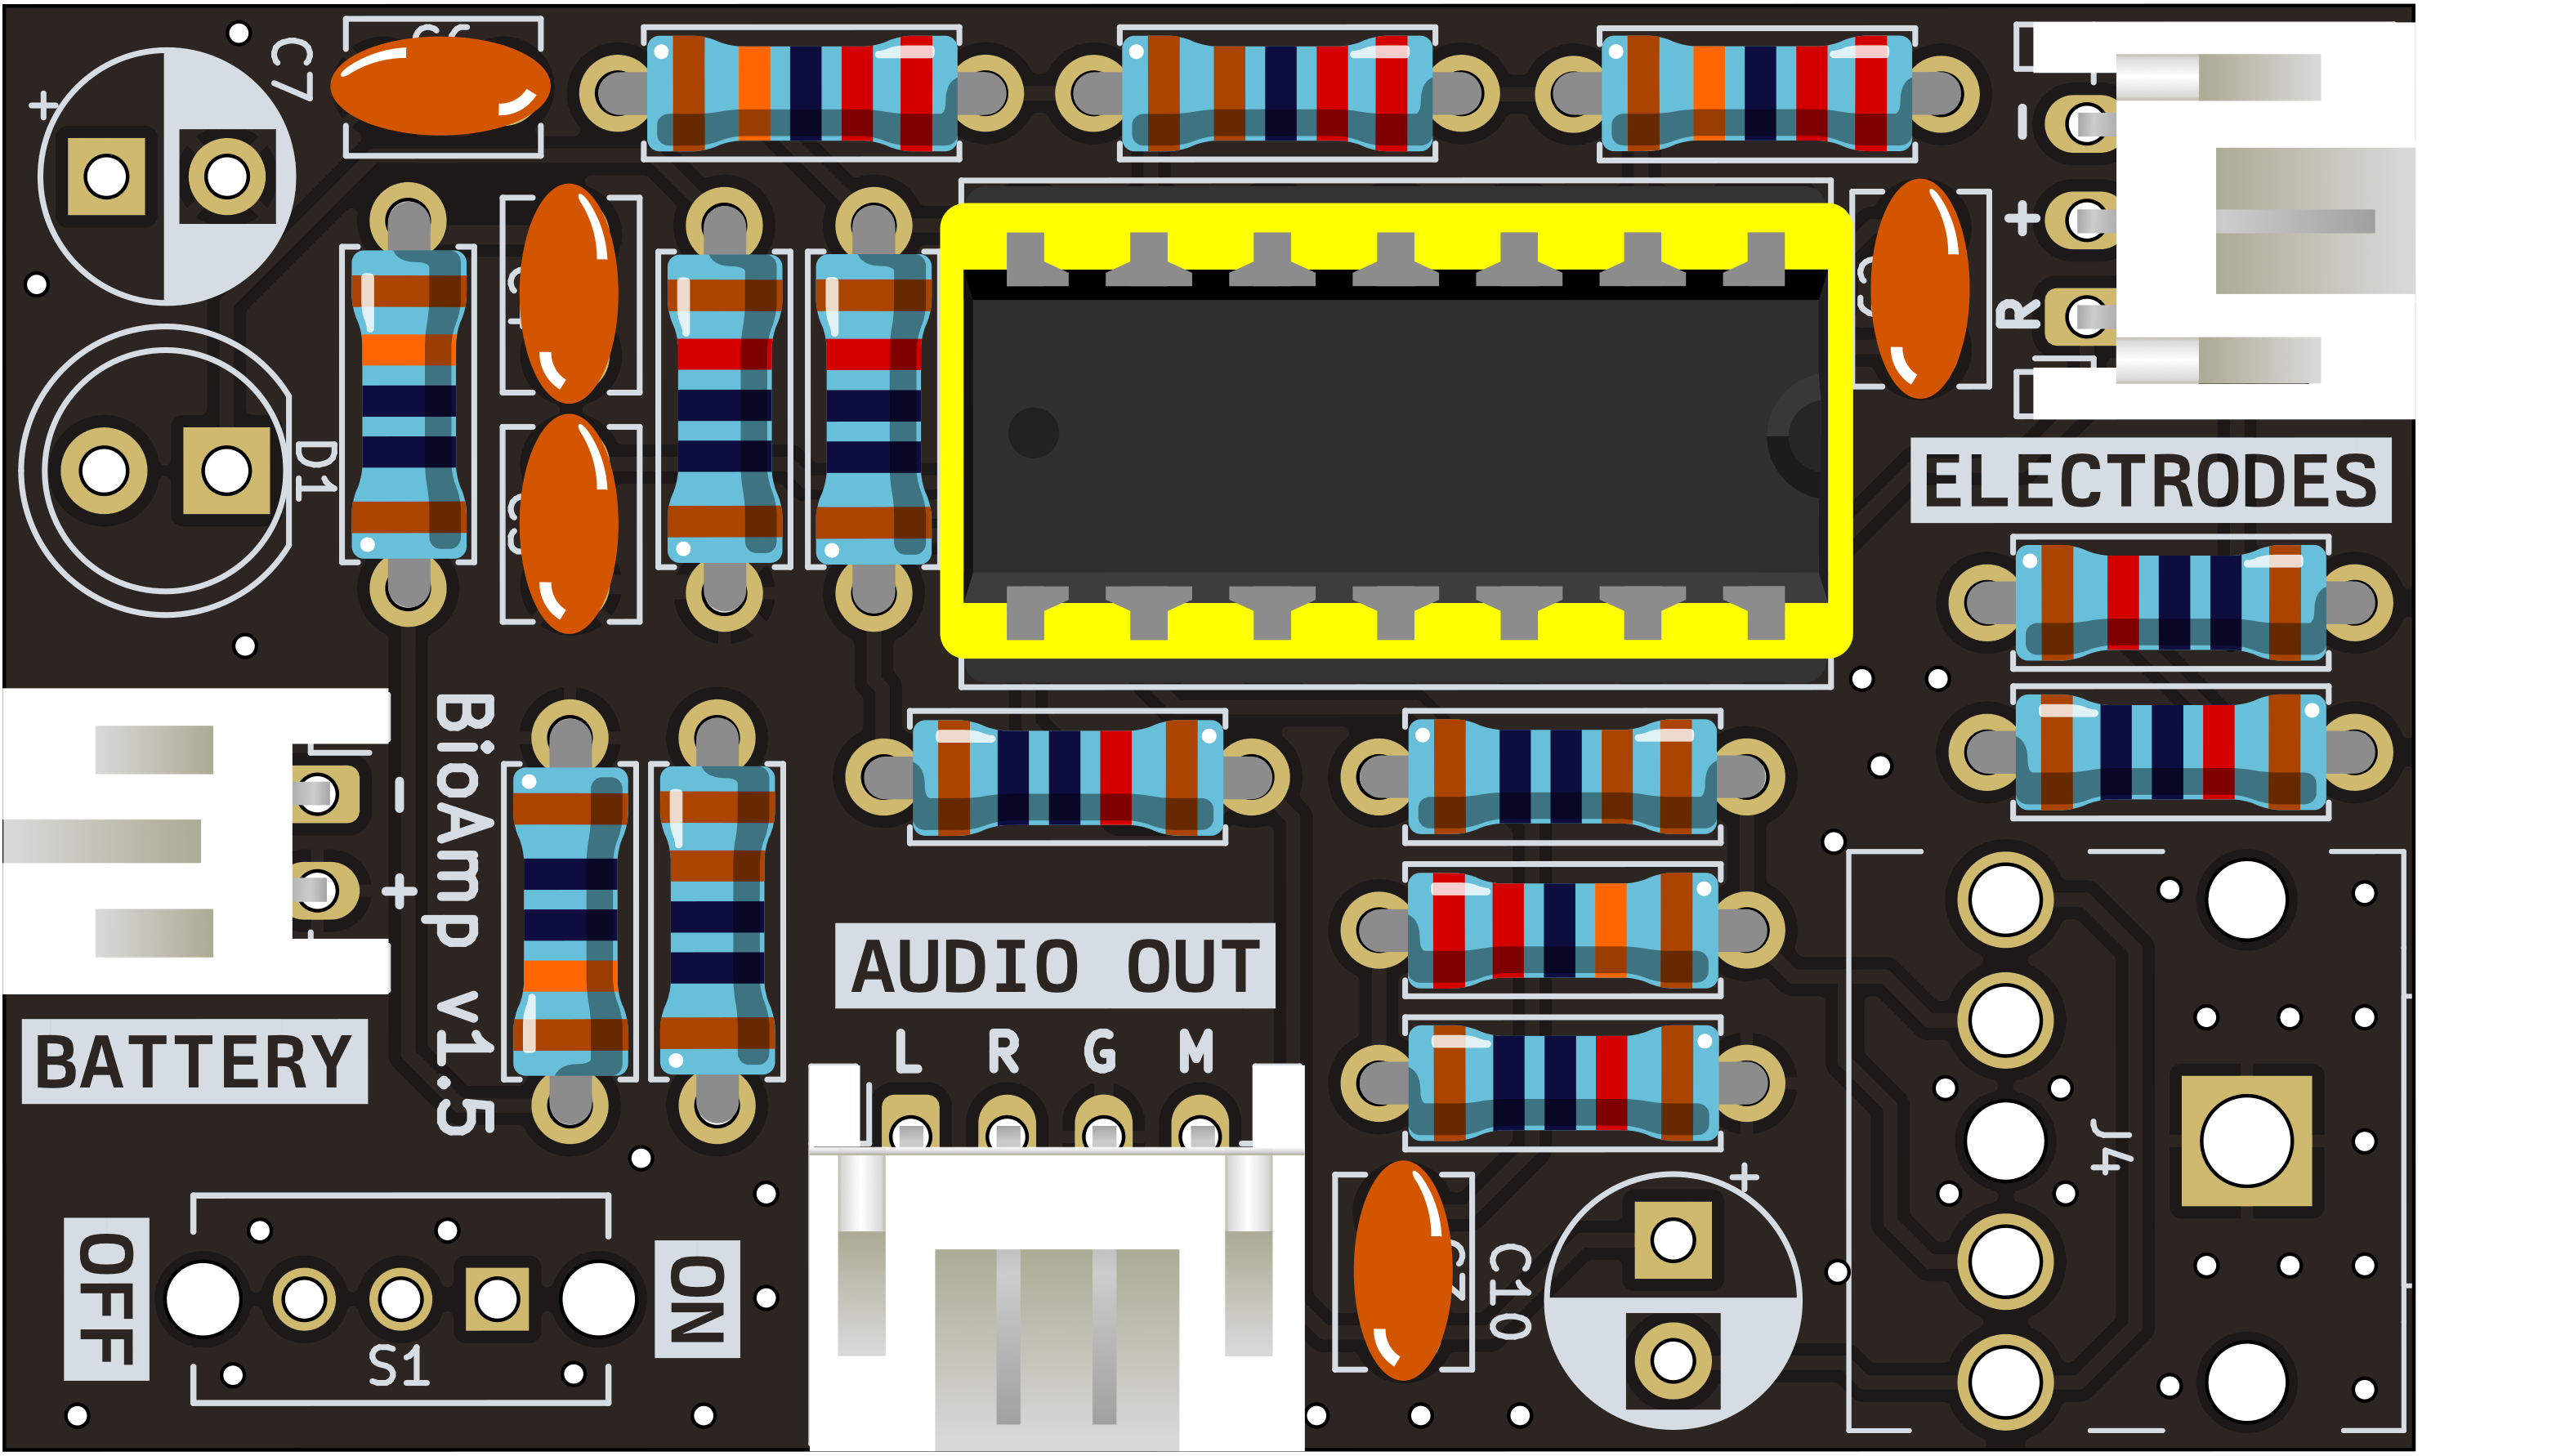
Step 11 - IC#
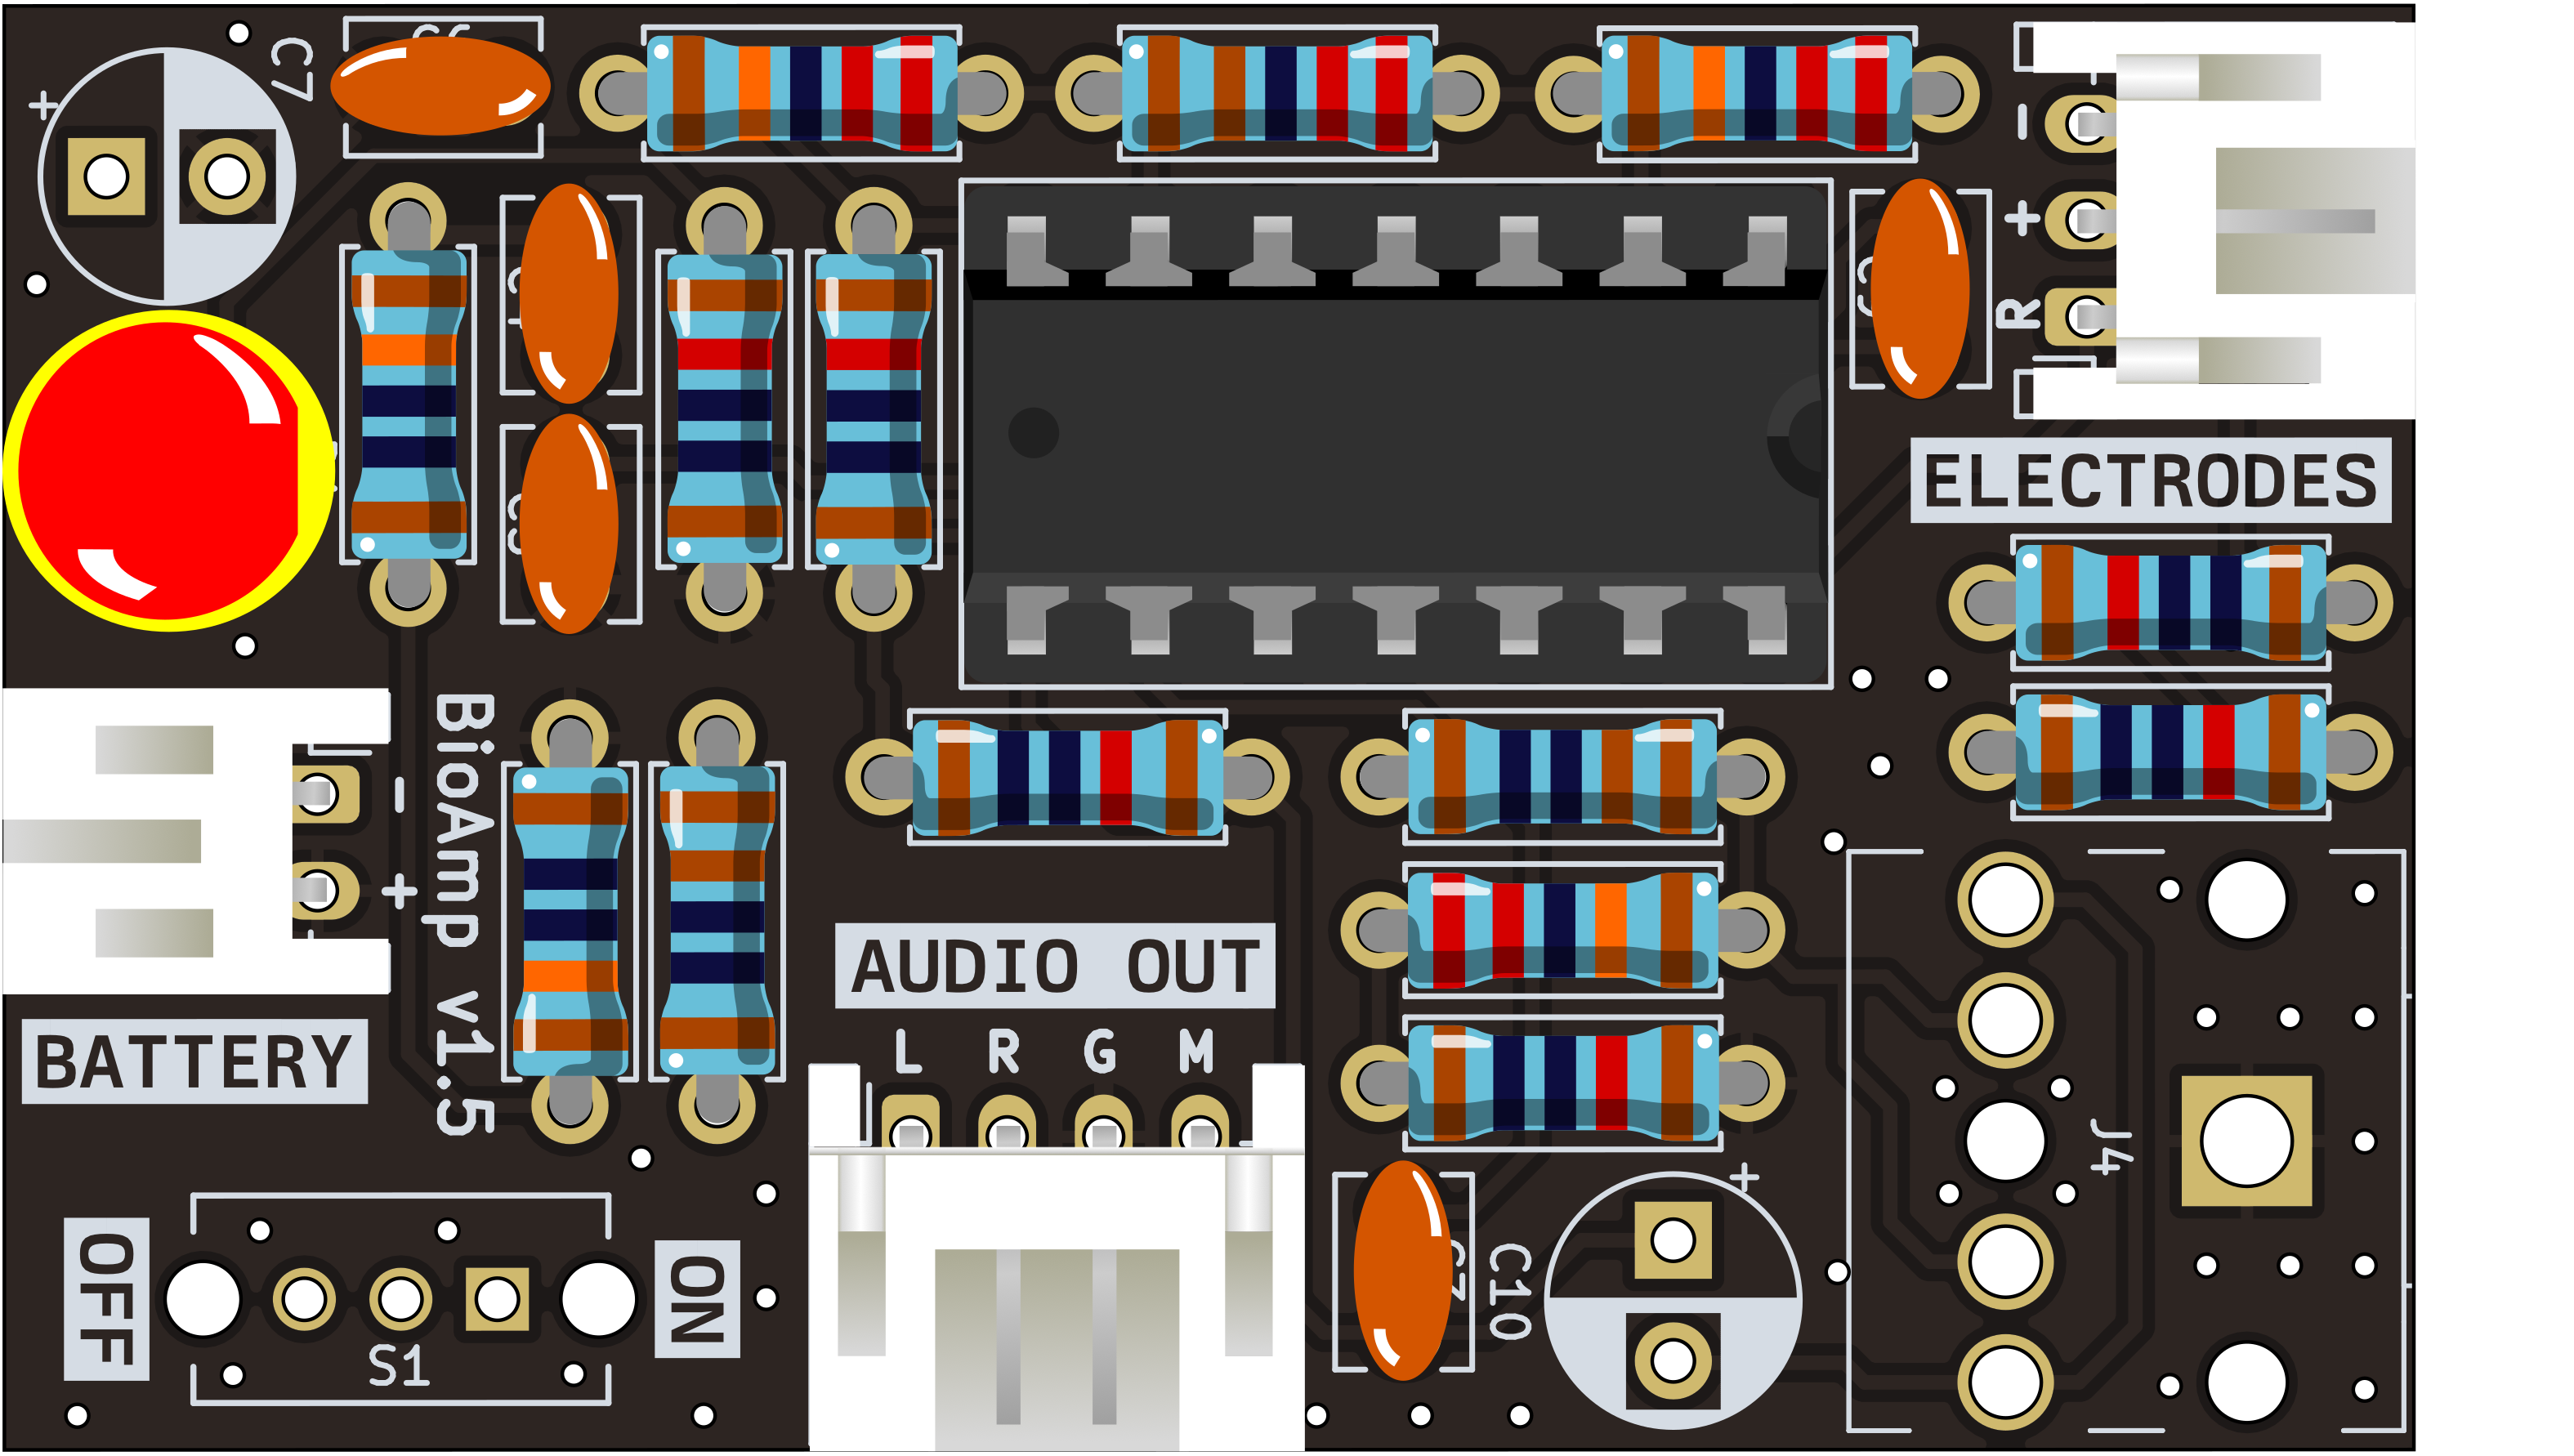
Step 12 - Power LED#
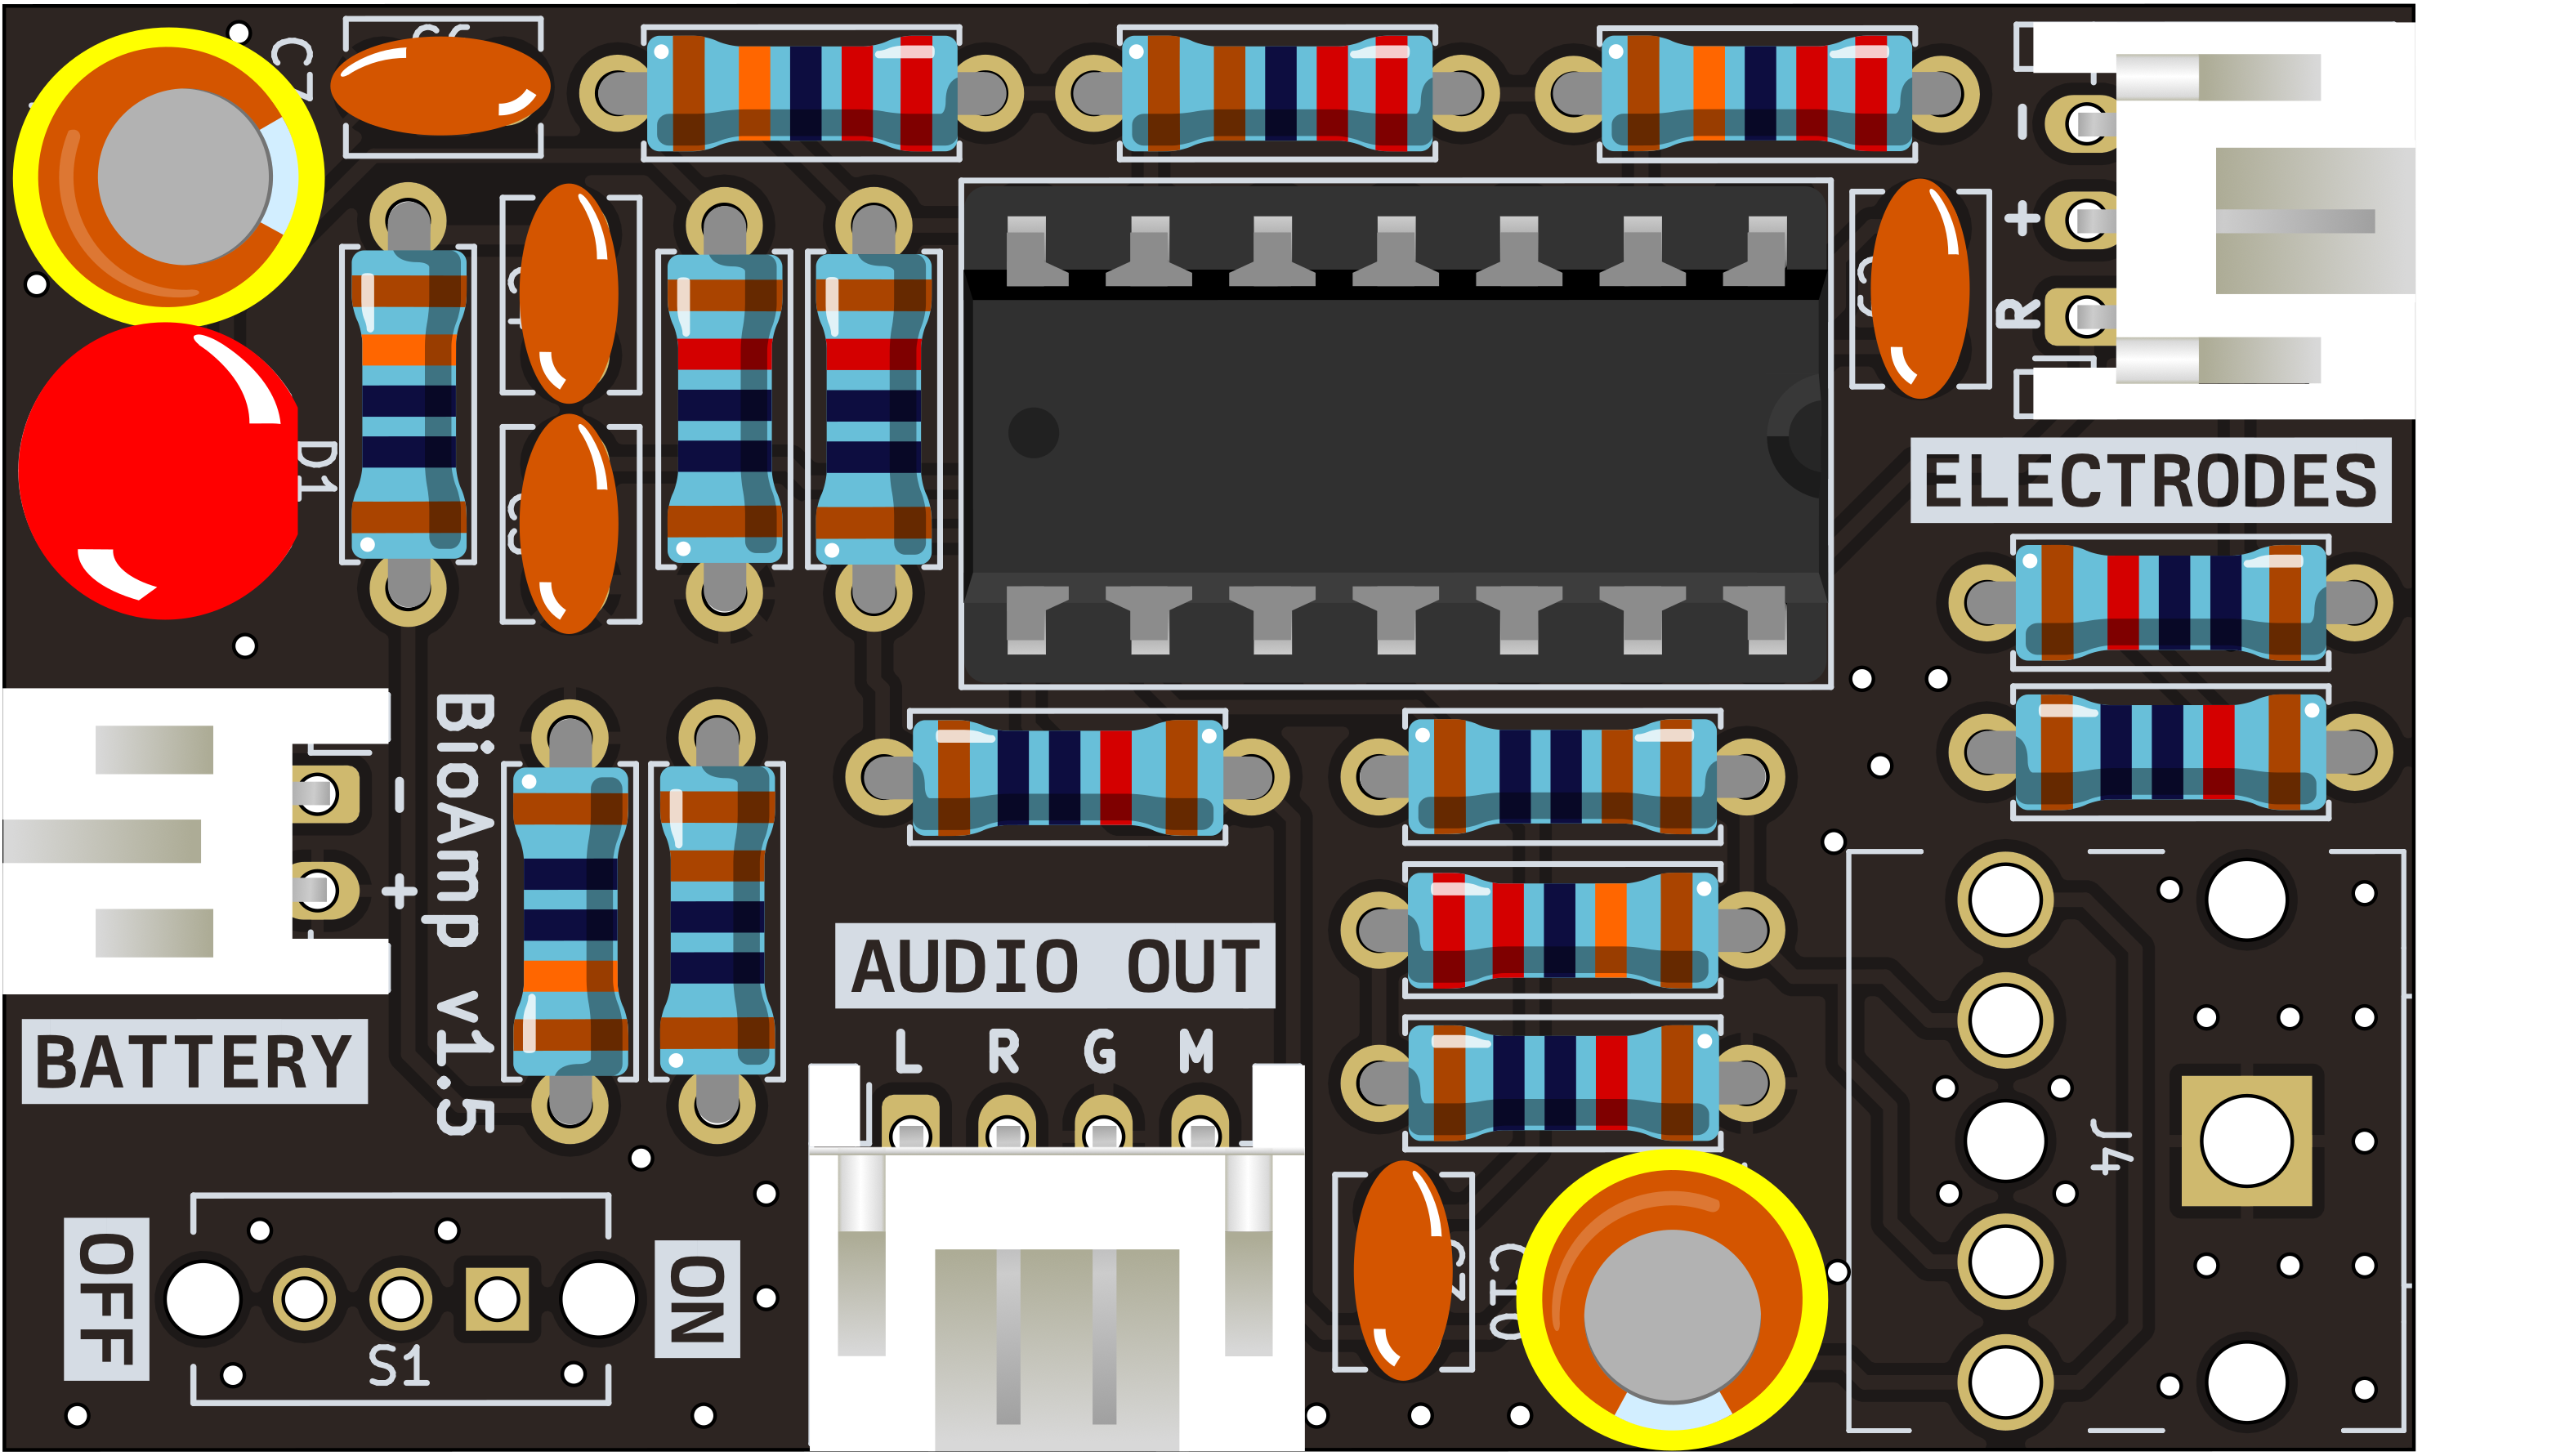
Step 13 - 47uF Capacitors#
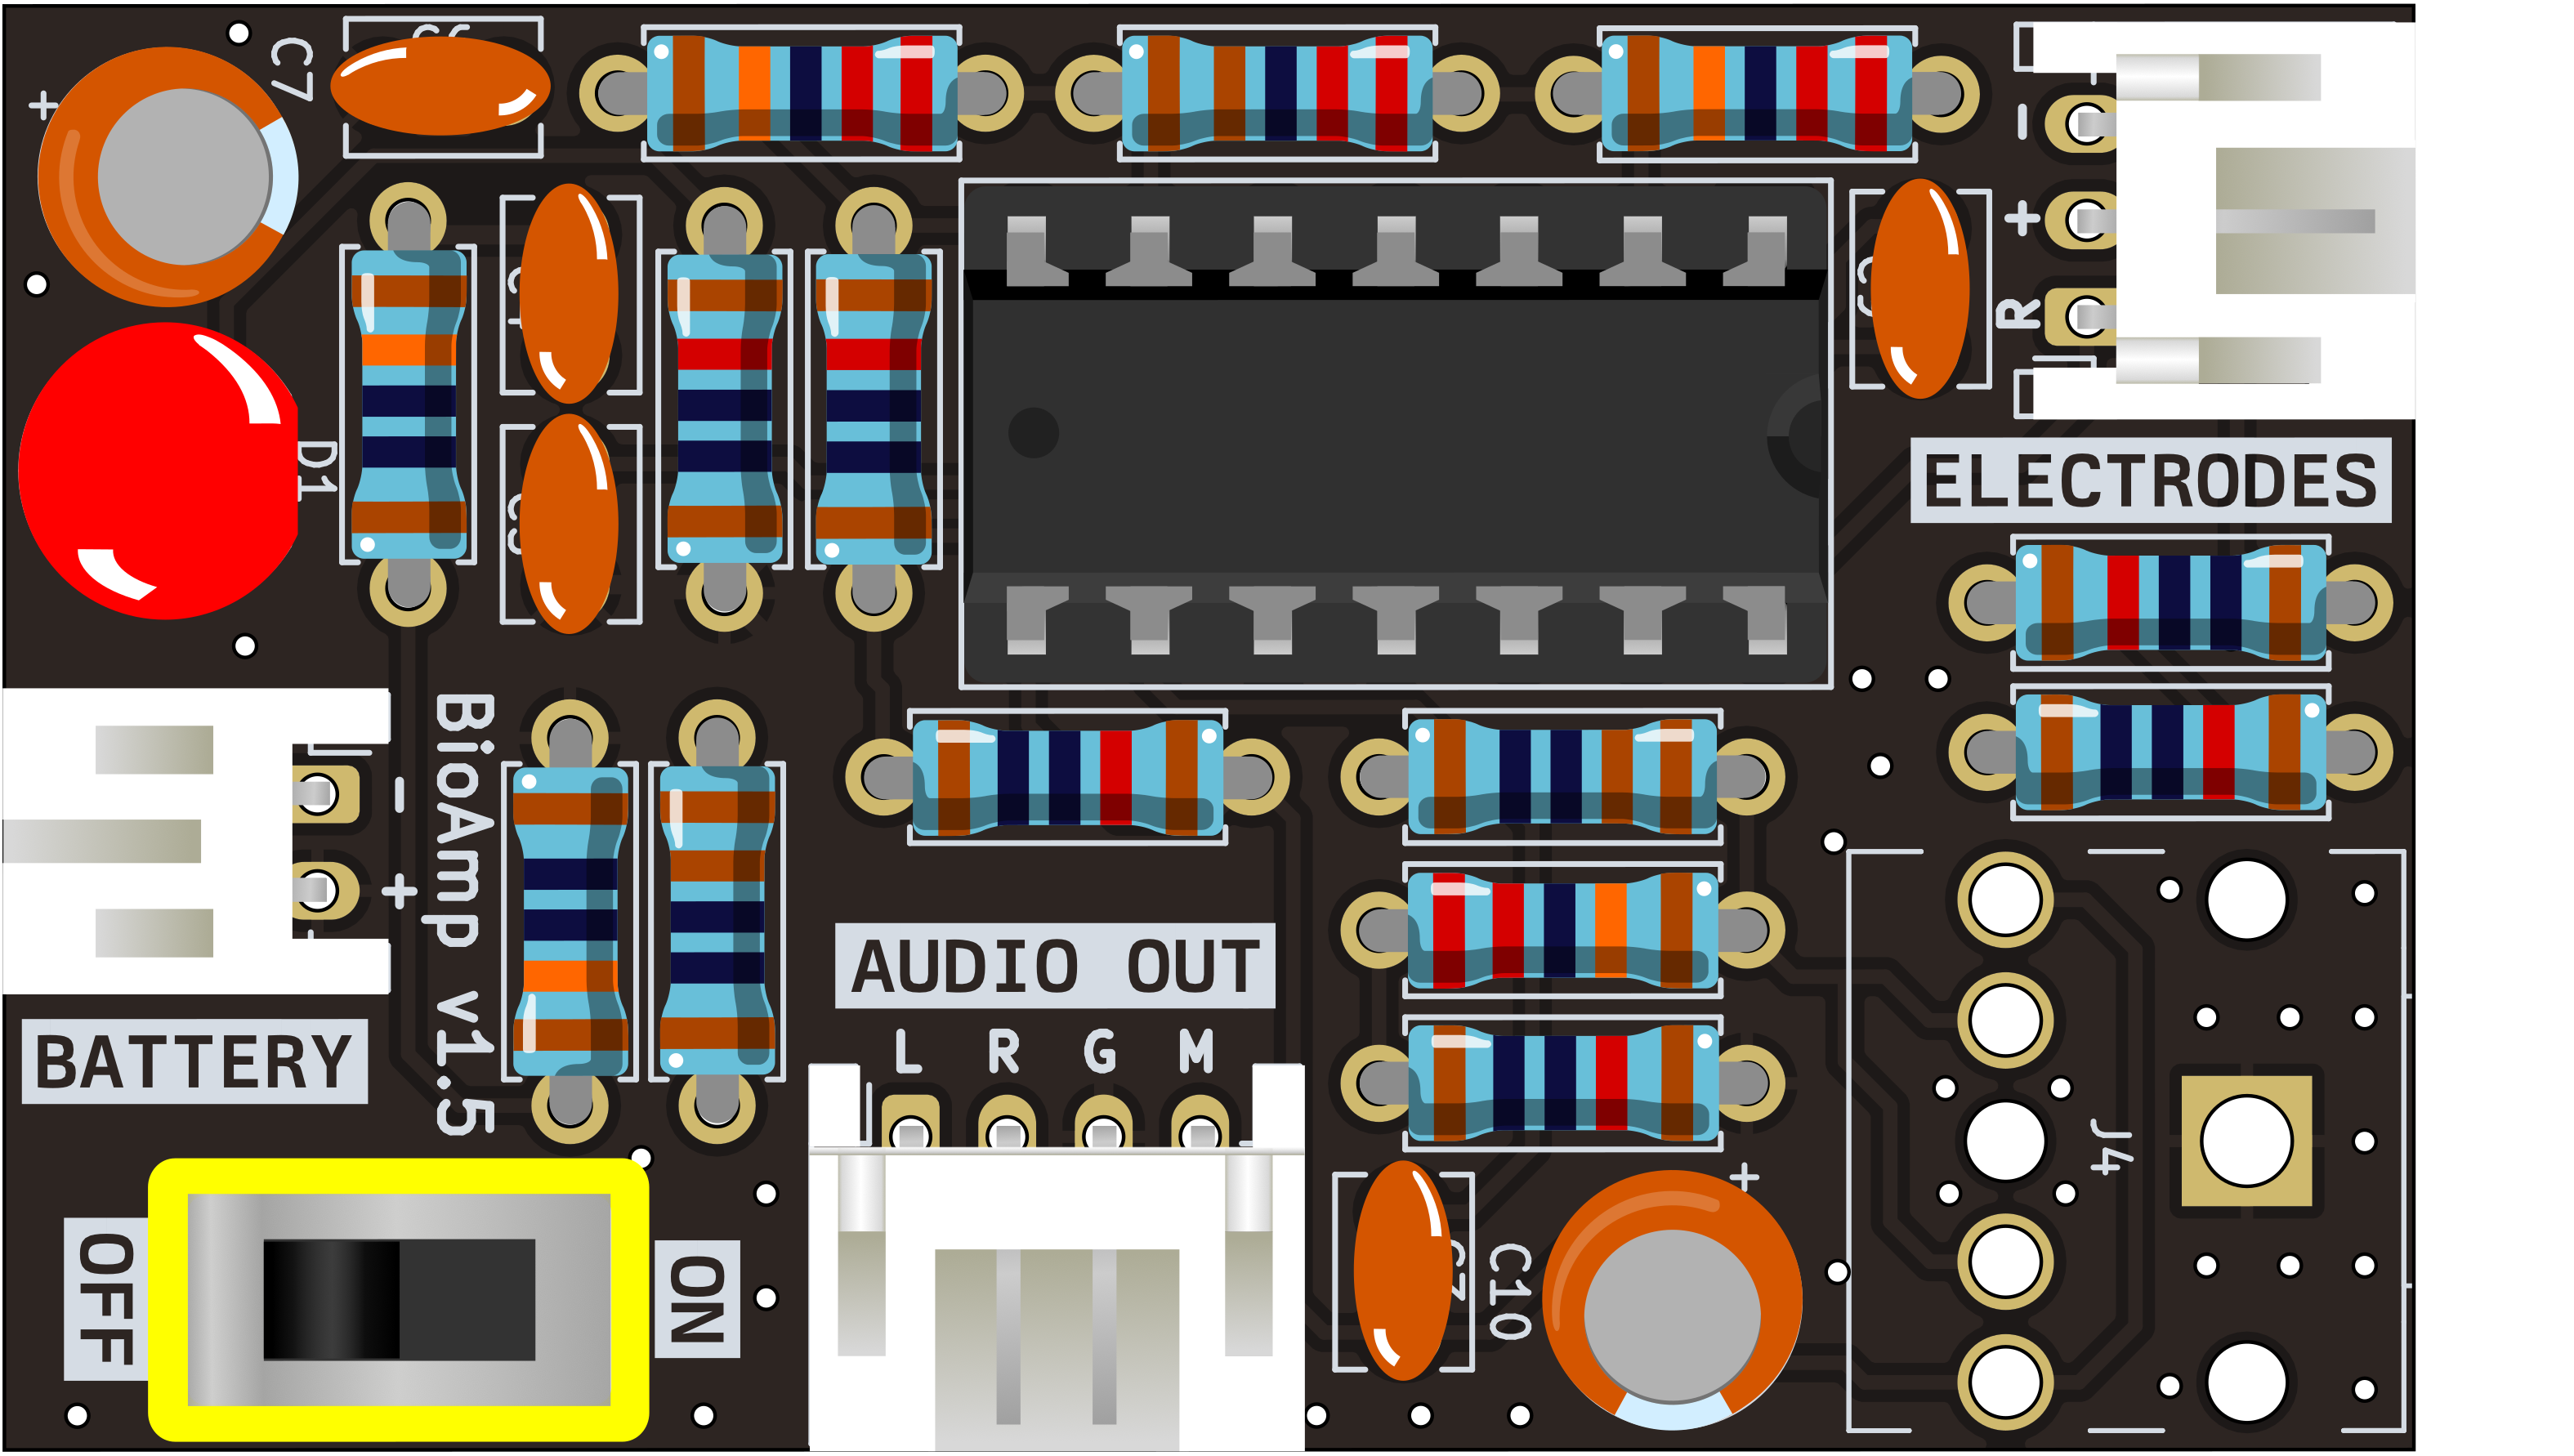
Step 14 - Switch#
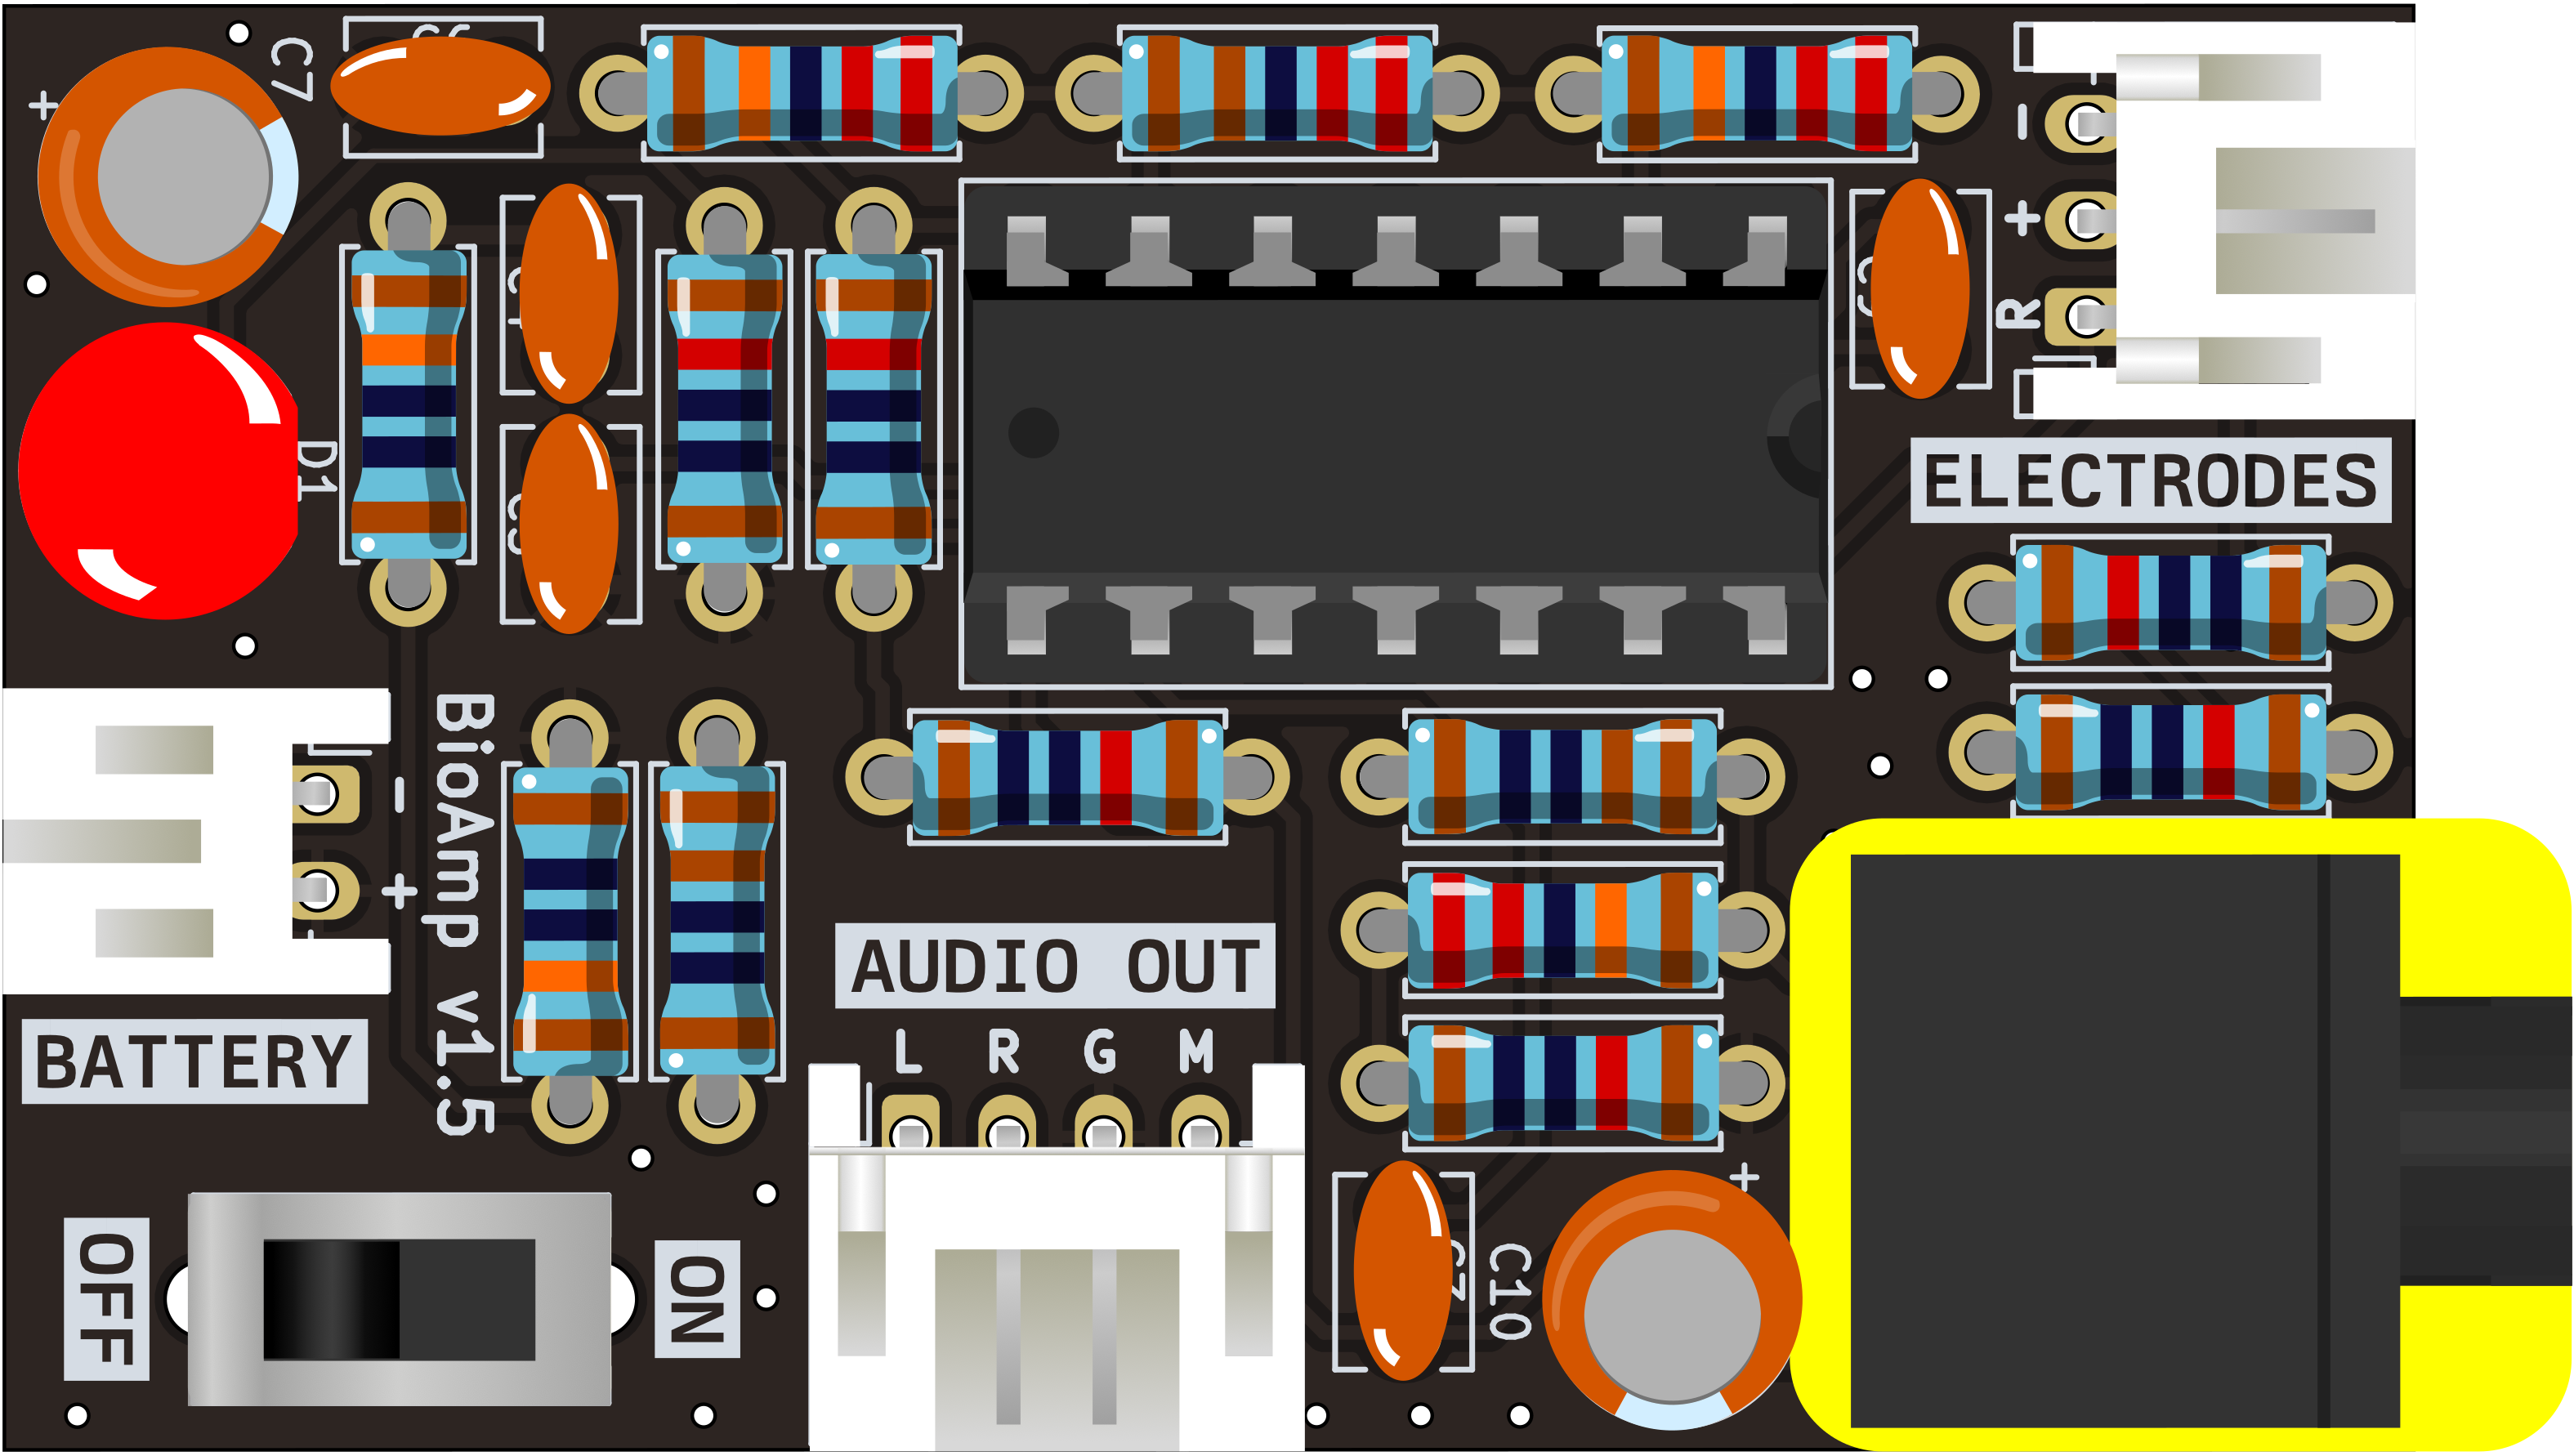
Step 15 - Headphone jack#
Using the kit#
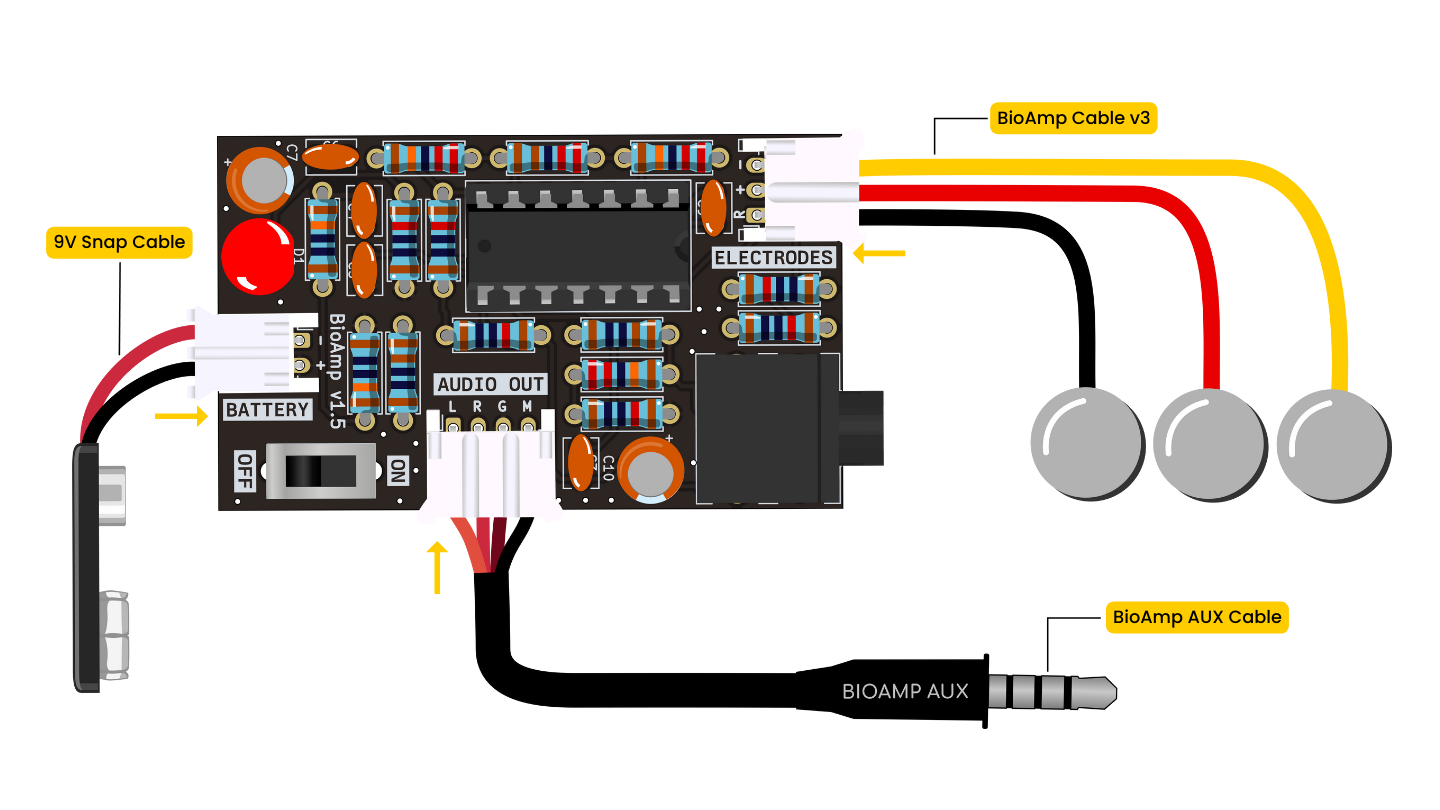
The image below shows the possibilities of using BioAmp v1.5. Seems complicated? Don’t worry, we’ll explain each and every step in detail. So follow along to create your own setup.

Step 1: Connecting the cables#
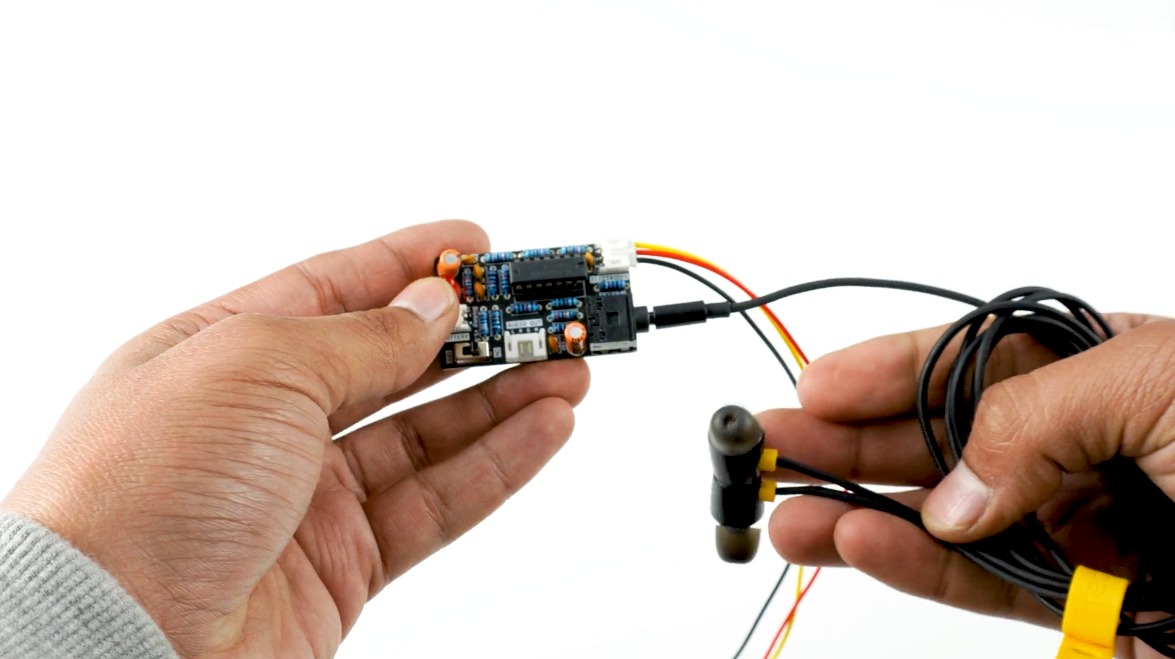
Connect the BioAmp cable, 9V snap cable and BioAmp AUX cable to BioAmp v1.5 by inserting the cable ends in the respective JST PH connectors as shown below.
Step 2: Skin Preparation#
Apply Nuprep Skin Preparation Gel on the skin surface where electrodes would be placed to remove dead skin cells and clean the skin from dirt. After rubbing the skin surface thoroughly, clean it with an alcohol wipe or a wet wipe.
For more information, please check out detailed step by step Skin Preparation Guide.
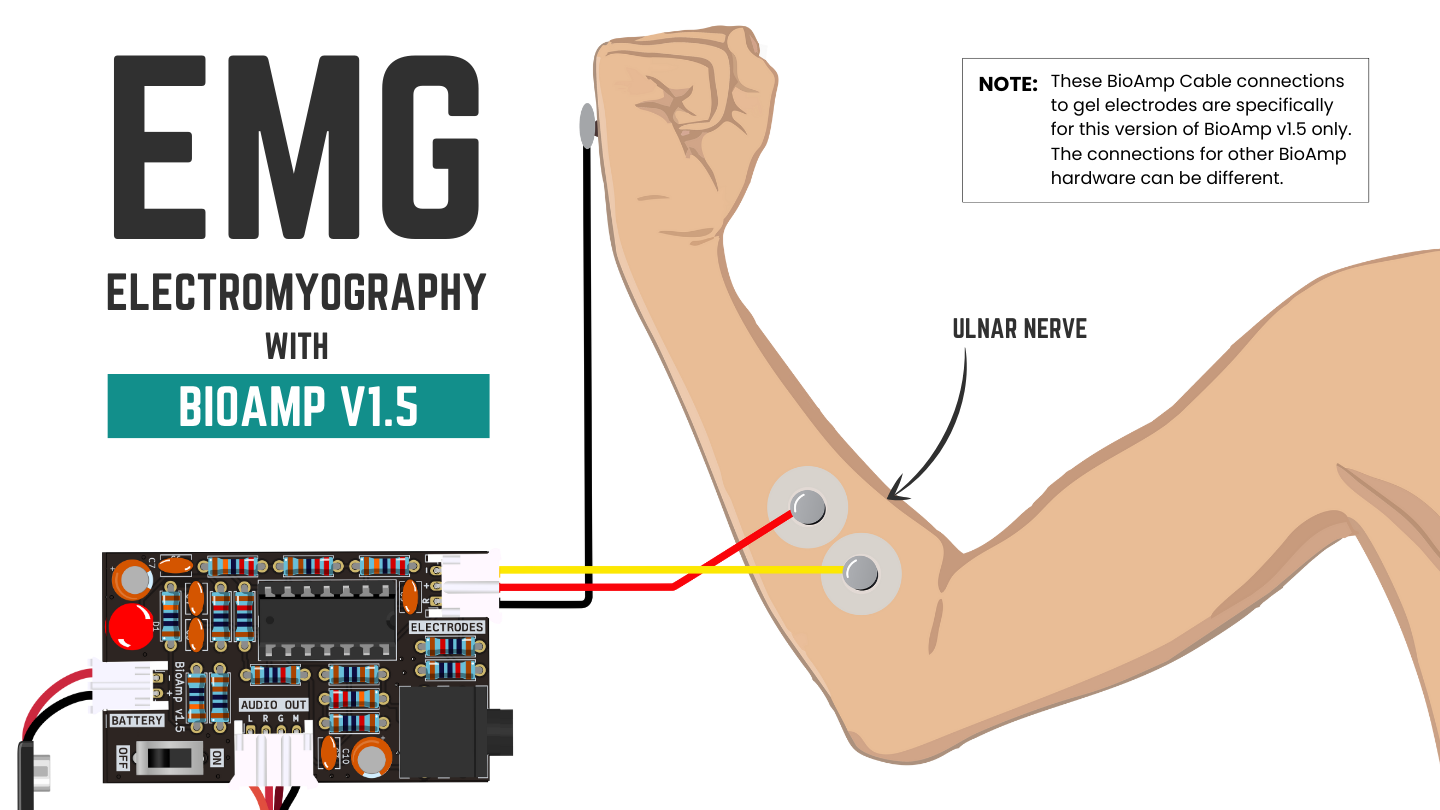
Step 3: Electrode placements#
We have 2 options to measure the EMG signals, either using the gel electrodes or using dry electrode based Muscle BioAmp Band. You can try both of them one by one.
Using gel Electrodes#
Connect the BioAmp cable to gel electrodes.
Peel the plastic backing from the electrodes.
Place the IN+ and IN- cables on the arm near the ulnar nerve & REF (reference) at the back of your hand as shown in the connection diagram.
Using Muscle BioAmp Band#
Connect the BioAmp cable to Muscle BioAmp Band in a way such that IN+ and IN- are placed on the arm near the ulnar nerve & REF (reference) on the far side of the band.
Now put a small drop of electrode gel between the skin and metallic part of BioAmp cable to get the best results.
Note
These BioAmp Cable connections to gel electrodes/band are specifically for this version of BioAmp v1.5 only. The connections for other BioAmp hardware can be different.
Tip
In this demonstration we are recording EMG signals from the ulnar nerve, but you can record EMG from other areas as well (biceps, triceps, legs, jaw etc) as per your project requirements. Just make sure to place the IN+, IN- electrodes on the targeted muscle and REF on a bony part.
You can visit the complete documentation on how to assemble and use the BioAmp Bands.
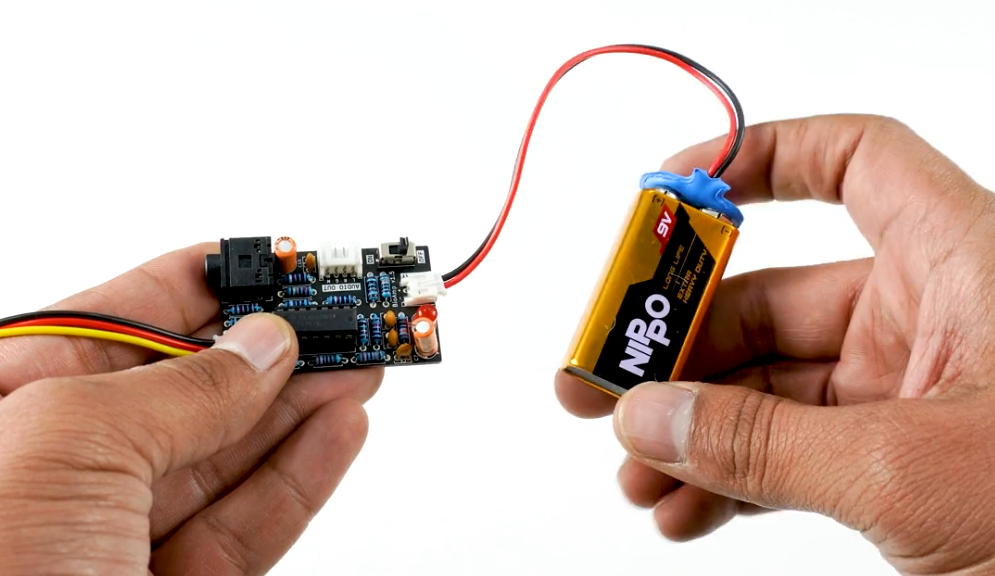
Step 4: Connecting 9V battery#
Connect any 9V battery to BioAmp v1.5 using the 9V snap cable. Now activate the board by flipping ON the power switch, and you’ll notice an LED light up, showing that the board is ready to use.
Step 5: Listen to your muscle signals#
You can either listen to the muscle signals (EMG) on a speaker or wired earphones/headphones. Let’s try both of them.
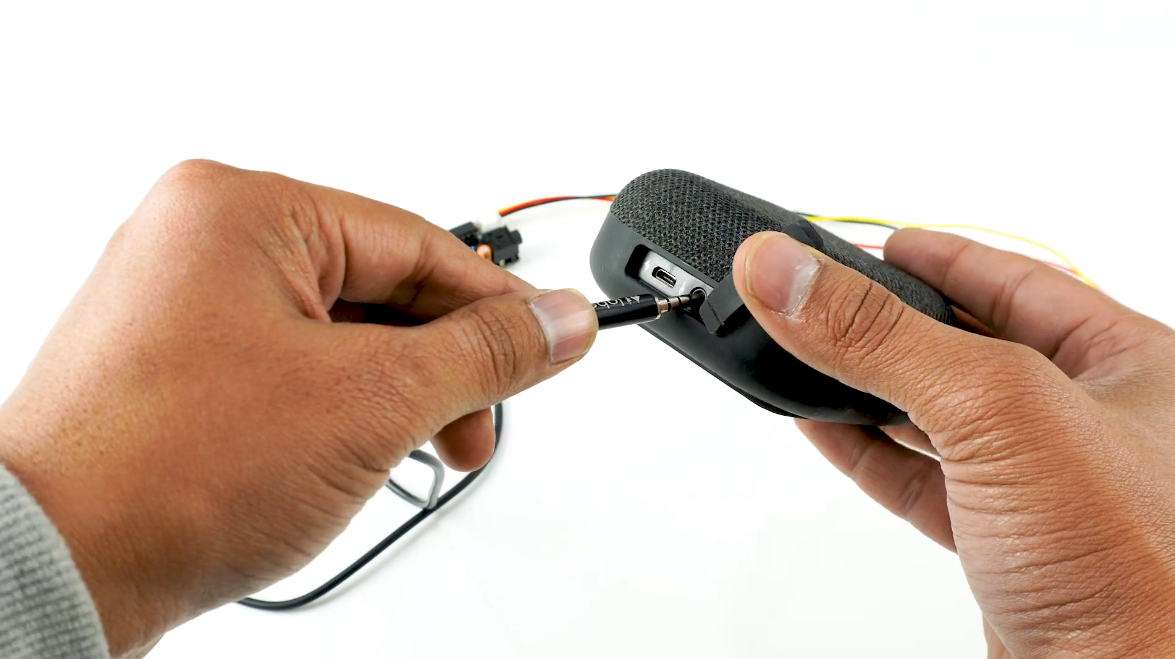
Using speakers#
Connect the BioAmp AUX cable on a bluetooth speaker that have 3.5mm jack support.
Switch on the speaker and turn the volume to maximum.
Flex and listen to your muscles.
Using wired earphones/headphones#
Plug your wired earphones or headphones on the 3.5mm jack of BioAmp v1.5.
Plug it in your ears.
Flex and listen to your muscles.
Step 6: Visualize EMG signals on mobile phone#
Connect the BioAmp AUX cable to your mobile phone/tablet that has 3.5mm jack support. Now you can use various apps to visualise the signals.
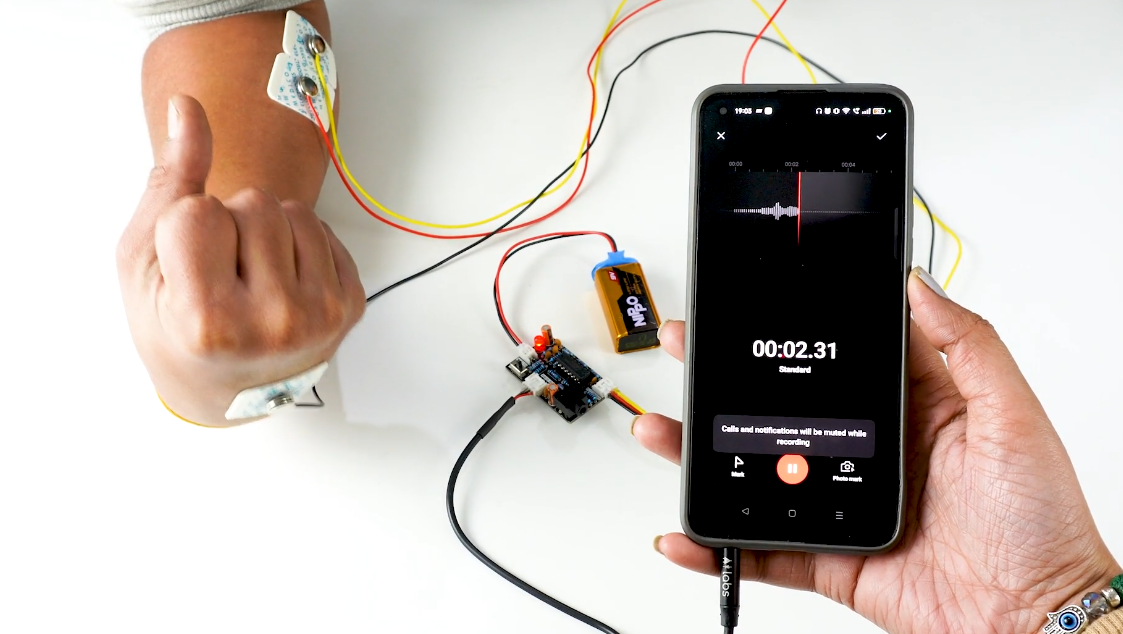
Using Phone Recorder app#
Open any audio recorder app on your mobile tablet.
Flex your muscle to be able to record the muscle signals.
If you want to extract that data then it will be saved by default as a .wav file but you can convert it in any other format according to your project requirements.
Using Backyard Brains’ Spike Recorder mobile app#
Download the Spike Recorder App from playstore.
Open the app, click the setting icon on the top right corner and set the recording type to EMG.
Apply the 50Hz or 60Hz notch filter depending on the country you are living in. For example if you are in India then the AC current oscillates at a frequency of 50Hz but it oscillates at 60Hz frequency in USA. This AC current acts as a noise in the signals so we have to remove it by applying this notch filter.
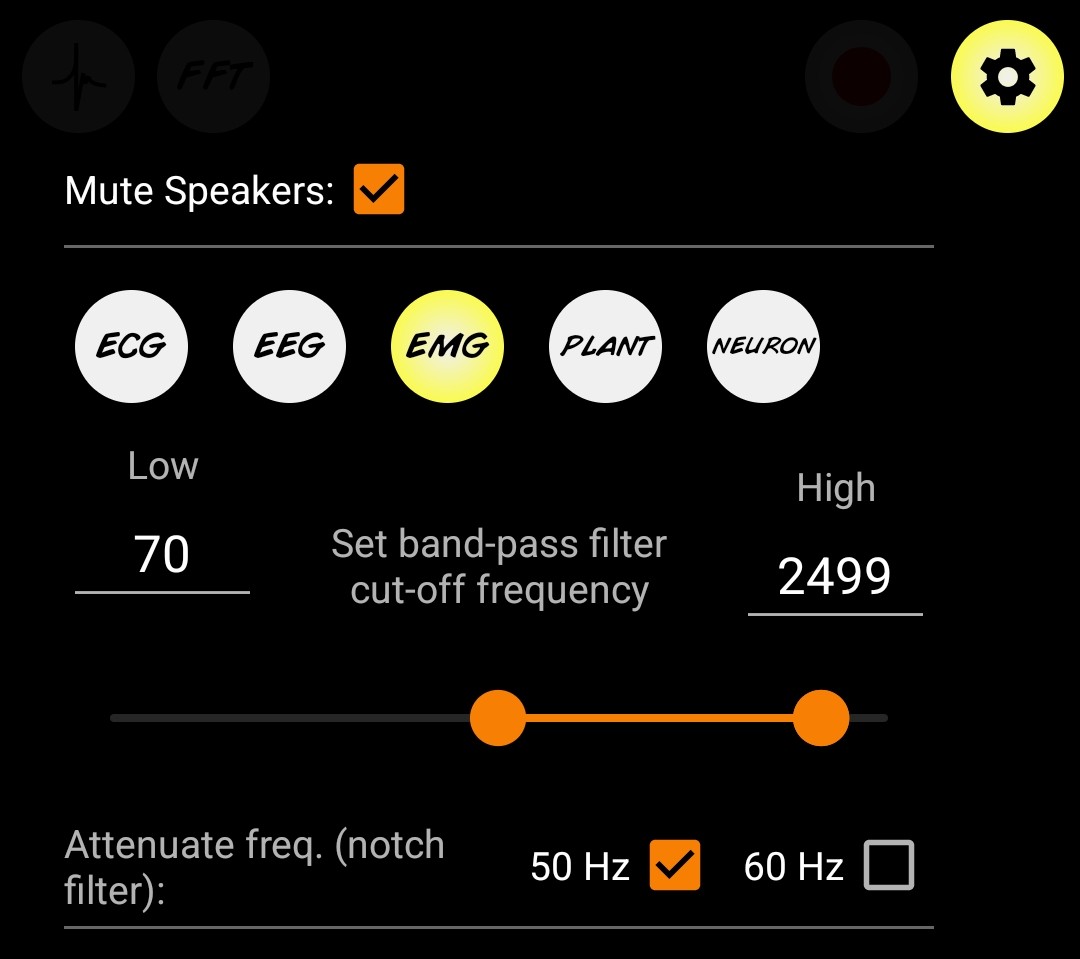
Again click on the setting icon to close it and you are ready.
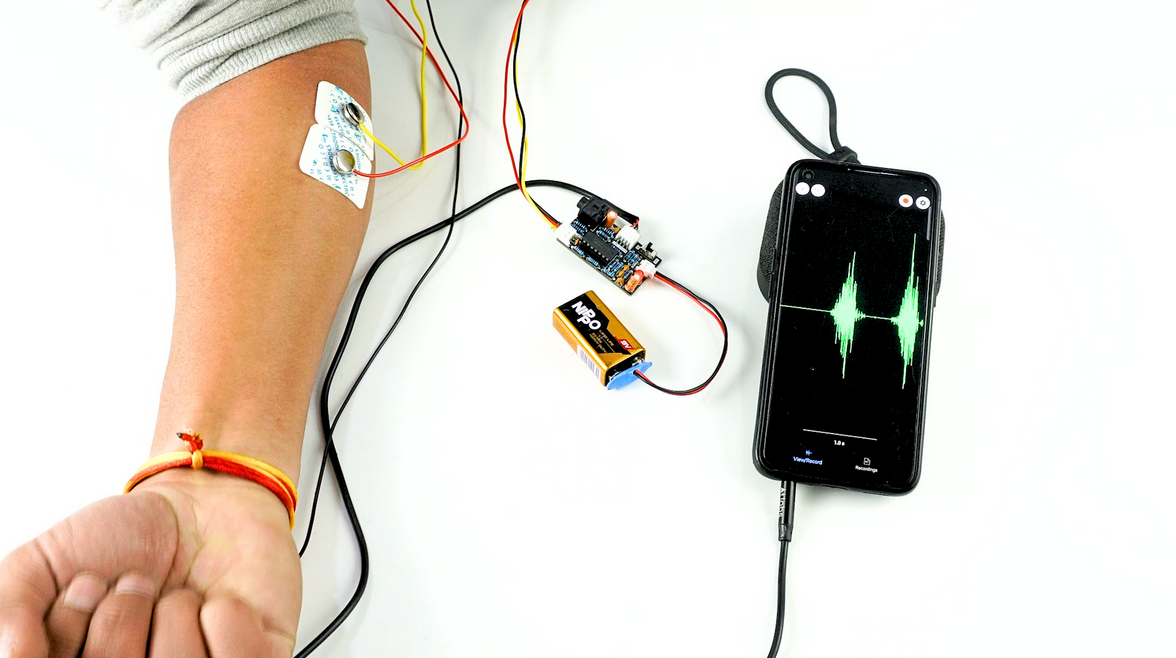
Flex your muscles to be able to visualize the muscle signals (EMG).
You can record the EMG data as a .wav file by pressing the record button on the top right corner of the app and then convert it in any other format as per your project requirements.
Step 7: Visualize the EMG signals on laptop#
Connect the BioAmp AUX cable to your laptop that has 3.5mm jack support. Now you can install various softwares on your laptop to visualise the signals.
Using Backyard Brains’ Spike Recorder#
Install the spike recorder software that you downloaded earlier.
Open the software, click the setting icon on the top right corner and set the low band pass filter to 72Hz and high band pass filter to 720Hz.
Apply the 50Hz or 60Hz notch filter depending on the country you are living in. For example if you are in India then the AC current oscillates at a frequency of 50Hz but it oscillates at 60Hz frequency in USA. This AC current acts as a noise in the signals so we have to remove it by applying this notch filter.
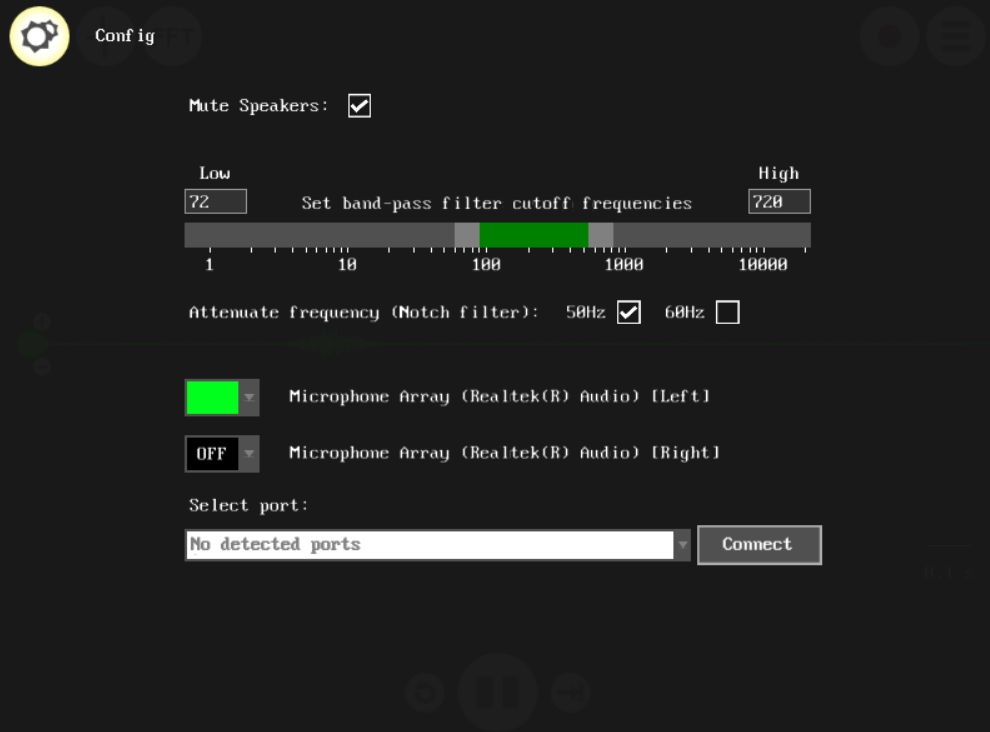
Again click on the setting icon to close it and you are ready.
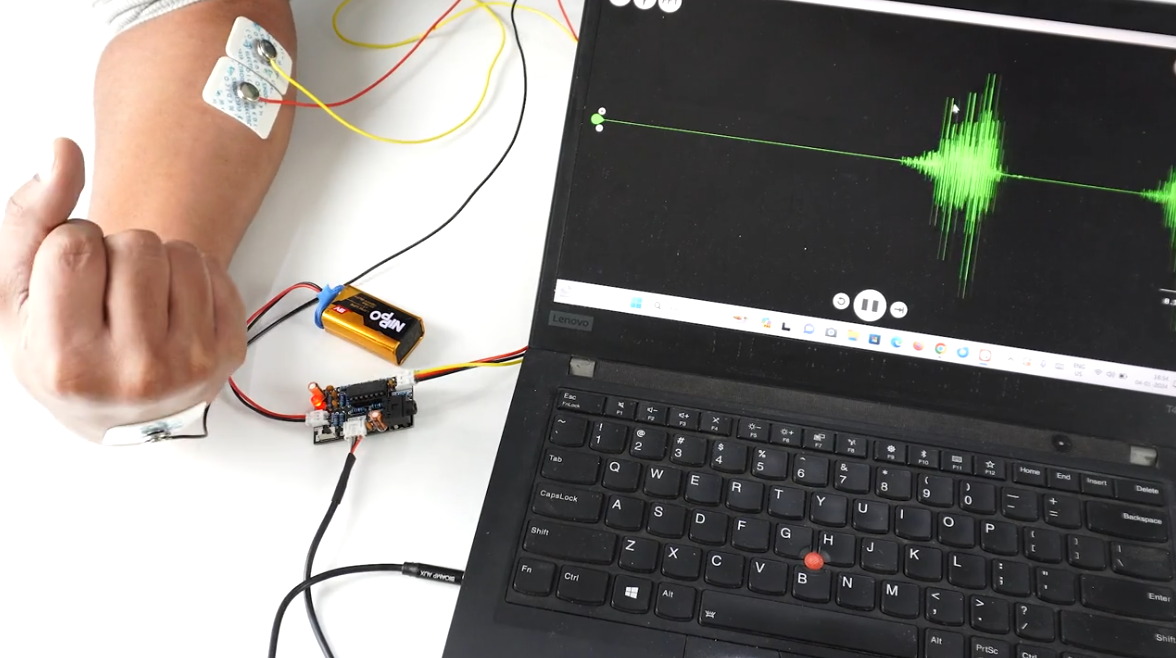
Flex your muscles to be able to visualize the muscle signals (EMG)
You can record the EMG data as a .wav file by pressing the record button on the top right corner of the app and then convert it in any other format as per your project requirements.
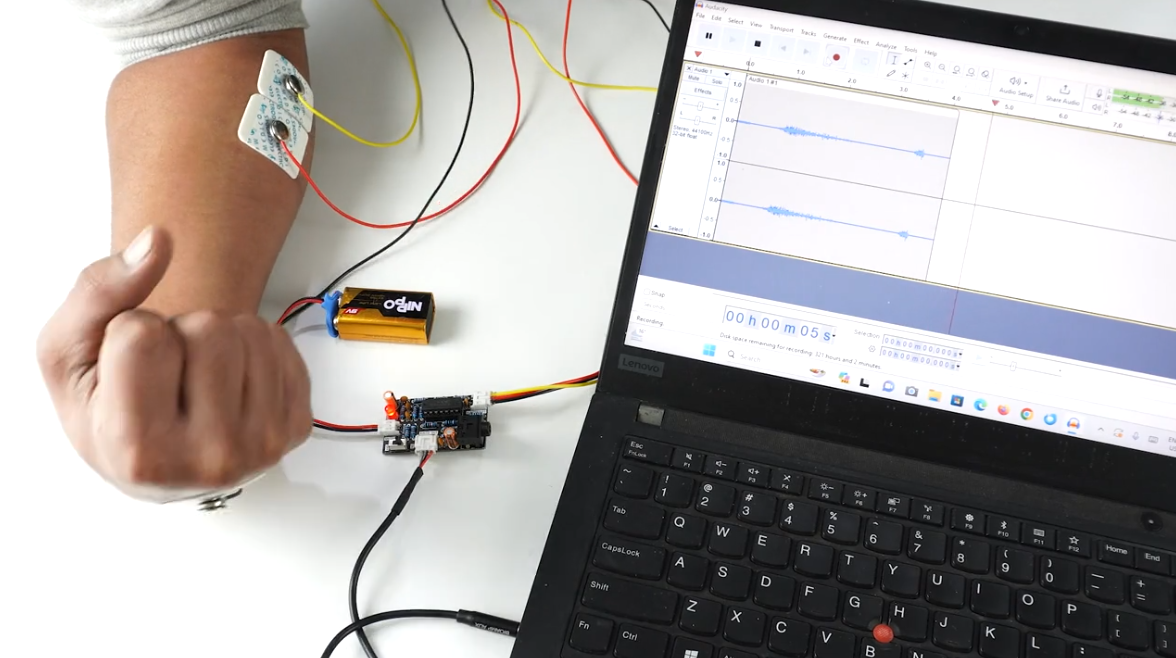
Using Audacity#
Install the audacity software that you downloaded earlier.
Open the software and set the recording device to microphone.
Flex your muscles to be able to visualize the muscle signals (EMG)
By default the EMG data would be recorded as a .wav file but you can convert it in any other format as per your project requirements.