NPG Lite Flasher#
Overview#
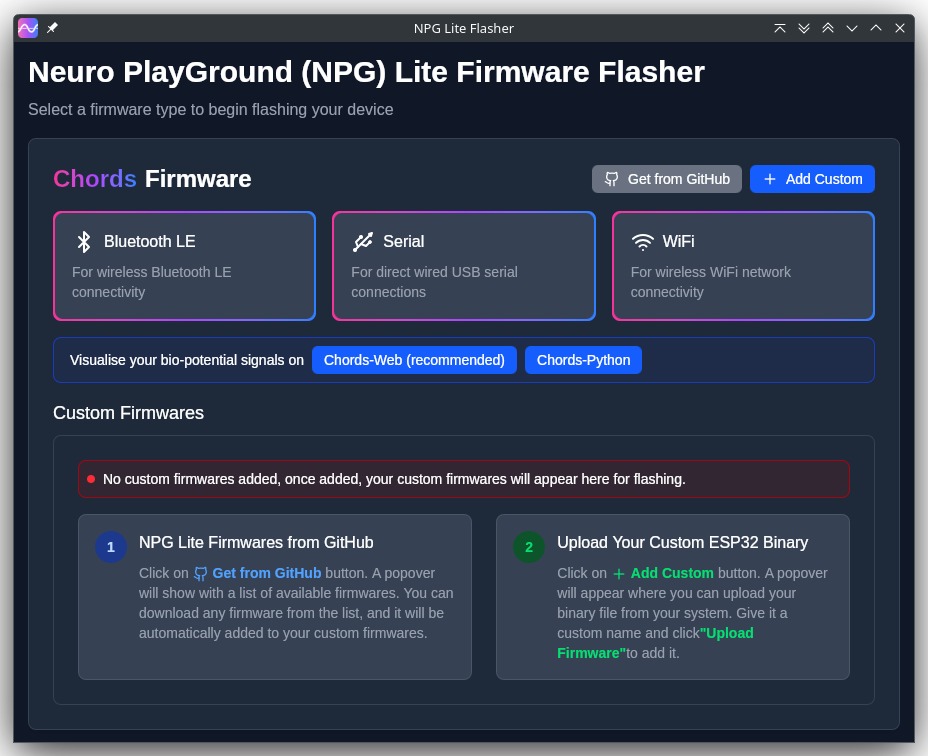
NPG Lite Flasher is an open-source desktop application that allows you to flash firmware onto the Neuro PlayGround Lite, as well as any other ESP32-based board using a binary file. A polished GUI (and CLI) to upload new firmware bundles to your NPG Lite device (or any ESP32 board).
🖥️ Sleek New UI
Redesigned interface for clarity
Built-in steps to fetch firmware from GitHub
Custom firmware upload support
🔄 One-Click Integration
Launch Chords-Web or Chords-Python directly for real-time visualization
🧠 Smarter Firmware Management
Auto-detects duplicate firmware names
Shows live download status with green checkmarks
Auto-fills firmware names from file metadata
⚡ Enhanced Flashing Workflow
“Add & Flash” now supports custom uploads in one smooth step
NPG Lite Flasher#
System Requirements#
Operating System: Windows 10+ / macOS 10.15+ / Linux (glibc 2.27+)
Hardware Requirements#
Neuro PlayGround Lite Board or any ESP32 board.
USB type-C cable
Setting up the hardware#
Let’s get started by getting your NPG Lite or ESP32 development board ready. Turn ON the NPG Lite using the power switch located on the side of the board.
Installation#
Download the installer from the latest release: NPG Lite Flasher Release
Choose the installer for your OS:
Fedora →
.rpmDebian/Ubuntu →
.debmacOS →
.dmgWindows →
.msiOr download the source bundle to build yourself
Run the installer for your OS:
Windows (.msi)
Double-click the downloaded .msi file.
If you see a SmartScreen warning, click More Info → Run Anyway.
Proceed through the installer wizard: Next → select install location → Install → Finish.
Fedora (.rpm)
Open a terminal and run:
sudo dnf install npg-lite-flasher-<version>.rpm
Enter your password and confirm the install when prompted.
After installation, launch NPG Lite Flasher from your Applications menu.
Debian/Ubuntu (.deb)
Open a terminal and run:
sudo apt install ./npg-lite-flasher_<version>_amd64.deb
If you hit missing dependencies, run:
sudo apt --fix-broken install
Launch NPG Lite Flasher from your desktop launcher or via:
npg-lite-flasher
macOS (.dmg)
Double-click the downloaded npg-lite-flasher.dmg file.
When you see the macOS warning:
“npg-lite-flasher.dmg” was downloaded from the Internet.
Are you sure you want to open it?
click **Open**
Drag NPG Lite Flasher.app into your Applications folder.
Eject the mounted image and open the app from Applications.
(Optional) Build from source
git clone https://github.com/upsidedownlabs/NPG-Lite-Flasher.git
cd NPG-Lite-Flasher
npm i
cargo tauri build
Uploading the Firmware#
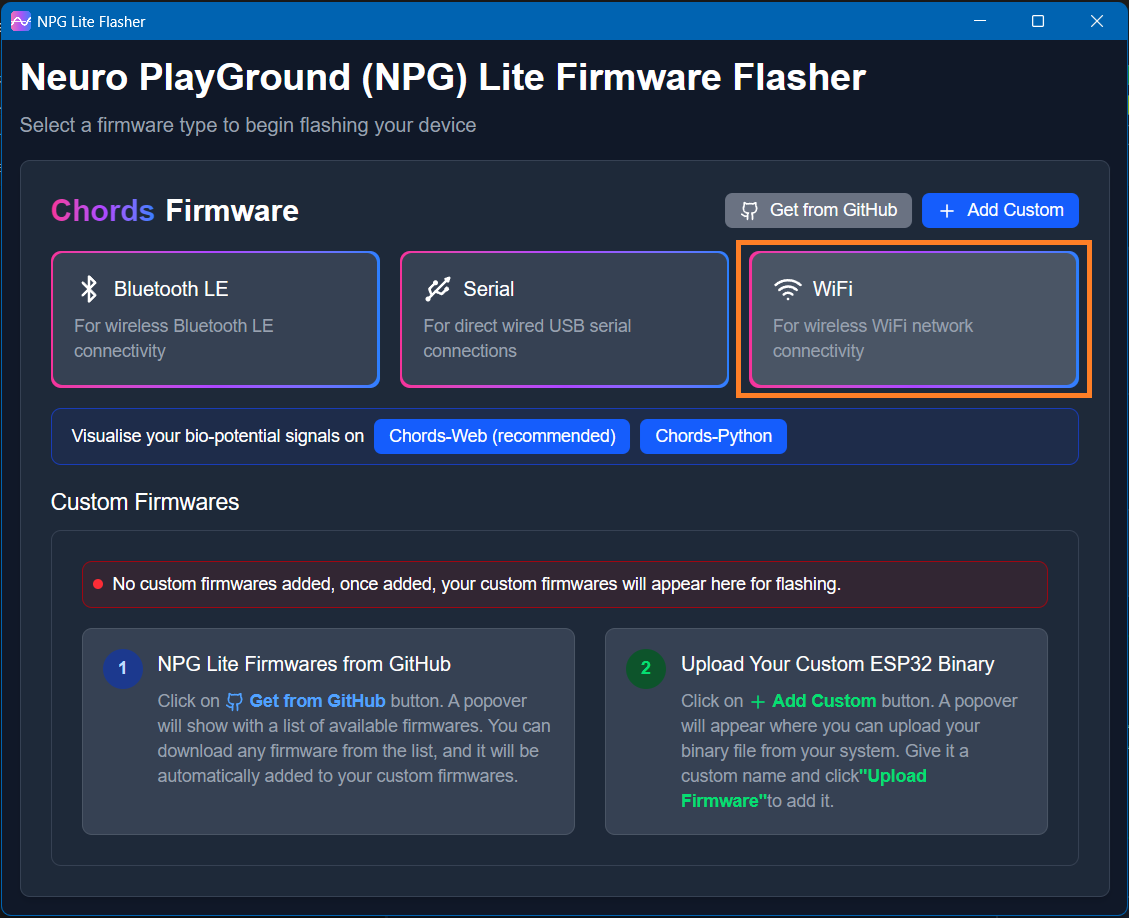
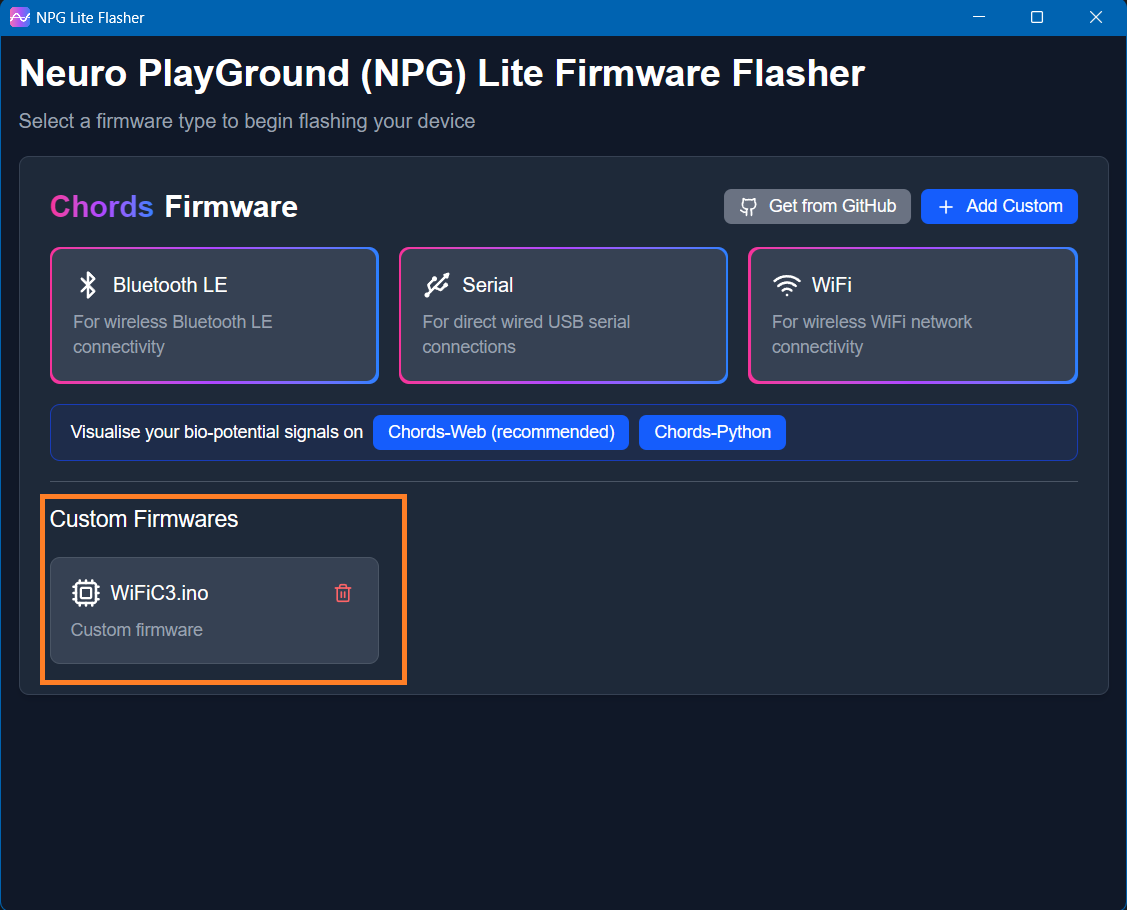
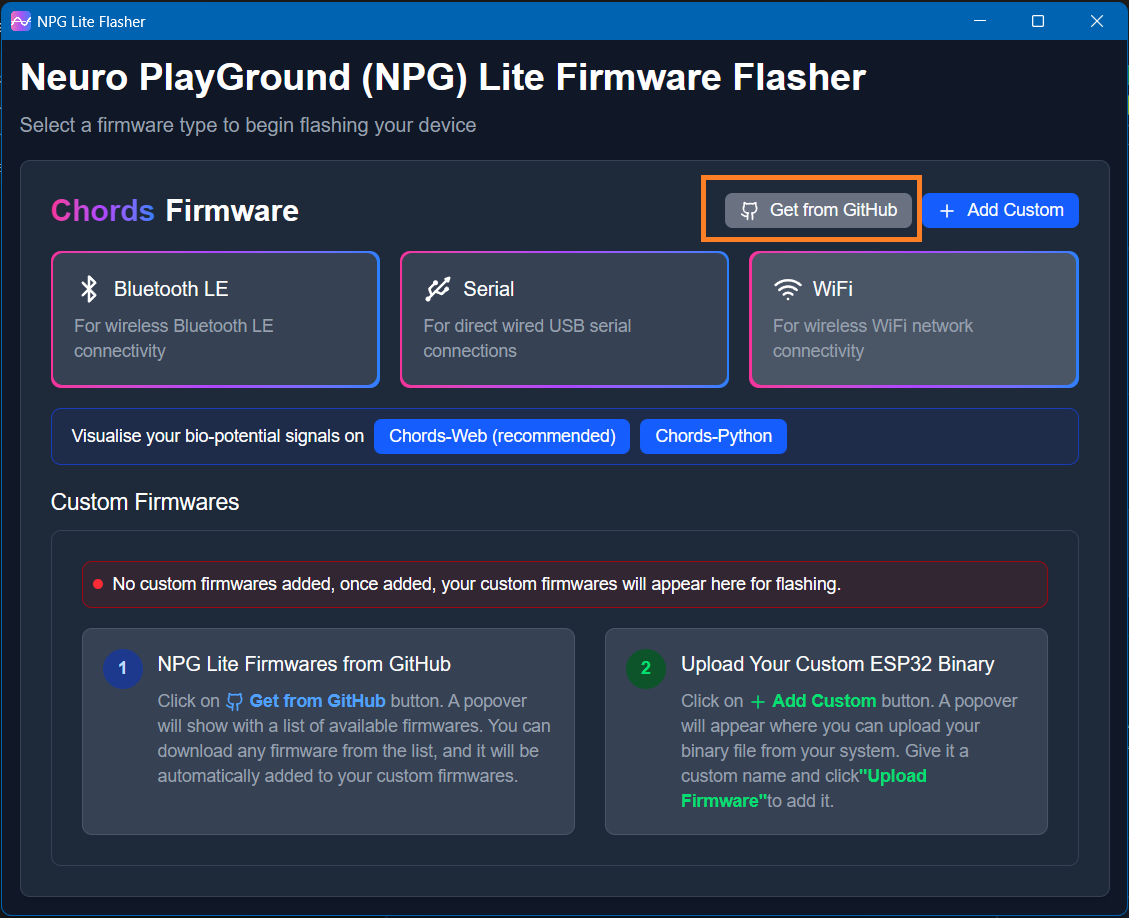
You can choose from multiple firmware options depending on how you plan to use the NPG Lite - including Bluetooth Low Energy (BLE), Serial, Wi-Fi, or even upload your own custom firmware.
Open the NPG Lite Flasher.
Select the
Bluetooth LEtab, at the top of the window you’ll see tabs for each firmware types - click on Bluetooth LE to bring up the BLE-specific interface.
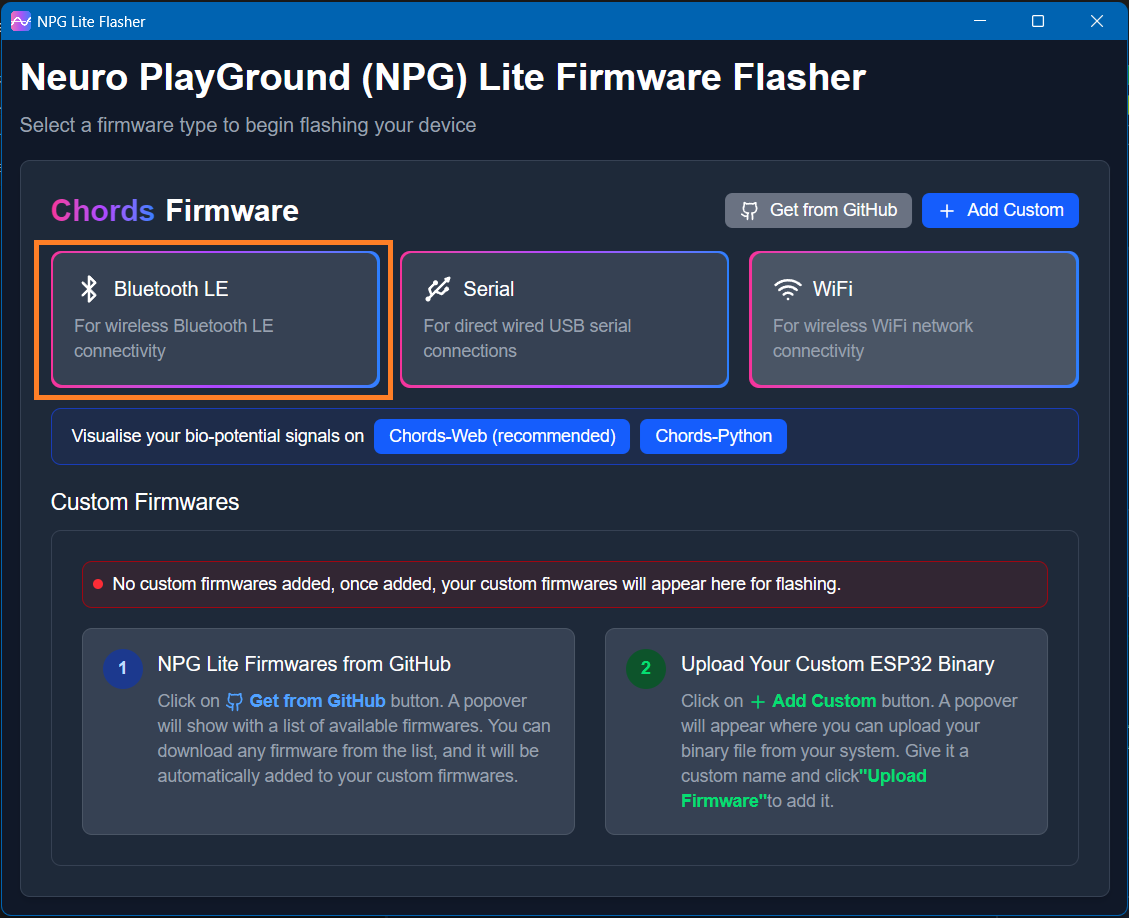
Bluetooth LE specific interface will appear.

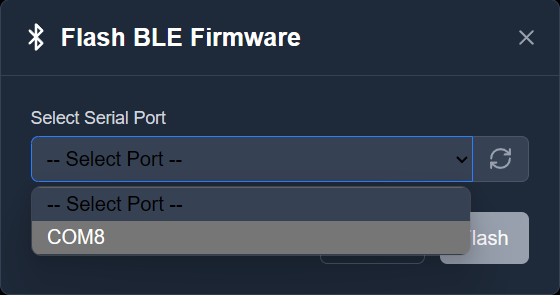
Connect your NPG Lite device via USB-C. The Flasher should detect a new serial COM port. From the Port dropdown, choose the port corresponding to your NPG Lite.
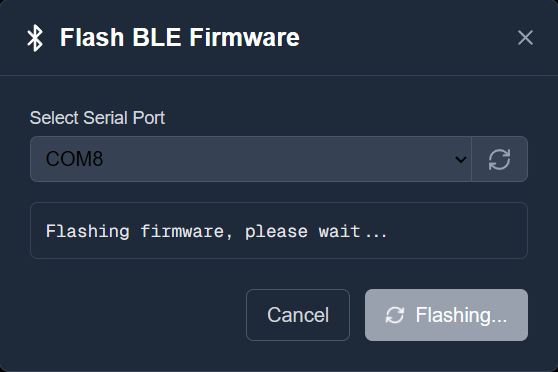
Click
Flash, the Flash button to begin uploading the BLE firmware.

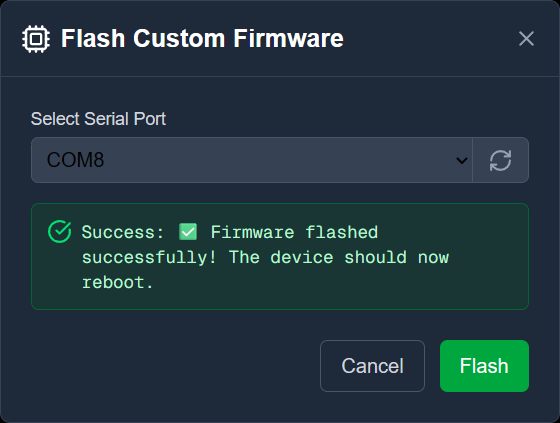
Wait for confirmation, you’ll see a “Success” message. This indicates the firmware has been successfully flashed.
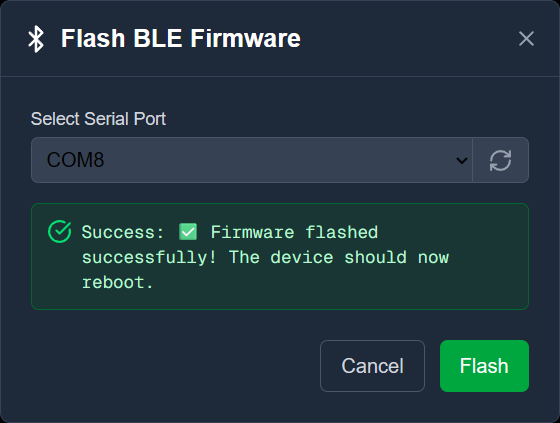
Restart your device : Unplug the USB cable, toggle the NPG Lite’s power switch OFF and then ON, and your board will now boot into the new Bluetooth LE firmware.
Open the NPG Lite Flasher.
Select the
Serialtab, at the top of the window you’ll see tabs for each firmware types - click on Serial to bring up the Serial-specific interface.
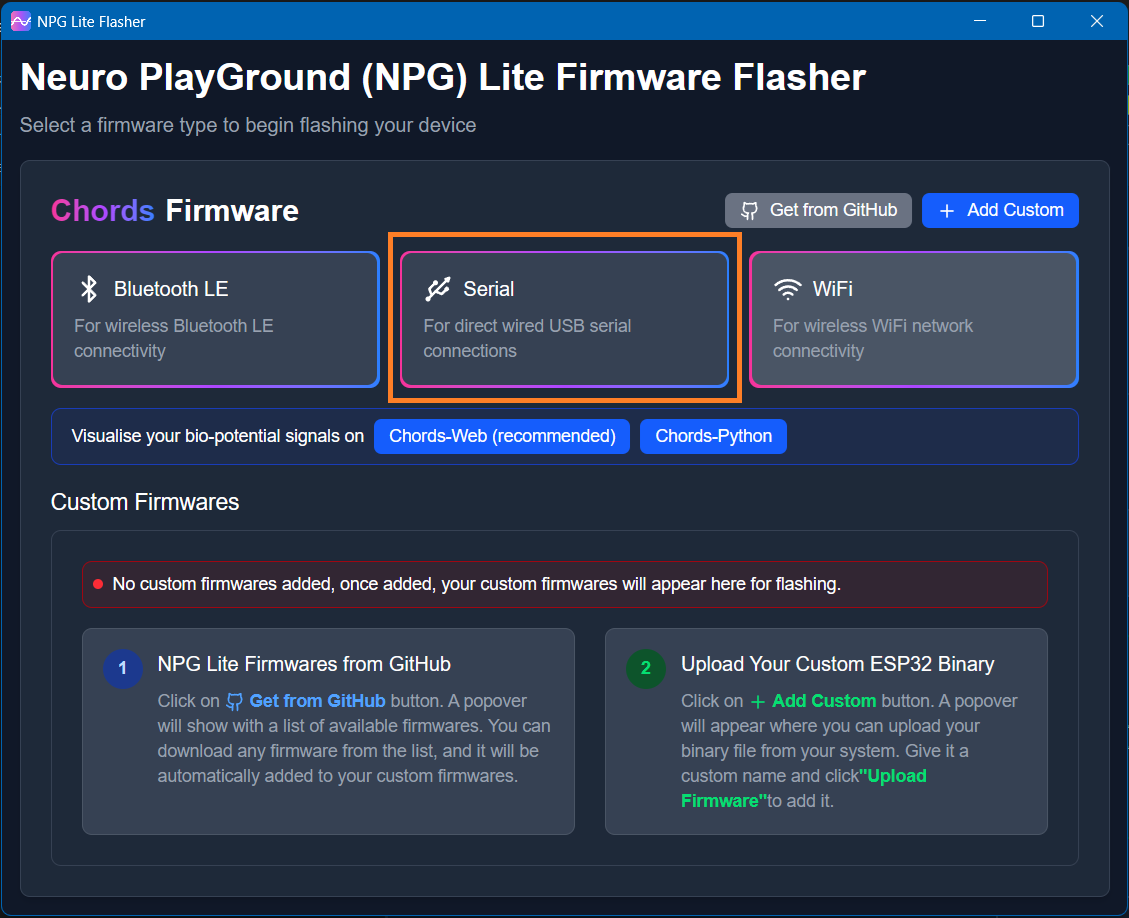
Serial specific interface will appear.
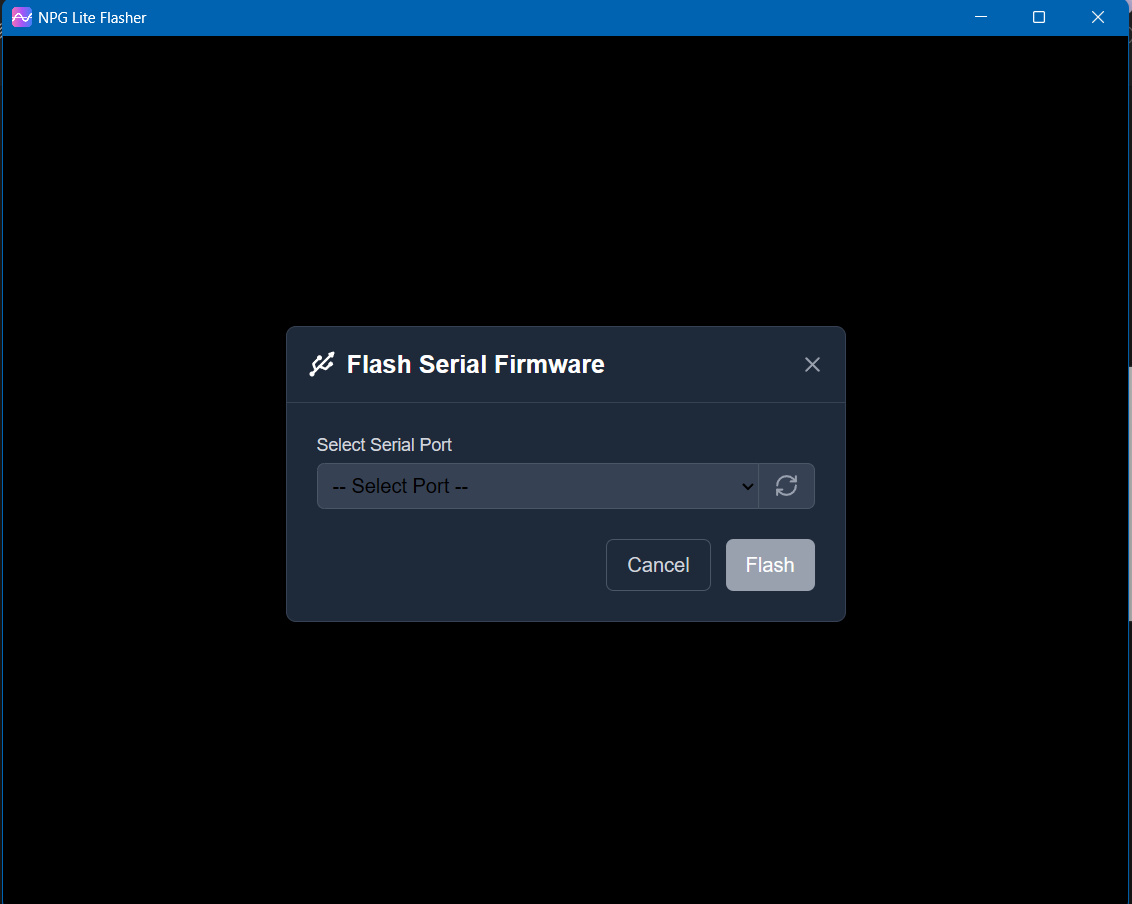
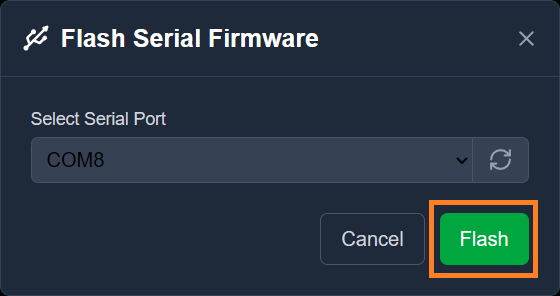
Connect your NPG Lite device via USB-C. The Flasher should detect a new serial COM port. From the Port dropdown, choose the port corresponding to your NPG Lite.
Click
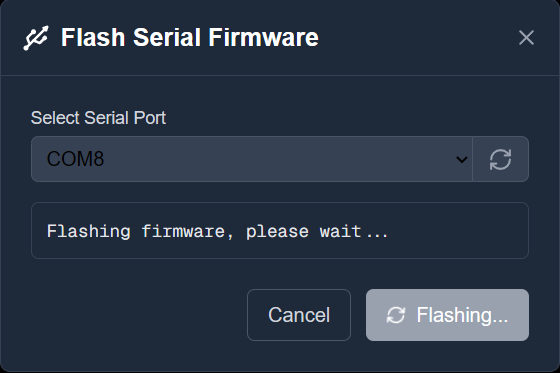
Flash, the Flash button to begin uploading the Serial firmware.
Wait for confirmation, you’ll see a “Success” message. This indicates the firmware has been successfully flashed.
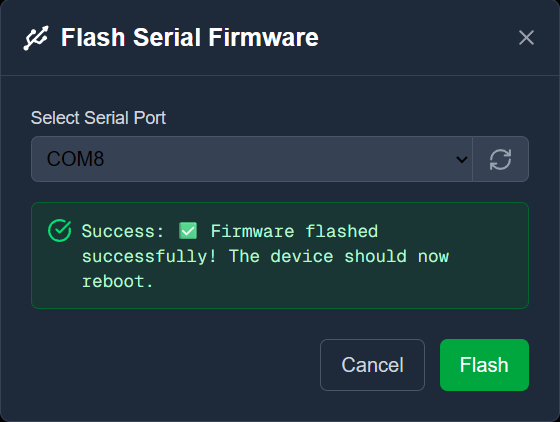
Restart your device : Unplug the USB cable, toggle the NPG Lite’s power switch OFF and then ON, and your board will now boot into the new Serial firmware.
Open the NPG Lite Flasher.
Select the
WiFitab, at the top of the window you’ll see tabs for each firmware types - click on WiFi to bring up the WiFi-specific interface.
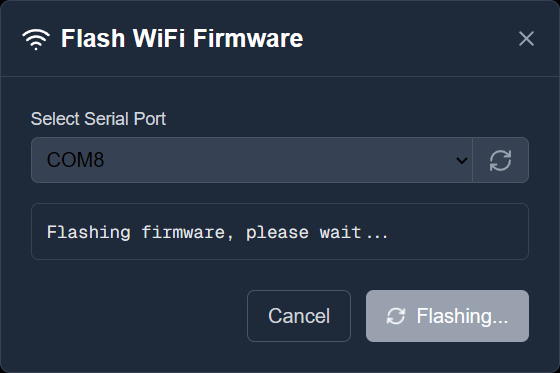
WiFi specific interface will appear.
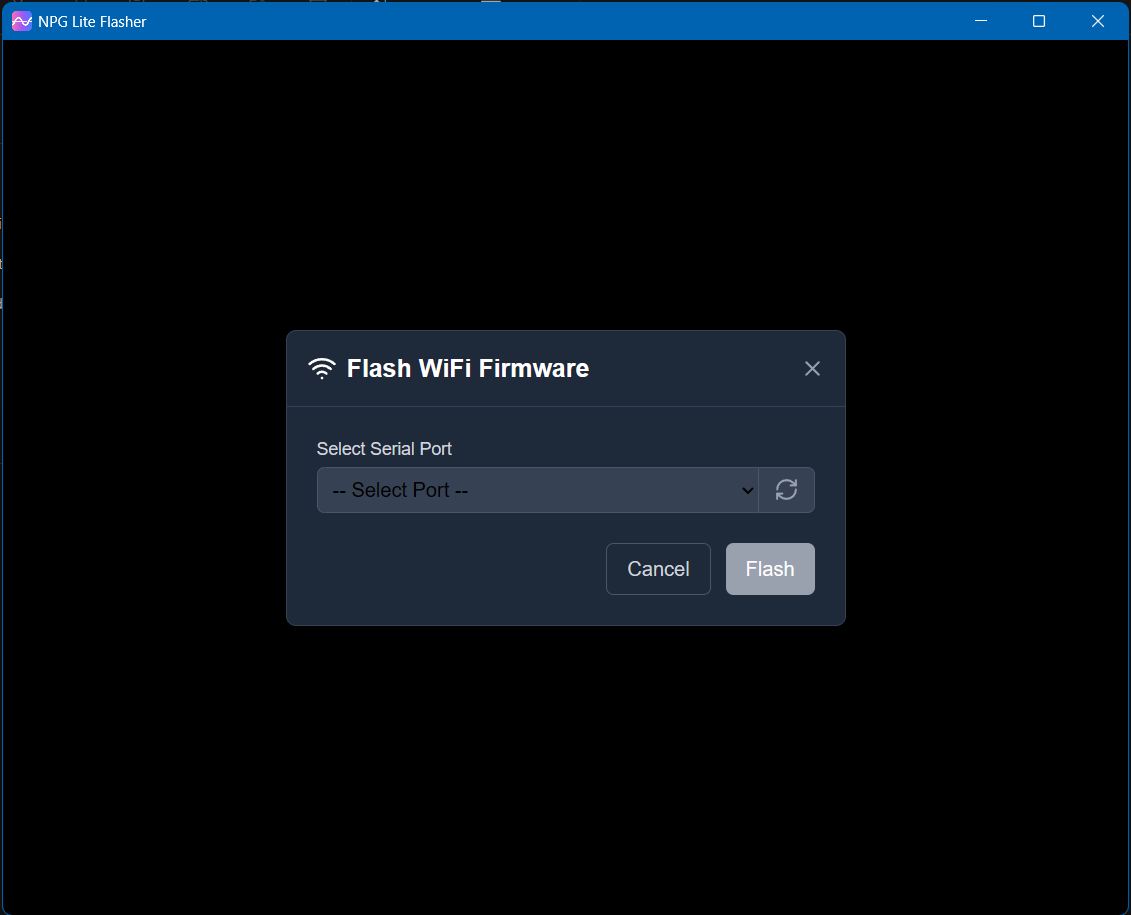
Connect your NPG Lite device via USB-C. The Flasher should detect a new serial COM port. From the Port dropdown, choose the port corresponding to your NPG Lite.
Click
Flash, the Flash button to begin uploading the WiFi firmware.

Wait for confirmation, you’ll see a “Success” message. This indicates the firmware has been successfully flashed.

Restart your device : Unplug the USB cable, toggle the NPG Lite’s power switch OFF and then ON, and your board will now boot into the new WiFi firmware.
Open the NPG Lite Flasher.
Select the
+Add Customtab, at the top of the window to switch into custom‐firmware mode.
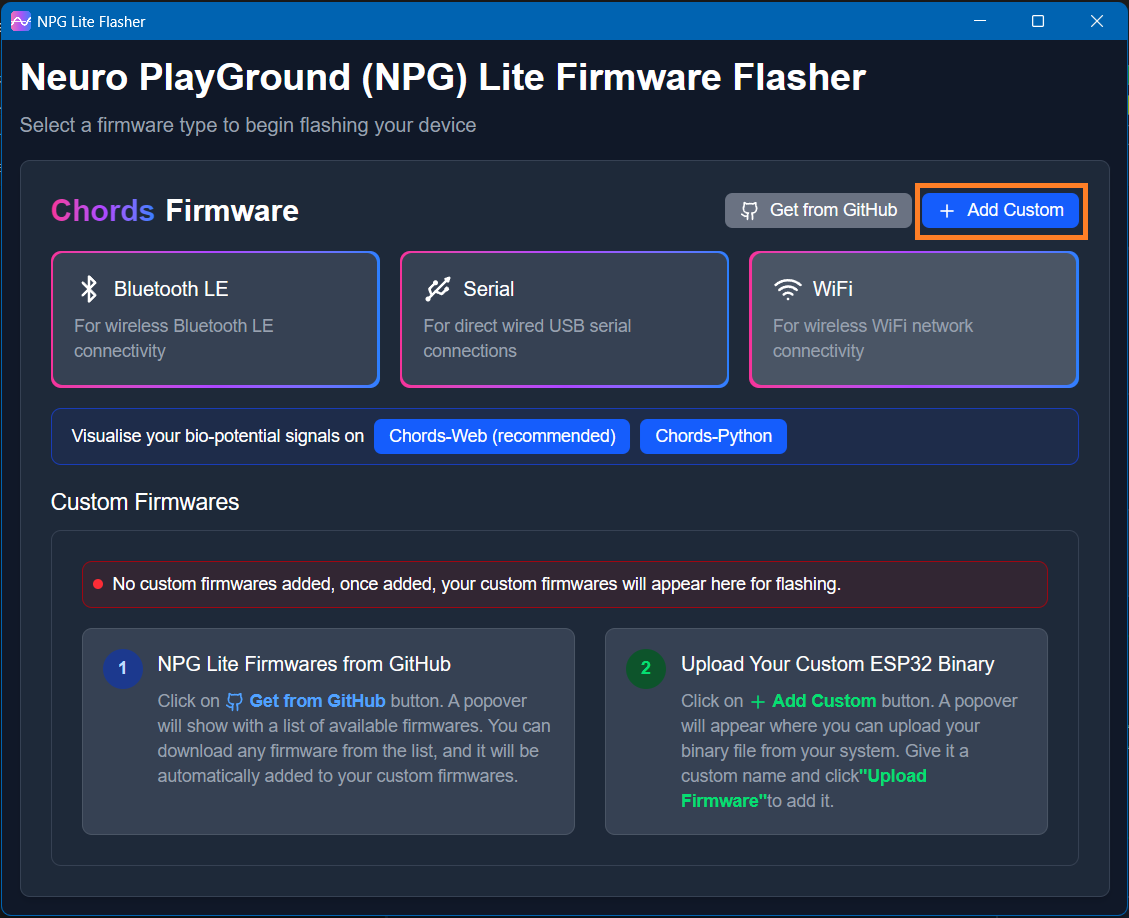
+ Add Customspecific interface will appear.
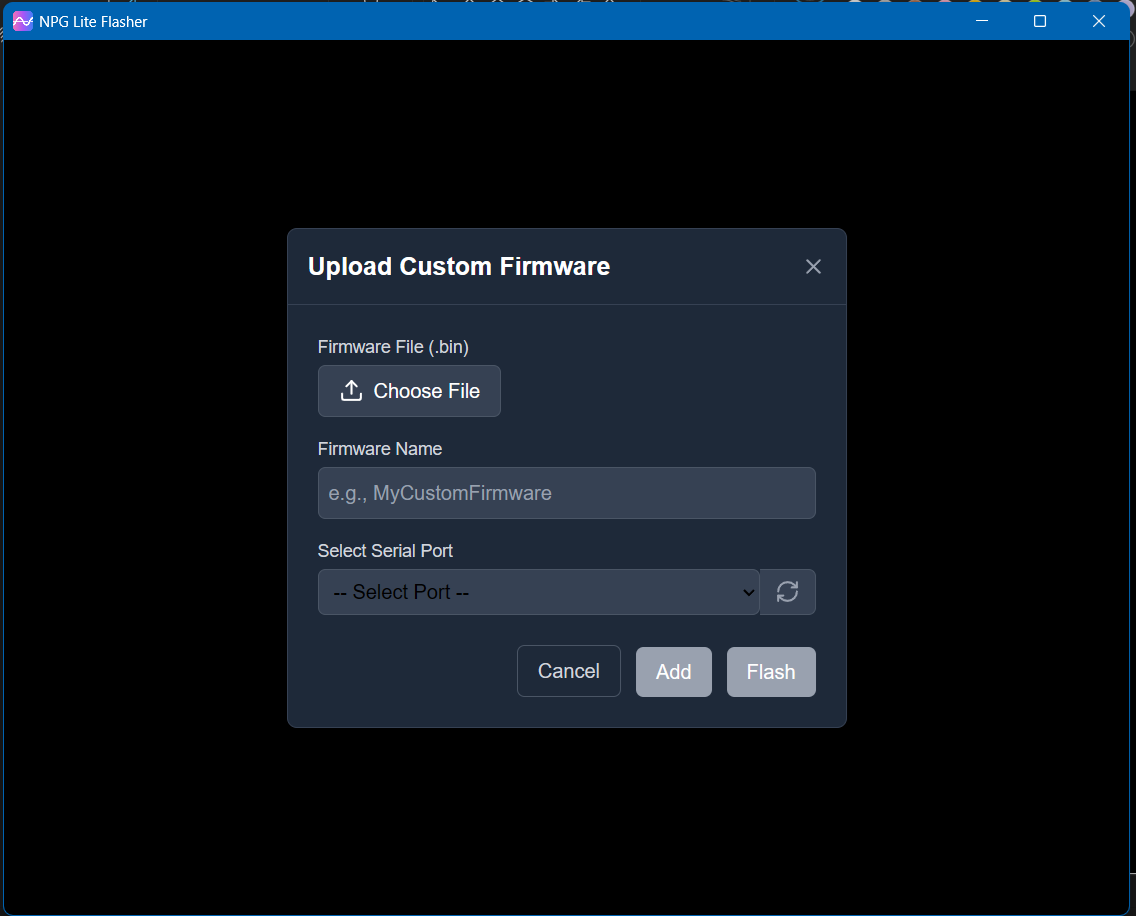
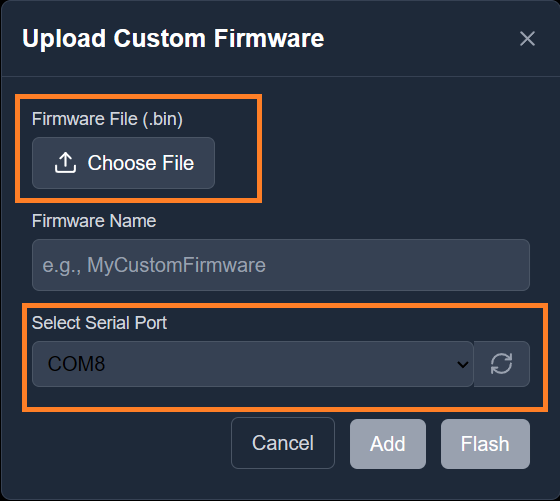
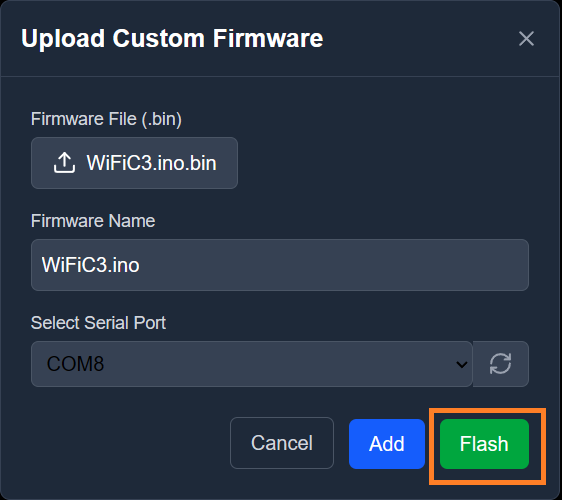
Add your firmware file: Click on
Choose Filebutton to locate your firmware and select your compiled .bin file.Once imported you will see the your firmware file name in Firmware Name.
Connect your NPG Lite device via USB-C. The Flasher should detect a new serial COM port. From the Port dropdown, choose the port corresponding to your NPG Lite.
Click
Flash, the Flash button to begin uploading the Custom firmware.
Wait for confirmation, you’ll see a “Success” message. This indicates the firmware has been successfully flashed.
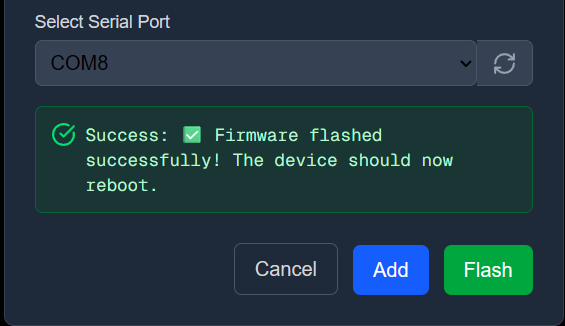
Restart your device : Unplug the USB cable, toggle the NPG Lite’s power switch OFF and then ON, and your board will now boot into the new Custom firmware.
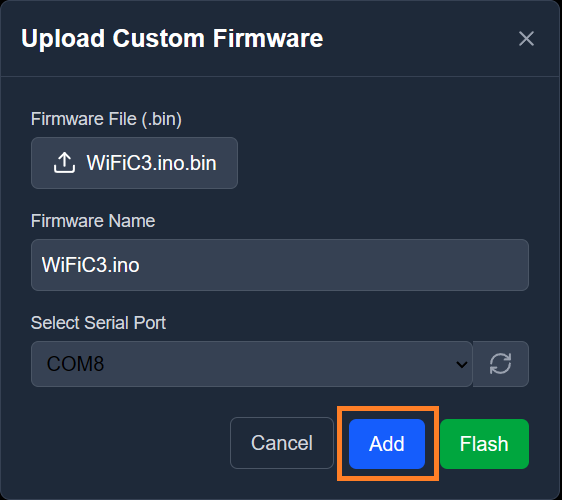
Click
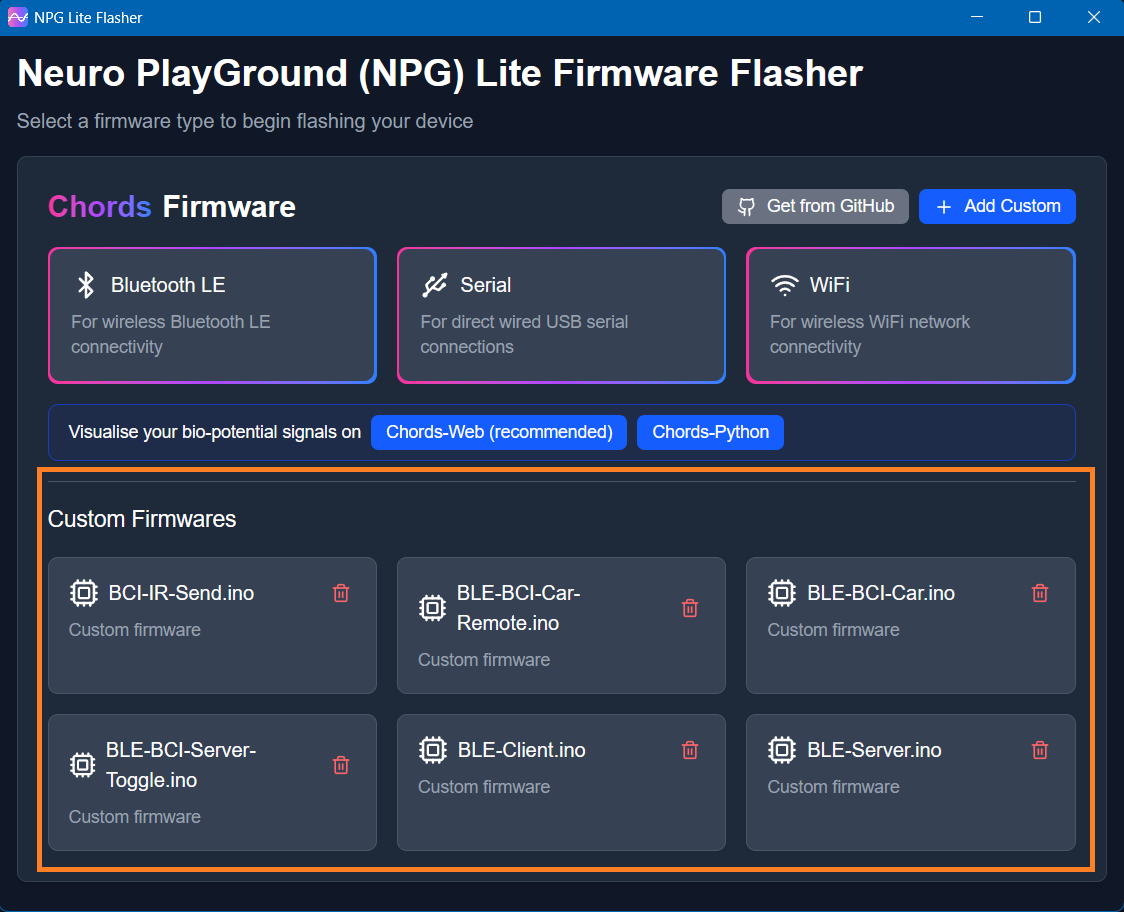
Add, this will add the firmware in the +Add Custom list for future flashes - so you can skip the file-selection step next time.
Open the NPG Lite Flasher.
Select the
Get From GitHubtab, at the top of the window to select the firmware designed by Upside Down Labs for NPG Lite and ESP32 devices.
A firmware list will appear. You can download multiple firmwares simultaneously, but only one can be flashed at a time.
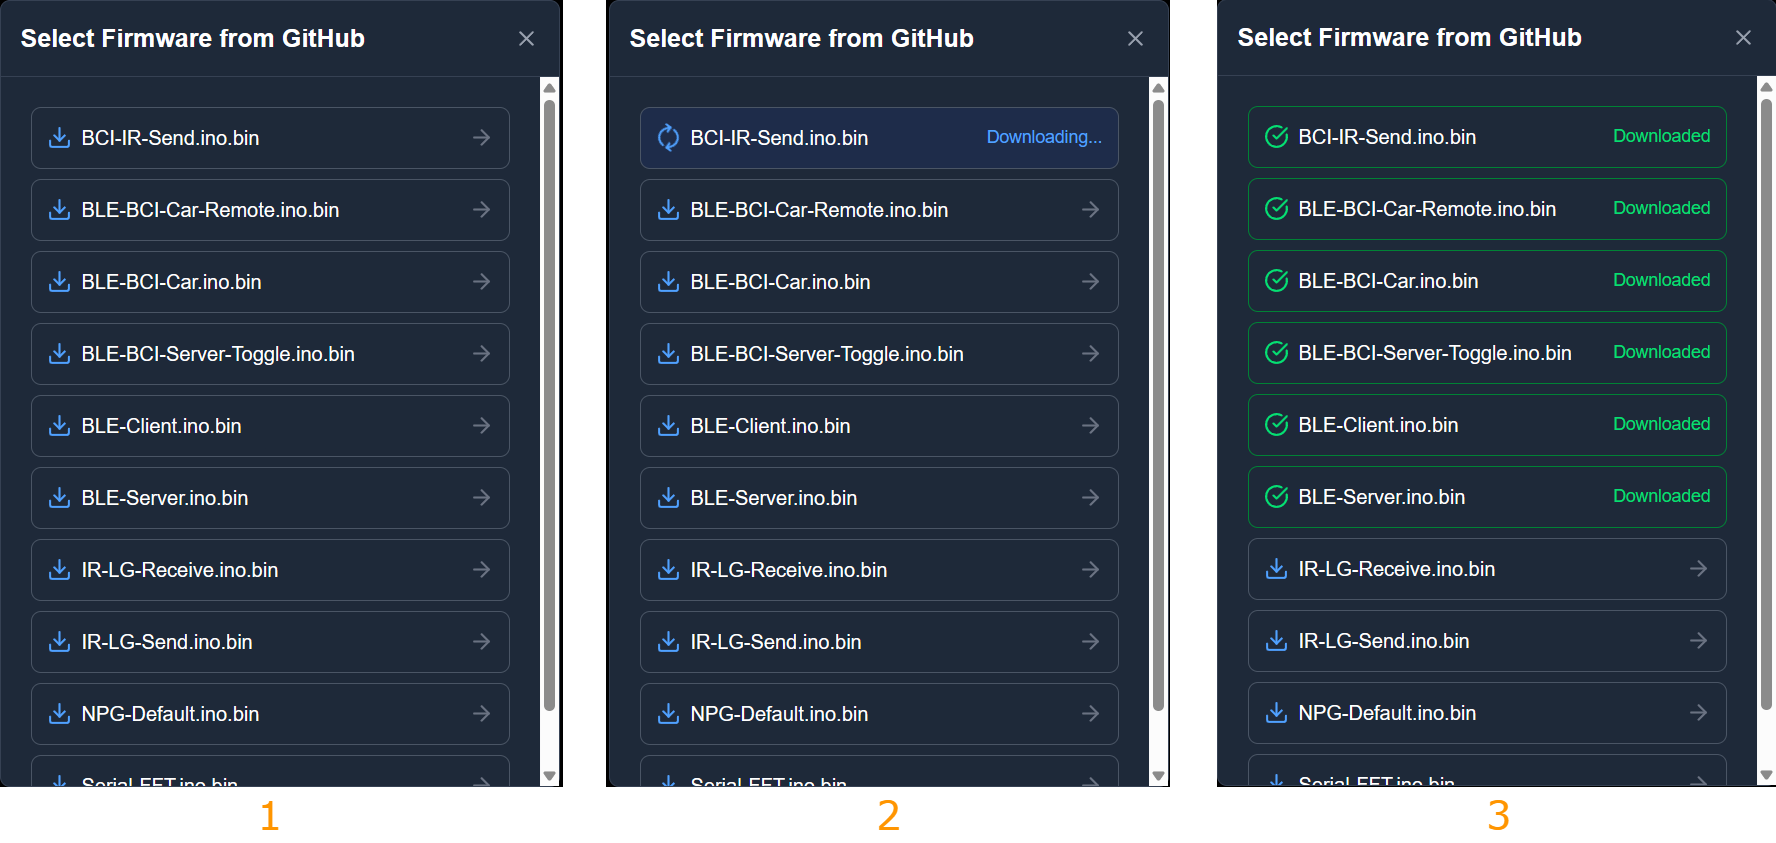
Once downloaded,
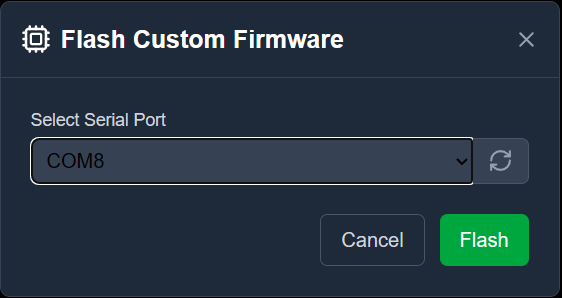
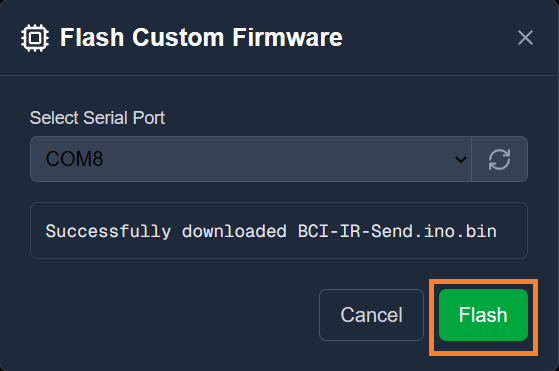
Flash Custom Firmwarescreen will appear, clickFlashto flash the firmware onto your device. Make sure your NPG Lite device is connected via USB-C. The Flasher will detect serial COM port automatically. You can also choose COM port from the Port dropdown, corresponding your device.
Wait for confirmation, you’ll see a “Success” message. This indicates the firmware has been successfully flashed.
Restart your device : Unplug the USB cable, toggle the NPG Lite’s power switch OFF and then ON, and your board will now boot into the new firmware.
Check the
Custom Firmwarestab for future flashes; this saves you from downloading the same firmware file again.
Troubleshooting
Device not found:
Verify USB-C cable and power switch
Install appropriate USB-serial drivers
Permission errors (macOS/Linux):
Run with sudo or add your user to the dialout group
SmartScreen warnings (Windows):
Use More Info → Run Anyway as described above
Real-Time Visualization#
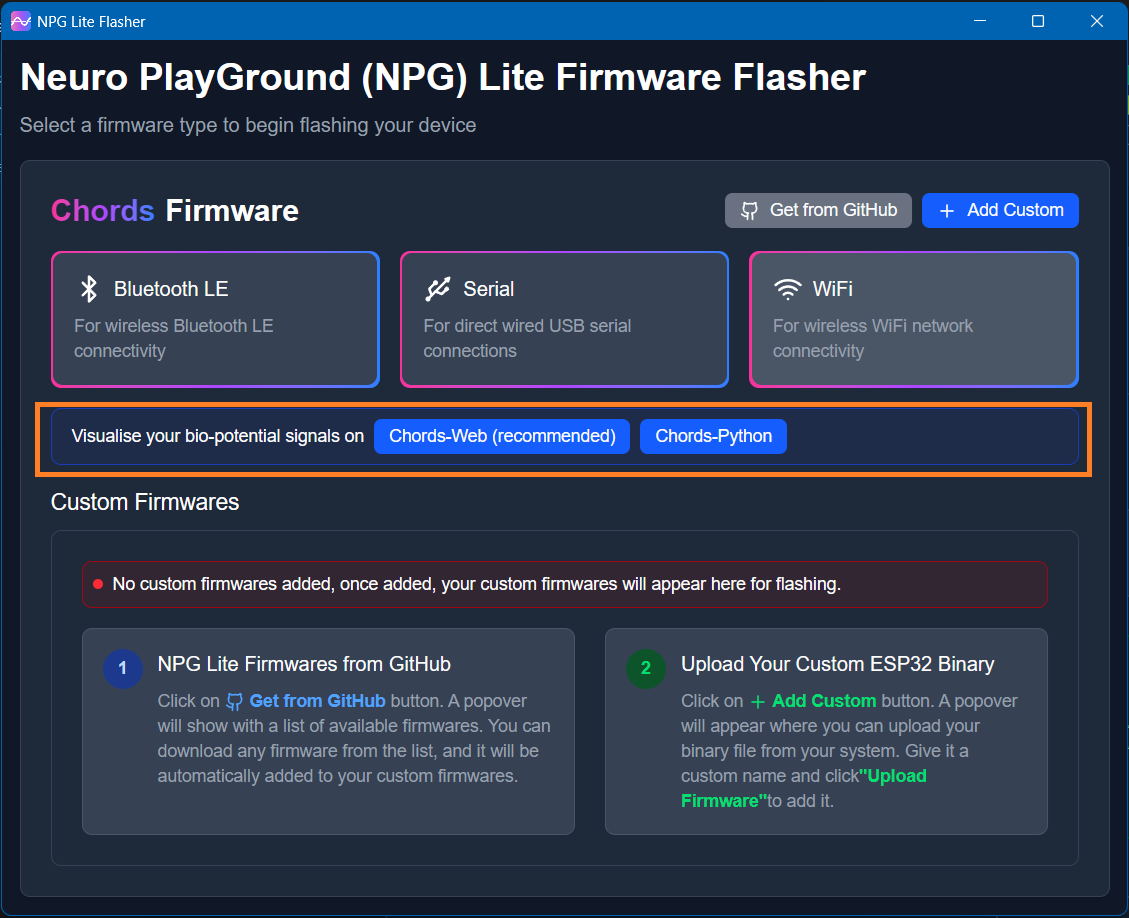
After flashing, visualize your biopotential signals with Chords-Web or Chords-Python:
In the flasher, click Open
Chords-WeborChords-Pythonas per your preference (under “Visualize”).
For
Chords-Webbrowser tab opens toChords-Web.Click
Connect → select your NPG Lite → start streaming.For
Chords-Pythonfollow the Chords Python documentation .
Use the UI to:#
Choose 1–3 channels to view
Play/Pause the live stream
Apply bandpass or 50/60 Hz notch filters
Record and export data to CSV
GitHub Repository#
For full source code, issue tracking, and contribution guidelines, head over to the NPG Lite Flasher GitHub repo.
You’ll discover setup guides and can track ongoing development - including bug fixes and feature enhancements: NPG Lite Flasher GitHub